9 been-around-the-block Office tips
Last fall, I shared several older but useful Excel tips. This month, I'd like to share more tips, but open the collection to all of the Office apps. I use these tips and shortcuts often, and they've become second-nature to me. Even though they're old, I'm hopeful that some of you will learn something new. I've identified in each tip's heading whether the tip is app-specific or available in all (or at least several) Office apps.
If you don't see your favorite old but useful tip, please share it in the comments section below. I've included instructions for Office 2003 through 2013, where significantly different. There's no downloadable example file for this article.
1. Outlook: Create an email shortcut
Most users send a lot of email to the same people. Frequently entering the same email address -- even with Outlook's AutoComplete feature -- is inefficient. You have to launch Outlook, open a new email window, and enter the email address every single time. A quicker and more efficient route is to create a shortcut on your desktop as follows:
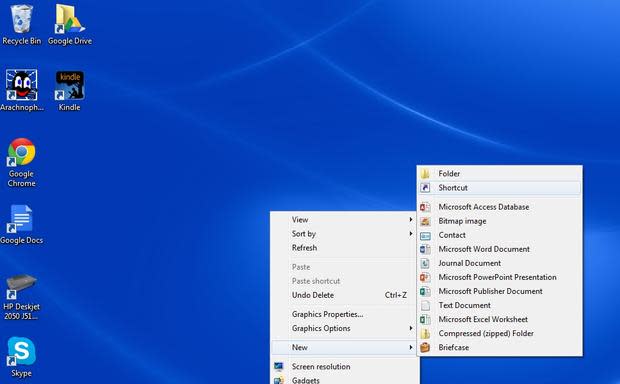
Right-click the desktop, choose New, and then select Shortcut (Figure A).
Figure AFigure A In the Create Shortcut dialog, type mailto:emailaddress (Figure B), and click Next. There's no space in that string.
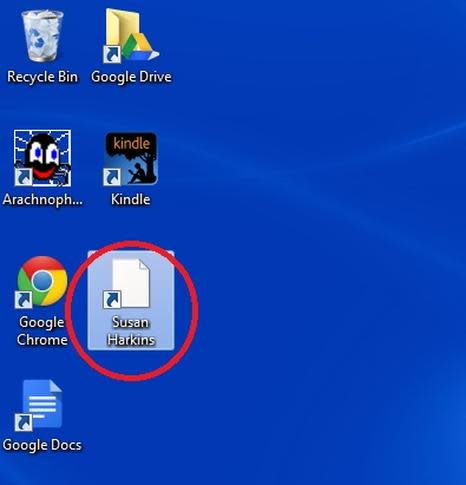
Figure BFigure B Give the shortcut a meaningful name, and click Finish. Windows will add a shortcut icon to the desktop (Figure C).
Figure CFigure C

You just compressed several steps into a simple double-click. To send an email to the address entered in step 2, double-click the shortcut icon on the desktop to open an email window with the To control already addressed. Don't go nuts and clutter your desktop with these shortcuts, but do consider this simple alternative if you use the same address frequently.
2. Office: Remove a graphic's background
It's easy to add a company logo or some other graphic file to an Office document, but the file's background tags along. If it looks fine that way, great. Usually, it doesn't. You'll most likely want the graphic and document backgrounds to match, and the easiest way to accomplish that is to make the graphic's background transparent. Here's how:
Select the image.
Click the contextual Format tab (Picture Tools).
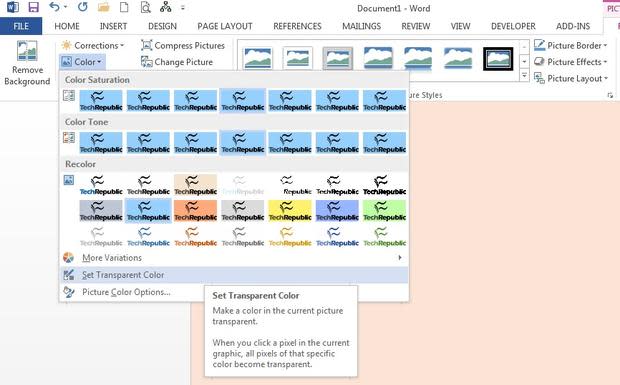
In the Adjust group, click Color.
Choose Set Transparent Color below the gallery thumbnails (Figure D). The cursor will change into the Set Transparent Color tool (icon).
Figure DFigure D Click anywhere on the image's background to make it disappear (Figure E).
Figure EFigure E

If you're still using Office 2003, do the following:
Right-click the image and choose Show Picture Toolbar.
Click the Set Transparent Color option (second from the right).
Click the image's background.
Although this route is simple, it won't work on all graphic formats. When that happens, use PowerPoint's Remove Background tool. To find out more about this tool, read the Remove The Background section in "Pro tip: Create a silhouette using PowerPoint tools."
3. Word: Select by style
When searching for text or elements that share a common style, use the Styles pane instead of Find & Replace. To display the Styles pane, click the dialog launcher for the Styles group. Right-click the style in question. By choosing Select All, as shown in Figure F, you can quickly change the style in use or even delete all of that data quickly. It's a great way to manipulate a large amount of text.
Figure F
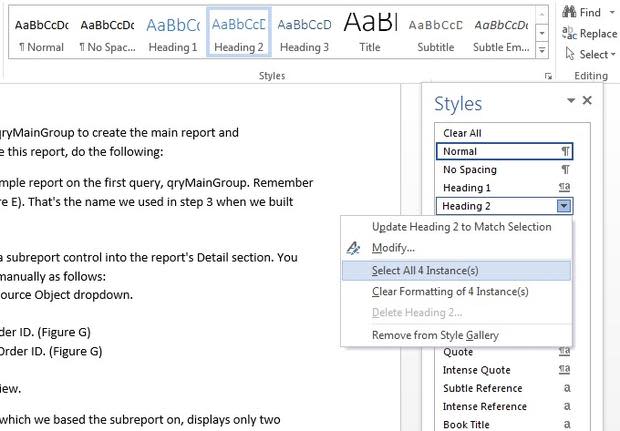
Use the Styles pane to select elements of a common style.
In Word 2003, click the Styles and Formatting icon at the left end of the Formatting menu. After selecting the style in the Styles and Formatting task pane, click Select All.
4. Word: Keep Word open
You can have many Word documents open at the same time. However, when you close the last document, Word closes too. It's convenient, if that's what you want. If you don't want to shut down Word, you have to re-launch it -- or remember to open another document before you close the last document.
Fortunately, there's an easier way: press [Ctrl]+[F4] to close the last document. Doing so closes the last document but leaves Word up and running.
5. Office: Ribbon management
If you're using the ribbon version, you probably learned quickly to double-click a tab to hide and display the ribbon. The double-click is a toggle, and it's permanent; you must intervene with more double-clicking to switch between hidden and visible.
If you don't want to permanently unhide the ribbon, single-click a tab to temporarily display the ribbon. Then click the option you want. Word will hide the ribbon when you're done. It's an easy way to use the tabs without permanently unhiding the ribbon.
6. Word: Sticky borders
Word sometimes misunderstands your intentions when it comes to lines and borders. What you intend for Word to treat as a line object, it interprets as a border. If you don't know that, you'll find it almost impossible to get rid of the line object. You can't just select it and press [Delete]. If you find yourself stuck with a line that you just can't get rid of, click inside the paragraph below or above the line. Then, choose No Border from the Borders drop-down in the Paragraph group. Doing so will remove the border (what you thought was a line object) from the paragraph or element to which Word attached it. In Word 2003, you'll find this option on the Formatting menu.
7. Excel: Quick row and column selection
You can quickly select an entire row or column (or even a block) using a simple keyboard shortcut.
To select the current column, press [Ctrl]+[spacebar]. To expand the rows, press [Up Arrow] or [Down Arrow] without releasing the [Ctrl] key.
To select the current row, press [Shift]+[spacebar]. To expand the columns, press [Right Arrow] or [Left Arrow] without releasing the [Shift] key.
8. Office: Undo
Is it possible that anyone doesn't know about [Ctrl]+[Z]? This keyboard shortcut will undo what you've just done. New users learn quickly enough that they can use it in one app -- usually Word. They don't always realize that they can use it in all of the Office apps. In addition, not only will [Ctrl]+[Z] undo your last keystrokes or actions, it'll undo some of Word's automated corrections. For instance, Word automatically inserts curly quotes (instead of straight quotes). When you really need a straight quote, use [Ctrl]+[Z] after Word inserts the curly quote to cancel Word's automatic format. It won't remove the quote. Rather, it will undo the automated change from a straight quote to a curly quote -- leaving a straight quote.
9. PowerPoint: Nudging
Perhaps my favorite PowerPoint tip is nudging. To move an object slightly, you might try dragging it, but dragging isn't always sensitive enough -- dragging moves the object too much despite your best efforts to control the distance. If you want to move an object just a hair, select the object and hold down the [Ctrl] key while pressing the appropriate arrow key. Doing so will nudge the object, according, just slightly.
Send me your question about Office
I answer readers' questions when I can, but there's no guarantee. When contacting me, be as specific as possible. For example, "Please troubleshoot my workbook and fix what's wrong" probably won't get a response, but "Can you tell me why this formula isn't returning the expected results?" might. Please mention the app and version that you're using. I'm not reimbursed by TechRepublic for my time or expertise, nor do I ask for a fee from readers. You can contact me at susansalesharkins@gmail.com.
