Is Centrallo the new Evernote for Android?
One aspect of mobile life that you simply can't escape is the need to keep your life organized. From notes, to lists, to ideas -- applications that manage your thoughts are the junk drawer of the mobile world. To this point, Evernote has served as Queen of that very random castle. However, there are always new apps coming along with one simple goal -- to usurp the crown from the Queen.
A new contender in this fight is Centrallo. Currently in beta, Centrallo already does a great job of organizing, centralizing, prioritizing, and sharing your information. With Centrallo, you can easily:
Drag and drop an item onto another to create a list
Drag lists onto lists
Attach photos, videos, voice notes, location-based reminders, links, and more
Create lists, within lists, within lists
Sync across multiple devices
Publish lists to the web with a single tap
Share links (with optional password protection)
Collaborate with lists
Track who accepts your invitations
Of course, when you're going up against a giant like Evernote, the road to the top is going to be long and arduous. Does Centrallo have what it takes? Let's find out. Let's install the app and see what it has to offer.
Installation
Installing Centrallo is pretty straight forward. Just follow these steps:
Open the Google Play Store on your Android device
Search for Centrallo
Locate and tap the entry by Centrallo Productivity
Tap Install
Read through the permissions listing
If the permissions listing is acceptable, tap Accept
Once the installation is complete, you should find a launcher on your home screen, in your app drawer, or both locations. Tap the launcher to start the app.
First use
When Centrallo first starts up, you must swipe through a quick intro. Once you've done that, you'll land on a login screen (Figure A). Either login to a pre-existing account or create a new one.
Figure A
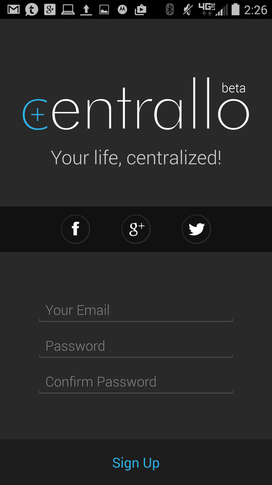
Centrallo ready for your login on a Verizon-branded Droid Turbo.
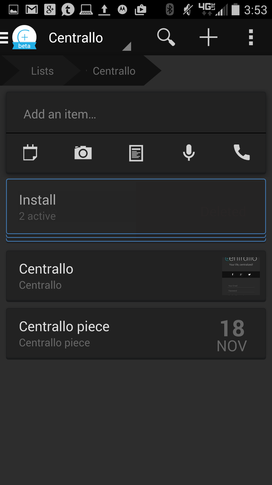
Once you've logged in, you'll be presented with the main screen (Figure B). Here you can quickly add items of all sorts and even combine items into lists.
Figure B

The Centrallo main page.
One thing you need to understand -- in Centrallo, a "list" is not a bulleted list of items. Think of Centrallo lists as collection of items. To create a list, here's what you do:
From the main window, tap the plus sign [+]
Give the item a name and tap Save
Create a second item (in the same manner you created the first)
Long-press the second item, and when the item is outlined in blue (Figure C), drag it onto the first item
Figure C
Creating a list by dragging an item onto another.
The Inbox
Each Centrallo account has an associated inbox. With this, you can send important emails and links to be reviewed (through Centrallo) at a later time. To locate this email address, do the following:
From the main window, swipe right from the left edge of the screen
Tap Settings (Figure D)
Under App settings, locate the Forward to email address (this is the email address you need)
Figure D
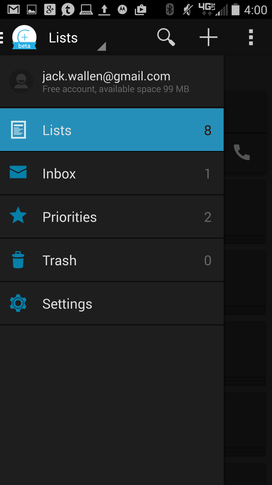
Locating your Centrallo email address.
Now, you must set up trusted inbound email addresses. These are email addresses that Centrallo will accept emails from. If you do not set up an email address as trusted, incoming mail will be rejected. To set this up, do the following:
From the main window, swipe right from the left edge of the screen
Tap Settings
Under App settings, tap Trusted inbound addresses
Enter a trust email address and tap the plus sign [+]
That's it. To get to those emails, you must swipe right from the main window and tap Inbox. Here you should see any emails that have come in from the trusted address. You can then move those emails to a list by doing the following:
From the Inbox, select the email to be moved
Tap the menu button
Tap Move (Figure E)
From the pop-up, tap Lists
Select the list that will house the email
Tap In selected item
Figure E
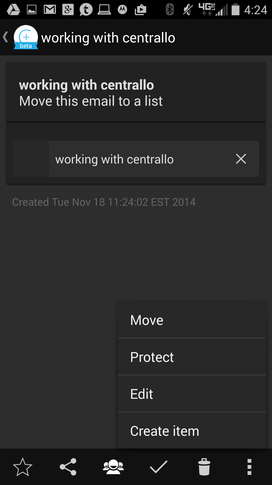
Moving an email into a list.
Password protect an item
Should there be an item you need to secure, you can easily do that as well. Here's how:
Open up the item
Tap the menu button
Tap Protect
Enter a password
Tap Set
In order to access that protected item, the password must be entered.
Sharing items
You can also share items with other Centrallo users. If the user doesn't have a Centrallo account, they'll be sent an email prompting them to sign up. To share an item, do the following:
Open the item to share
Tap the share button at the bottom (head and shoulder icon, third from the left)
Tap the plus sign [+] in the top right corner
Enter the email address (Figure F)
Tap the right-pointing arrow
Figure F
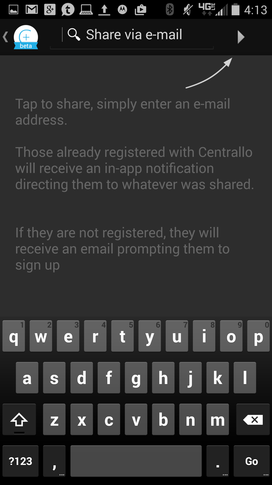
Sharing an item.
You can also share protected items. However, the shared user will have to have the same password that was used to set the protection.
Centrallo is certainly a worthy contender in the battle of the mobile information management space. But can it usurp the reigning Queen, Evernote? What do you think? Does Centrallo have what it takes? Share your thoughts in the discussion thread below.
