Create C# code on your Mac using Atom and OmniSharp

Image: iStock/arhon
I have been working with the .NET Framework since its inception. The .NET Framework has always been tied to the Windows platform family, thus many developers have shunned it in favor of cross-platform solutions like Java or the more popular JavaScript.
Microsoft seems to have recognized this perceived shortcoming with recent announcements for the next version of ASP.NET to be cross platform and for .NET to now be run as an open source project. While this will be great, there are options for building .NET code on non-Windows environments. Here's a look at using Atom on OS X to build .NET applications.
Introducing OmniSharp
OmniSharp is a set of open source projects with the ultimate goal of enabling .NET development in your favorite text editor, whether it is Windows-based or not. It is not a Microsoft project, but there are a couple of Microsoft folks contributing to it. While Microsoft pushes for cross-platform support for .NET, OmniSharp is a great companion for building applications.
My current editor of choice for building code on my Mac is Atom (I still go with Visual Studio when using Windows), and the OmniSharp plugin is freely available to make Atom useful for .NET development. OmniSharp provides plug-ins for command-only development as well as Emacs, Vim, Adobe Brackets, and Sublime Text. Also, another interesting fact is OmniSharp takes advantage of NancyFX.
Atom configuration
Installing and configuring OmniSharp is quick and painless. It requires three packages:
language-csharp: adds C# language support to Atom.
autocomplete-plus-async: provides the autocomplete feature (resembling the Visual Studio feature) for C# in Atom.
omnisharp-atom: is the actual OmniSharp server, which is the backbone of working with C# in Atom.
These three packages can be installed via the Atom package interface (Atom | Preferences menu on OS X) as shown in Figure A. In addition, you can install the packages via the command line using the following three commands:
apm install language-csharp apm install autocomplete-plus-async apm install omnisharp-atom
Once the packages are installed, the OmniSharp menu will appear (Figure B), which provides three options:
Toggle: This enables and disables the OmniSharp plug-in.
Find Usages: This finds and displays all occurrences of selected code are used.
Go To Definition: This locates and displays the definition for selected code.
The flame icon in the lower left corner of the Atom solution window shows whether OmniSharp is running. When running, the flame appears in green as shown in the bottom of Figure B. The flame appears gray when OmniSharp is not running.
Figure A
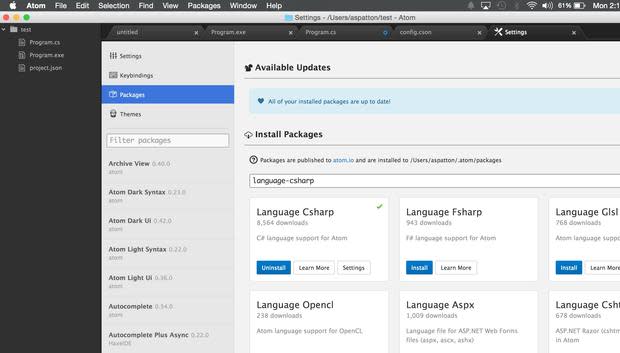
Add or configure packages in Atom.
Figure B
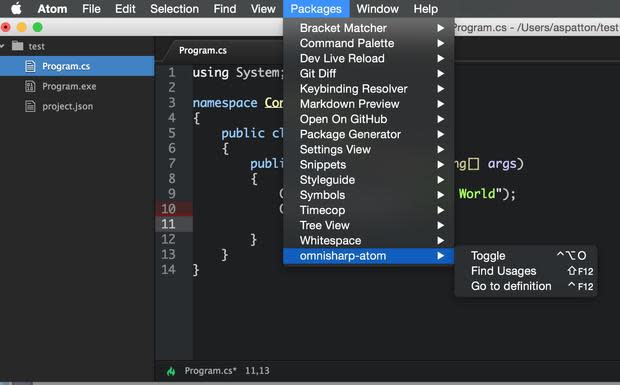
The OmniSharp package menu is visible once installed.
The reason to use OmniSharp is the assistance provided with developing code, which is accomplished mainly by way of the autocomplete feature. Figure C shows the feature when typing a class name, and Figure D demonstrates it displayed with method names. Completions appear as you type -- you can point-and-click or press tab to select an item from the autocomplete list.
Clicking the OmniSharp flame icon (the green flame at the bottom of Figure B) opens information tabs, including Errors, Find (searching code), Build Output, and Output. Figure E shows the Errors tab, which provides information on the problems with your code -- in the example, the ReadOne method is an obvious error (notice it appears with a red background on its line number). Figure F shows the OmniSharp output tab content, which lets you know details related to its running.
Figure C
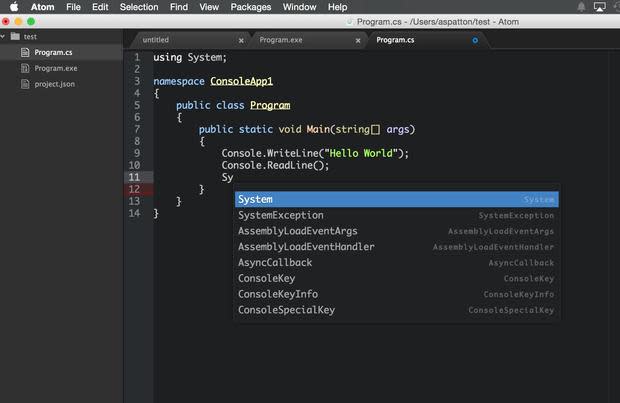
The autocomplete feature suggests object names as you type.
Figure D
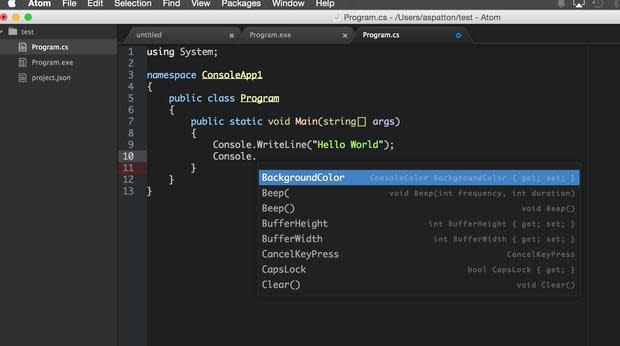
The autocomplete feature suggests method names as you type.
Figure E
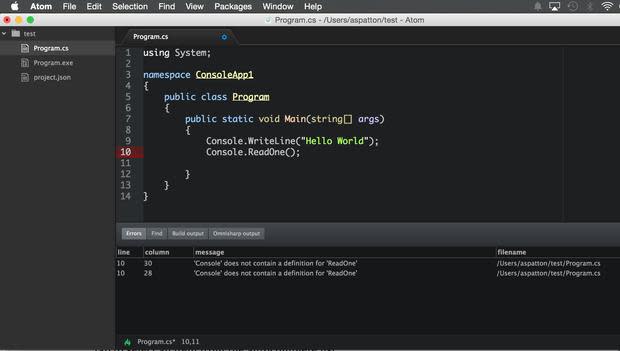
The OmniSharp Errors tab may be viewed by clicking the flame icon.
Figure F
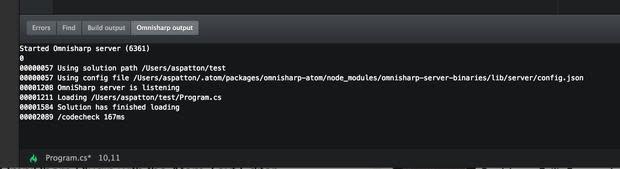
The OmniSharp Output tab provides information about the environment.
With OmniSharp installed and your C# code entered and validated, compiling the code can be accomplished with command-line tools. You can choose to use Mono (this uses the mcs command for compiling C# code) or work with vNext from Microsoft (remember, the company is promising cross-platform support in the new version), which is a work in progress. Also, you could copy to a Windows environment and compile using the standard C# compiler (csc command).
Create C# code on your Mac today
This year has seen Microsoft truly embrace open source with everything from Node.js and git support to open sourcing C#. Take a look at Microsoft's Openness site for more details.
One item that will not be cross platform is the Visual Studio IDE, so you will need to use other tools when working with .NET code on non-Windows platforms. You can build .NET applications on non-Microsoft platforms like Linux and OS X now with OmniSharp. Take it for a test drive with your platform and favorite editor today.
