
How to create and use Task Workflows in DeployStudio

Deploying new OS images -- whether it is Windows, OS X, or Linux -- always presents little nuances until the process is perfected and all the bugs are ironed out. With storage prices at an all-time low, thick images (or those that have every application and setting tweaked and installed) are quite popular. The only drawback is the downtime between a workstation going offline and getting it back online.
Thin images are slimmed-down versions of its larger, bigger brother, except that only the OS and relevant patches/updates are included. Other apps, plug-ins and settings are then installed remotely, either manually or via some from of policy management or 3rd-party suite.
Given that DeployStudio is capable of producing both thick and thin images, in terms of speed and efficiency, thin images would be an easy solution to deploy for desktops. But how do you handle settings, package installs or even binding to directory services? The answer is through the use of modular workflows that simplify the configuration process and allow a sysadmin to execute one or more tasks -- either singularly or chained together -- to completely configure a newly deployed image in minutes rather than hours.
Before we jump into the workflow creation process, here are the requirements:
Apple computer running OS X Server (10.6.8+)
DeployStudio installed and server service configured
NetInstall service configured
NetBoot image created using DeployStudio Assistant
Switched network
Static IP
Broadband internet access
Apple client computer running OS X (10.6.8+)
With these requirements in place, let's dive into the creation of three common workflows widely used in enterprise environments.
I. Renaming a computer/hostname
Launch the DeployStudio Admin.app from the server or admin station and authenticate using admin credentials (Figure A).
Figure AFigure A Under the Workflows section, click the plus sign [+] to add a blank workflow template, which will be configured to rename a client computer. If the computer account has already been added to the Computers database, skip down to step #6 (Figure B).
Figure BFigure B Before proceeding further, if the client computer has never connected to the DeployStudio Runtime before, or if the client computer information has not been added to the DeployStudio database under the Computers section, please boot the client computer now into the NetBoot created by DeployStudio. Once connected to the Runtime, it will appear in the Activity section ready for input (Figure C).
Figure CFigure C The Computers database will automatically create an entry* for all devices that connect to the DeployStudio Runtime based on its serial number. (Figure D)
Figure DFigure D
Since the chances are likely that the computer(s) will be renamed to something more identifiable, find the entry that correlates to the newly connected node and modify both the Local hostname and Computer name, and then click Save (Figure E).
Figure EFigure E
*Note: Additionally, clicking the plus sign [+] while selecting the Computers pane will prompt the new computer identifier to appear, which allows the addition of new computer placeholders based on either the serial number or MAC address of the device. This list can be pre-staged to include new computers before they are physically connected to the DeployStudio Runtime.Once the computer account has been added, feel free to power down the client desktop for now.
Back to the DeployStudio Admin console, select Workflows and return to the previously created workflow in step #2. Rename the workflow to something more useful, like "Rename computer," then click the small black plus sign [+] next to Drag tasks here to reveal the tasks box. Drag and drop the Configure task and Save the workflow template. (Figure F).
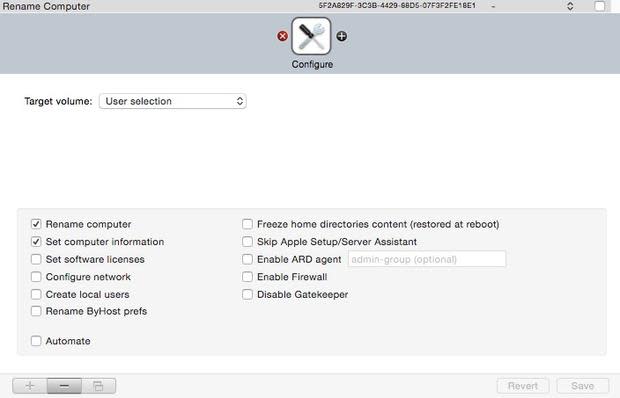
Figure FFigure F Several settings may be configured using the Configure task, and since all tasks are modular, only necessary settings are required to be selected. For a computer rename task to be successful, the Rename computer and Set computer information boxes should be checked. Next to Target volume, choose User selection from the drop-down menu and uncheck Automate (more on automation in the next article). Lastly, click Save (Figure G).
Figure GFigure G With the workflow saved, the last step is to checkmark the Publish box next to the workflow line item so that it will appear in the Runtime menu (Figure H).
Figure HFigure H
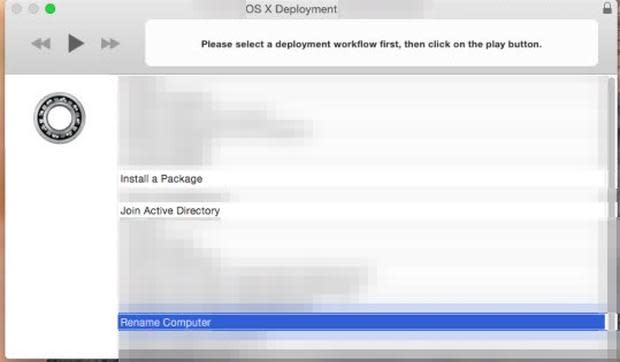
At this point, the Rename computer workflow has been created. However, please note that if no computer entry exists in the database, the task will fail. Please review that all the steps above have been followed correctly. Once verified, power on the client computer again and boot to the DeployStudio Runtime.From the client node, once the DeployStudio Runtime is loaded, the workflow selector will be displayed. Scroll down the list to the Rename computer workflow to highlight it, and then click the triangle (play) button (Figure I).
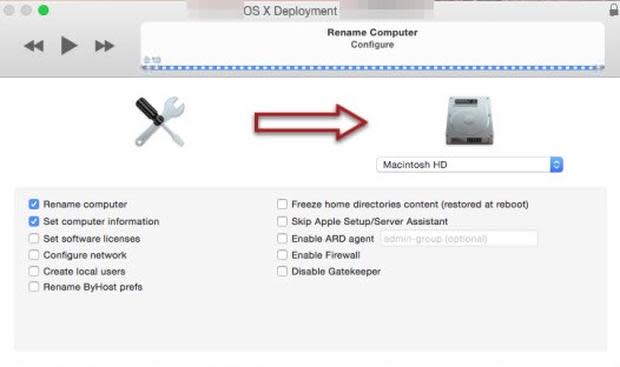
Figure IFigure I Since the workflow is not set to automate, it will allow for some last-minute changes to the workflow, if necessary. Click the play button to confirm the settings (Figure J).
Figure JFigure J Click the play button once again to execute the task (Figure K).
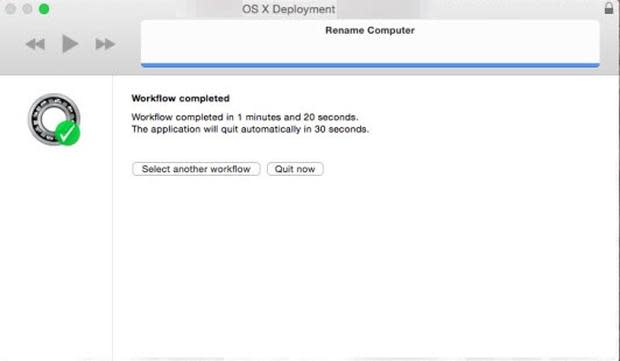
Figure KFigure K Once the task is completed, it will present either a checkmark (success) or an X (failure). Click the Quit button (or wait the requisite 30 seconds) to reboot the client node and complete the process (Figure L).
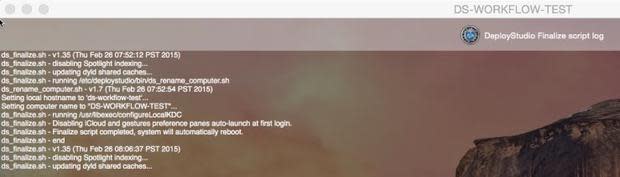
Figure LFigure L DeployStudio workflows process tasks in a pre-loaded environment independent from the host OS. Upon the next boot to the host OS, post-processing occurs and the scripts are run with the commands being executed on the OS itself and simultaneously recorded to the DeployStudio log. This is useful in the event that a command executes with an error, because troubleshooting this log may review clues as to what went wrong. Once post-processing is complete, the node will reboot a second and final time, and you can verify the settings have been configured by logging onto the client computer (Figure M).
Figure MFigure M


II. Binding to Active Directory services
From the DeployStudio Admin console, create another workflow and rename it something identifiable, such as "Join Active Directory," and then drag and drop the Active Directory Binding task to the workflow (Figure N).
Figure NFigure N Binding to Active Directory requires domain-level credentials or the delegated rights to be able to join computers to the domain, as well as knowledge of the domain name, security groups used to administer the computer, and the object path to the OU that contains the pre-staged computer object in Active Directory. Enter the information into the relevant fields. Checking the Use UNC path from Active Directory with network protocol will allow the choice of the default sharing protocol to be AFP or CIFS (also known as SMB). Verify that all entered information is correct and save the workflow (Figure O).
Figure OFigure O
Since this workflow eliminates a lot of tedious manual entry, take your time with the data entry portion. Remember the old carpentry adage: measure twice, cut once. By ensuring this workflow is 100% correct, it will allow the sysadmin to reuse it many times without ever having to worry about an issue with binding or misconfiguration.Again, restart the client node and boot into the DeployStudio Runtime, this time selecting Join Active Directory from the workflow selector, and click the play button (Figure P).
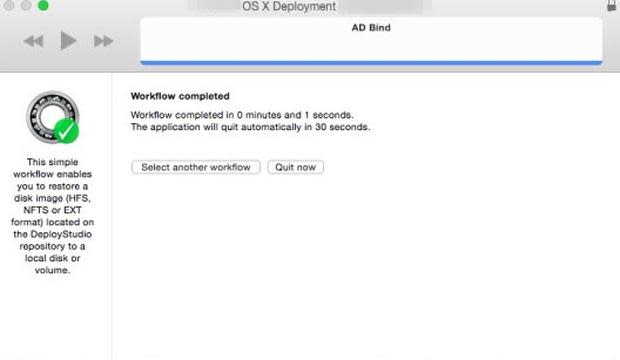
Figure PFigure P Biding workflows take time to get right, but once they're setup correctly, they execute in no time. Upon successful completion of the task, click Quit to reboot the client (Figure Q).
Figure QFigure Q Post-processing will occur, as several commands must be executed in order to bind a computer to a directory service. As with all other workflows, the tasks are recorded onto the DeployStudio log for review, and the node will automatically reboot once post-processing completes (Figure R).
Figure RFigure R


III. Installing an application package
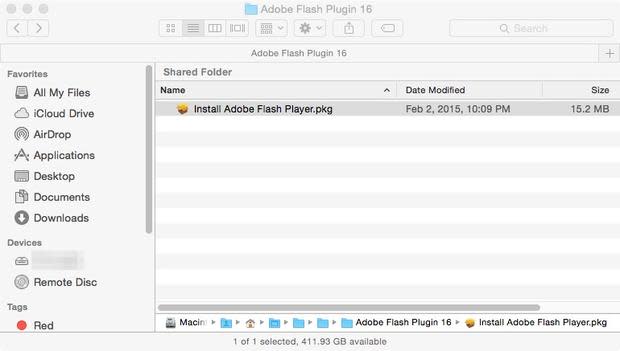
Prior to creating an installer package workflow, it's necessary to first copy the installer package to the DeployStudio repository. Locate the Packages directory within the repository, and copy the installer package** there (Figure S).
Figure SFigure S
**Note: Only applications of the installer package variety may be installed in this manner with DeployStudio. Self-contained apps may be copied to the Applications folder of client computers either manually or through the use of scripts or 1st/3rd-party suites, such as Apple Remote Desktop.In the DeployStudio console, under the Packages section, a new entry should be detected automatically with the name of the package that was copied to the repository -- in this case, Adobe Flash Plugin 16.pkg (Figure T).
Figure TFigure T Before deploying the app, a workflow must be created. This time, use the Package install task (Figure U).
Figure UFigure U From the Package drop-down menu, select the appropriate package. This is technically all that's required for a package installer workflow; however, I like to check the Ignore install failures checkbox so that any errors encountered during the process cause the workflows to hang. This is more of a concern when automating or chaining together workflows. Lastly, the Postponed installation box is checked by default. Most of the time, this does not pose a problem. However, in real-world experience, some packages prefer to install during the execution of the task (and not postponed). Save to complete the workflow (Figure V).
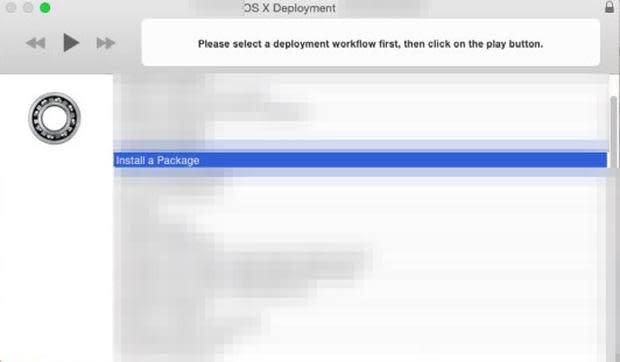
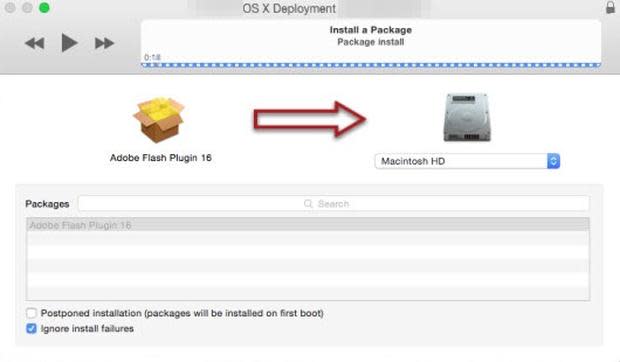
Figure VFigure V Reboot or the client node into the DeployStudio Runtime, select Install a package from the workflow selector, and click the play button (Figure W).
Figure WFigure W Verify the settings are correct, and then click the play button again to confirm and install the software (Figure X).
Figure XFigure X This is typically a quick install, but packages may take a bit longer depending on size, speed of the hard disk, and/or network congestion. Once the install has completed successfully, click Quit to reboot the client (Figure Y).
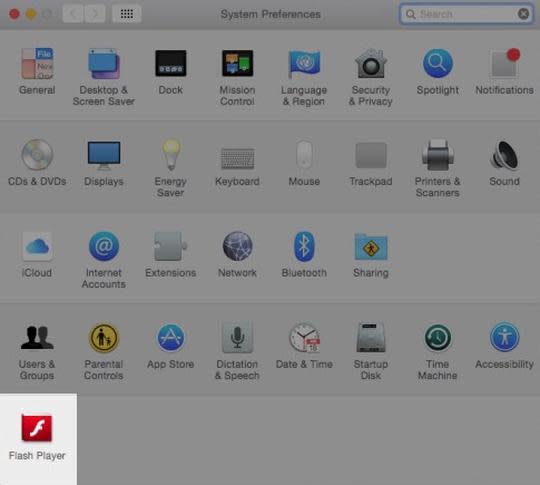
Figure YFigure Y Log back into the host OS and check the Applications folder (or in this case, the Preferences pane) to make sure that the application was installed correctly (Figure Z).
Figure ZFigure Z


These three important tasks are now configured as workflows to be used and reused for new or refresh computer configurations, as needed.
Given the modular nature of the workflow system in DeployStudio, single workflows like these can be modified for multiple locations, computer types on the fly without the need to reconfigure the entire suite. Also, as stated before, workflows may be automated and therefore chained together to perform full, sweeping restores and deployments, just by executing one workflow.
