
How to create a video interview with a Chromebook
chromebookvideo.jpg

I heard it once too often: "You can't edit video on a Chromebook." Actually, you can.
With a built-in webcam, microphone, and access to YouTube tools online, a Chromebook provides everything you need to create a basic video.
There are limits, of course. Chromebook hardware determines what you can capture: webcam resolution affects video quality, and the microphone impacts audio accuracy. YouTube tools limit what you can edit: the online YouTube Editor supports a maximum of 50 video clips. If your needs exceed these constraints, you'll need a different set of tools.
J.J. Abrams isn't likely to use a Chromebook to record or edit Star Wars, but a Chromebook can capably capture a video interview. For example, a video might help introduce a new team member to an organization: a written biography establishes a person's experience, while a video conveys personality. In an educational environment, an interview project may help a learner improve media or journalism skills.
Here's how to record, edit, and publish a video interview with your Chromebook.
1. Prepare
Plan your questions first. Unless you're investigating a specific issue, avoid questions that may be answered with a short response. Instead, ask broad, open-ended questions to elicit a story. For example, "Where did you go to college?" evokes a short response, whereas "What led you to pursue X as a career?" may prompt a longer conversation. Five to 10 such questions may be all you need to complete an interesting interview.
Select the place for the interview carefully. Choose a location with enough light, and without glaring reflections. Look at the scene behind your interview subject. Ideally, select a spot that conveys additional information about the subject, such as relevant items in their workspace. Avoid distracting settings, such as a busy street or places with intrusive sounds (e.g., sirens, alarms).
Fully charge your Chromebook battery before you start an interview session.
2. Record video
Set your Chromebook on a stable surface, and position the webcam slightly above or level with the subject. A few large books might help raise the Chromebook (in a school, this can be an excellent use for out-of-date encyclopedia volumes). Avoid the up-the-nose webcam shot. Position the webcam far enough back so that the subject may move around a bit during the interview without going off-camera.
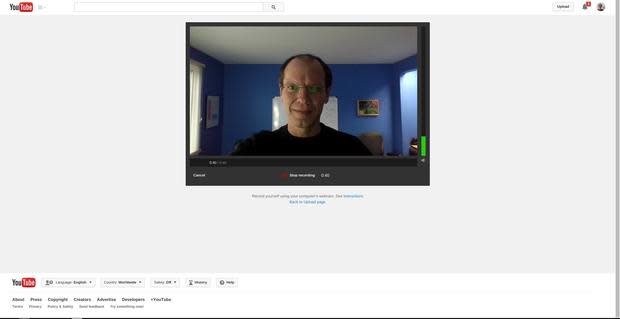
Open your browser to YouTube.com/my_webcam to record the interview (Figure A). You may need to allow YouTube access to your Chromebook camera and microphone.
Figure A
a-record.jpg

Record video from your webcam at YouTube.com/my_webcam.
Do a brief recording to make sure your Chromebook captures both video and audio clearly. Record a test question you ask, along with a brief response from your subject. If your Chromebook doesn't capture sound well, you might consider the purchase of a USB microphone.
If you're the interviewer, speak naturally. Glance at a question, memorize it, then ask it. Don't read your questions. Listen to the person's response, then ask your next question. Know your questions well enough that you can ask any one of them in any sequence. Don't interrupt; wait for the person to finish speaking. (If you work for 60 Minutes and are investigating an issue of international importance, interrupt. Otherwise, wait.)
You can pause or ask a question again at any time. You need recorded video, but not necessarily a single continuous shot. Ask a question again. You can clean a LOT up when you edit, but you need the recorded video to do so.
If you're the interviewee, choose a place to look at when you respond. Look into the camera, or at the interviewer. Don't shift back and forth between the two, unless multiple cameras are setup.
3. Edit
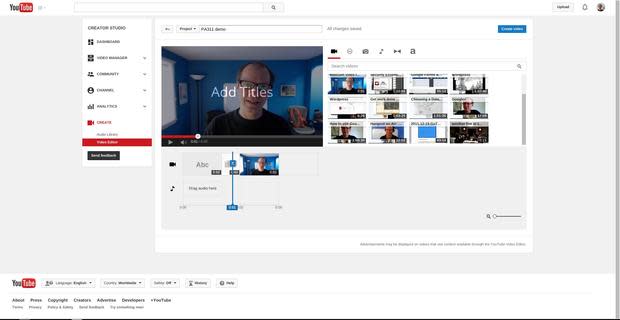
Edit your video with the YouTube.com/editor. Drag-and-drop video clips to the timeline, then add titles. Display the correctly-spelled name of the interview subject and the date of the interview and add credits, such as the interviewer's name and/or contact information.
Crop clips, as needed, to omit undesired segments. Arrange video clips in a sequence that makes sense and minimizes disconcerting cuts or jumps. Add transitions between the clips (Figure B) to smoothly move between different segments. For example, a cross-fade fades out one image, while another fades in.
Figure B
b-edit.jpg

Edit video clips, and add titles and transitions at YouTube.com/editor.
4. Publish
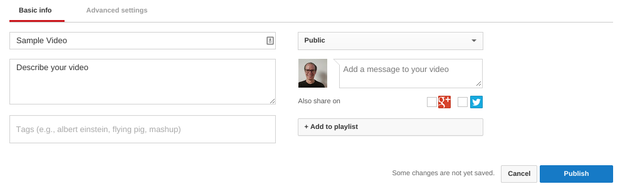
When you complete your edits, add a title, description, and tags. Choose one of three privacy settings for your video: public (anyone can view), private (only you and people you choose will be able to view the video), or unlisted (anyone with the link may view the video). Then, publish your video (Figure C).
Figure C
c-publish.png

Make your video public, unlisted, or private to share it with appropriate audiences.
Congratulations! You've just recorded, edited, and published a video interview with nothing more than a Chromebook and YouTube.
Does your HR department use video to introduce new team members? As an educator that uses Chromebooks, do your learners record and create videos? Or do you use other tools, such as WeVideo.com, to work with video on Chromebooks? Let us know in the discussion thread below.
