Declutter your Android inbox with these tips
The holidays are in full swing, which means time off for many people. There are family visits, celebrations and winter outings ahead, all of which require and deserve your full attention instead of worrying about what's going on back at work. However, whether you plan to be out of the office a little or a lot, chances are you'll use your phone to keep an eye on your email anyhow - if for no other reason than peace of mind.
I work in IT which means endless email notifications: misbehaving systems (or systems that might be about to act badly), certificate renewals, "hey, we might want to plan this out someday" messages, misdirected support requests, and the endless white paper emails which are thinly disguised solicitations. Much of this involves tasks or incidents I don't necessarily need to know about right away; plenty of "FYI" level material which can wait until I'm in the office. I'm quite sure almost any given discipline is similarly plagued by an overabundance of email.
To stay sane (relatively) I use Outlook rules to filter many of these messages into other folders. If my INBOX is as clean as possible it not only makes my job easier but also ensures the only items that get delivered to my Android are on a "need to know" and "I can actually do something about this now" basis. Otherwise, I'm stuck scrolling through screens of clutter and deleting stuff which might just as well wait until I finish decking the halls and head back into work.
Outlook rules aren't the only thing I need here, however; I also rely on the ability to access filtered emails in other folders from my Android. Furthermore, it comes in handy to create message filters to specifically display email relating to topics/senders of interest, specify priority senders and block spammer addresses as needed. Here are my strategies:
Outlook rules
Android Folder Sync
Android Messaging Filters
Android Priority Senders
Android Spam Blocking
In this article I'll tell you how it all works to help streamline your Android mobile email experience. Note I tested this on a Samsung Galaxy S3 and checked to confirm the same settings apply to S4 and S5 phones; these steps should be typical for the Android operating system.
Outlook rules
Here are some examples of my Outlook rules:
Figure A
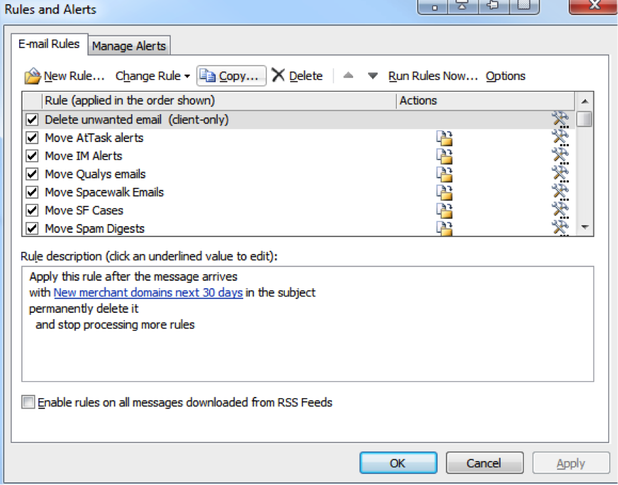
Image: Scott Matteson
That's just the tip of the iceberg. These rules go on for a few pages:
Figure B
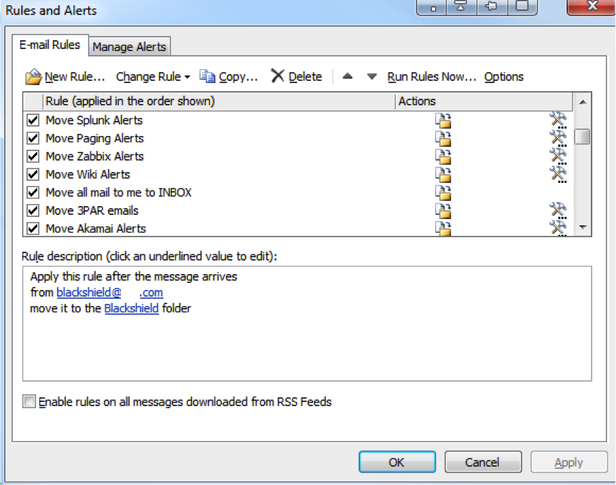
Image: Scott Matteson
(this is just page 2, but you get the point)
Each rule is based upon specific criteria such as subject, sender, recipient (which helps file away messages to groups I'm a member of, for instance) and other unique identifiers to redirect mail into various Outlook folders.
How many folders? Let's take a look:
Figure C
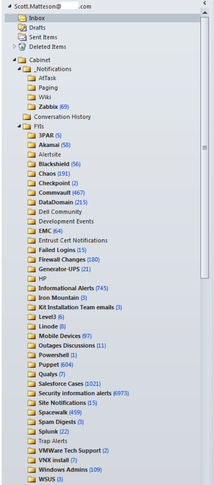
Image: Scott Matteson
Yeah, that's a lot of folders and I'll admit I'm a special case since I probably receive 1000 emails a day; a lot of these "FYI" kind of emails (hence the top-level folder name of "FYIs").
Furthermore, it took a bit of time to create all the rules, match them to a folder, then reorder the rule list for maximum efficiency (order is important since it determines which rules will be triggered first0, but once I did this maintaining the system was easy. The beauty of this structure is that only the stuff that belongs in my INBOX winds up delivered there and hence goes to my Android.
Android Folder Sync
As I mentioned, I would still like the option to access emails in some of the above folders even if I don't need them to be delivered directly to my inbox. The "Paging" folder is one such example since it might contain critical information I need to review when out and about. The "Folder Sync" function on my Android can handle that for me, and I'll walk you through an example of how to set it up.
Here's my inbox (note it says "Combined Inbox" since it will display both my work and personal email as I have both accounts set up on the Android). Isn't that emptiness a thing of beauty?
Figure D
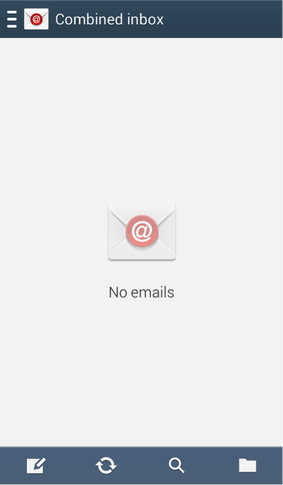
Image: Scott Matteson
Tap the menu button (to the left of the back button):
Figure E
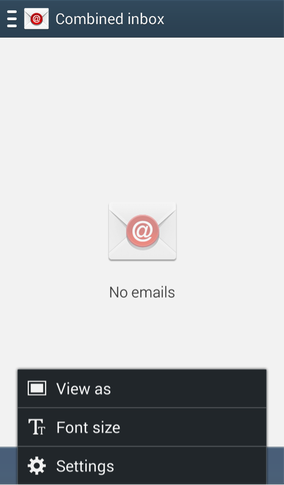
Image: Scott Matteson
Choose "Settings."
Figure F

Image: Scott Matteson
By default my work account is shown first under "Account settings," so I'll tap that:
Figure G
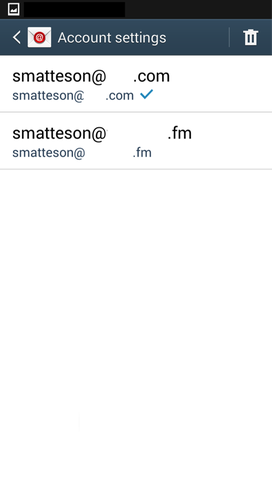
Image: Scott Matteson
The top account is for work, so selecting this shows me the following setting screen:
Figure H
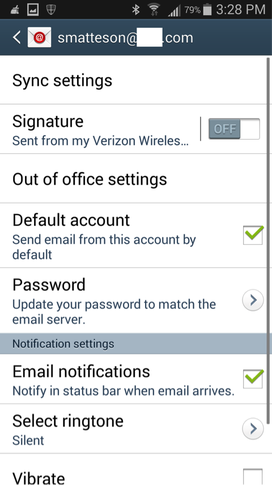
Image: Scott Matteson
If I scroll down to the bottom a "More Settings" button is revealed:
Figure I
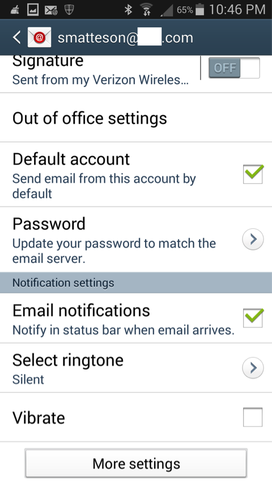
Image: Scott Matteson
Accessing "More settings" brings up the "Folder sync settings" option (finally!)
Figure J
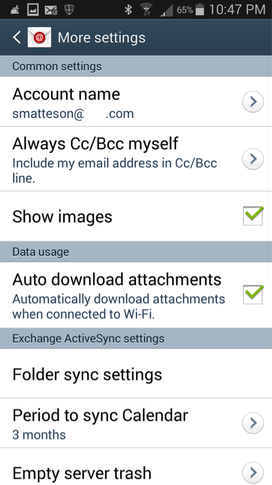
Image: Scott Matteson
If I tap "Folder sync settings" I can now control what items in my folders are synchronized with my Android:
Figure K
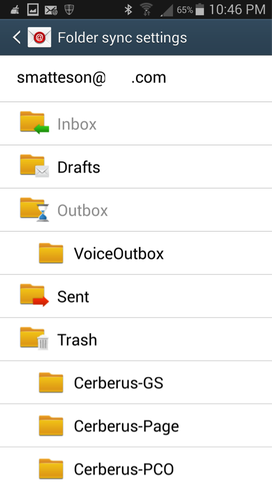
Image: Scott Matteson
I'll scroll down to Paging, a folder containing email items which I want kept on my phone:
Figure L
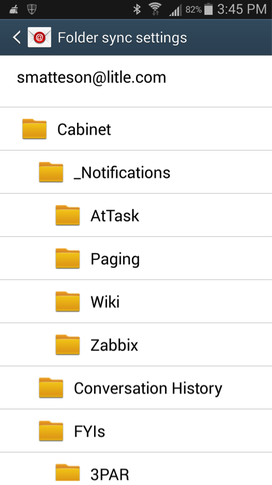
Image: Scott Matteson
Now when I tap "Paging" I can set the folder sync settings I need:
Figure M
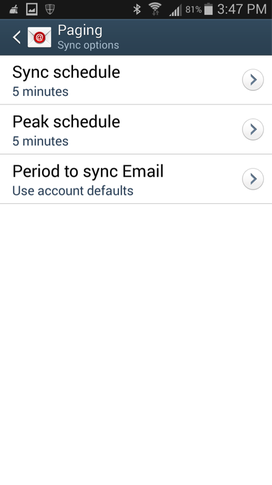
Image: Scott Matteson
As you can see, I've set the sync schedule (how often my Android will connect to the email server to update this folder during off-peak hours) for 5 minutes. I've set the peak schedule (how often my Android will connect to the email server to update this folder during peak business hours) to 5 minutes. I could set these to "Push" to have them delivered instantly, but 5 minutes is good enough.
The "Period to sync Email" refers to how far back email messages stored on the Android will go; the account default is one month which is also fine for me.
All I have to do is tap the back (<) button and the settings are saved.
Let's compare these folder sync settings to a different folder containing items I don't need synced to my Android; a folder called 3PAR:
Figure N
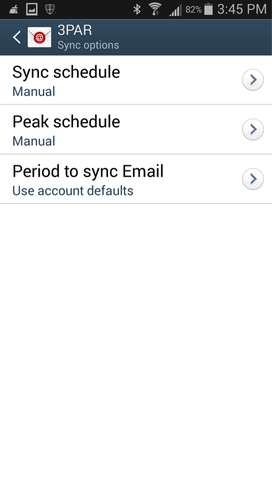
Image: Scott Matteson
In the above example both schedules are set to "Manual" since I don't need to see these items on my Android.
Android messaging filters
Let's say there are topics or senders I really care about and I want a specific email view on my Android which shows only items matching certain criteria. That's where Android Messaging Filters come in.
If I tap the menu button (to the left of the back button) and access "Settings" the following screen comes up:
Figure O

Image: Scott Matteson
I'll scroll down so that "Rules for filtering" is displayed:
Figure P
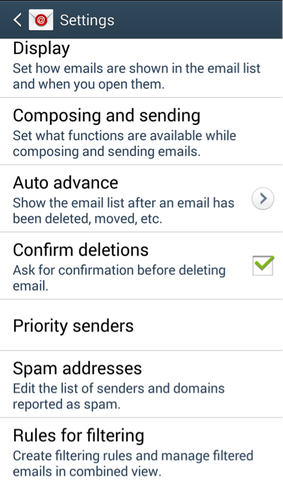
Image: Scott Matteson
When I tap "Rules for filtering" I then get the next screen:
Figure Q
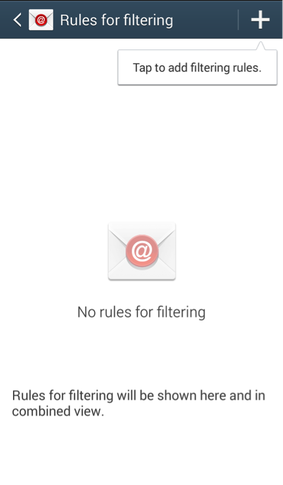
Image: Scott Matteson
I can touch "Tap to add filtering rules" to get started:
Figure R
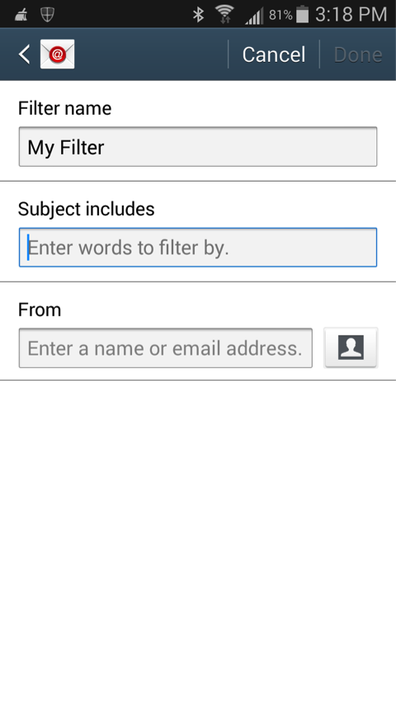
Image: Scott Matteson
Here is where you can specify the filter name, subject and from address. Let's say I want to see all mail with the phrase "Important Bonus information" in the subject (who wouldn't?). I'll add that to the "Subject includes" field:
Figure S

Image: Scott Matteson
I can customize the filter name, so I'll call it "Bonus Details" and tap "Done":
Figure T
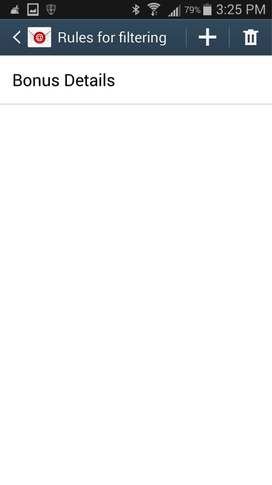
Image: Scott Matteson
We can see the filter I created above; all filters you set up will be shown here.
Let's say I also want to add a filter to show me emails from the boss (always a good idea, right?). I'll follow a similar process to create a filter called "Boss Emails" and add the appropriate address:
Figure U
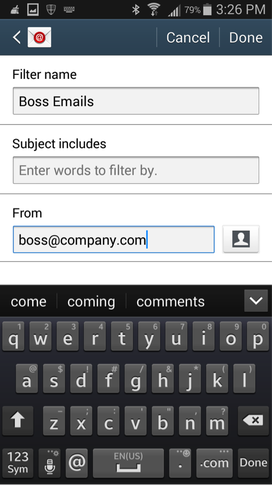
Image: Scott Matteson
And now when I tap "Done" I can see both my filters:
Figure V
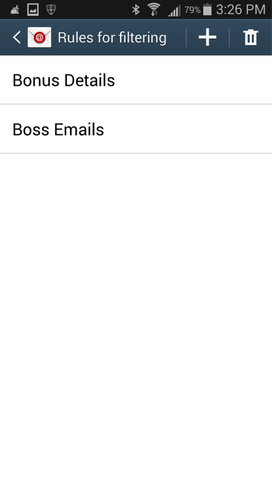
Image: Scott Matteson
How to actually display the filtered messages? Go to the main messages screen (which by default shows me my Combined Inbox meaning the Inboxes of both email accounts configured on my Android):
Figure W
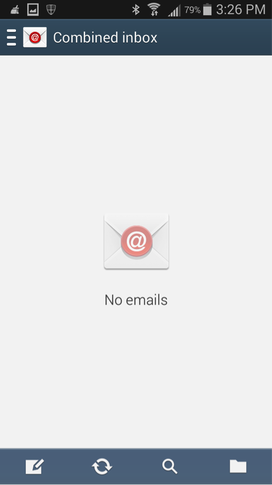
Image: Scott Matteson
If I tap the three horizontal lines next to the envelope symbol near the upper left this brings up another menu:
Figure X

Image: Scott Matteson
Tapping either the "Bonus Details" or "Boss Emails" filters will display only the email messages that match these specifications.
Android priority senders
Priority Senders work in a similar fashion to filters, whereby you can specify certain senders as important people and use a special view to only show items from them. However, this function also gives you the ability to set the priority sender inbox as the default folder and utilize email notifications, custom ringtones or make the device vibrate when messages arrive from these senders. That makes it very handy to attend to messages from certain people whereby perhaps other emails aren't quite so critical.
If I tap the menu button in my messages window and access "Settings" the following screen comes up:
Figure Y
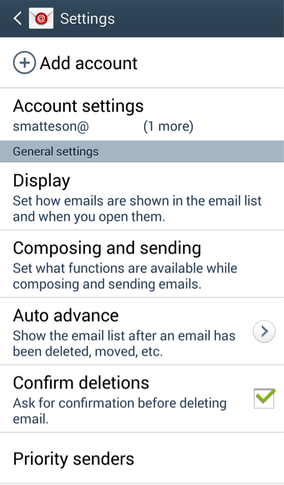
Image: Scott Matteson
I'll tap "Priority senders."
Figure Z

Image: Scott Matteson
This is where you can control how you want the device to respond to emails from Priority senders. Tapping "Priority senders" itself lets you add addresses:
Figure ZA
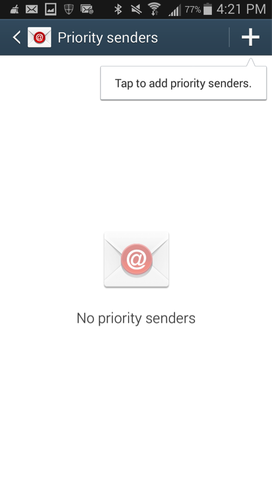
Image: Scott Matteson
This works much the same as the filter process; tap the + sign to add priority senders:
Figure ZB
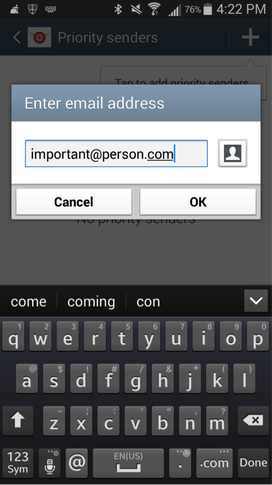
Image: Scott Matteson
I'll add an email address for an important person, tap OK, and then confirm it is displayed in the Priority senders window:
Figure ZC
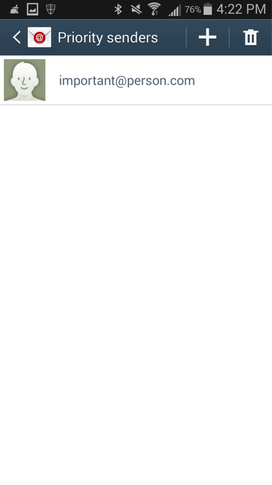
Image: Scott Matteson
Now if I go to my main messages window and tap the upper left menu button it shows me the option to display the priority sender inbox:
Figure ZD
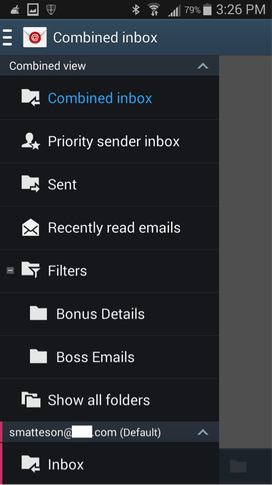
Image: Scott Matteson
Android spam blocking
Now that we've established how to see the things we want and not worry about the rest, how about getting rid of the stuff we DON'T want? Spam Blocking can help. Let's say I keep getting email from an annoying nuisance calling himself Pennywise@theclown.com (yes, I am a big Stephen King fan), offering me balloons. I can block Pennywise's ridiculous emails right from my phone.
If I tap the menu button in my messages window and access "Settings" the following screen comes up:
Figure ZE

Image: Scott Matteson
I'll scroll down so that "Spam Addresses" is displayed:
Figure ZF

Image: Scott Matteson
If I tap "Spam addresses" a familiar screen appears:
Figure ZG
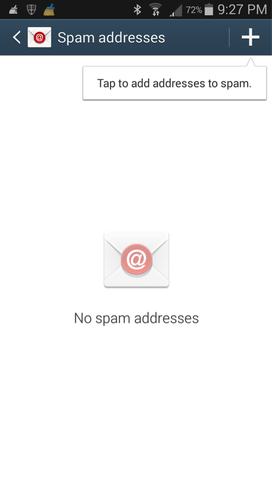
Image: Scott Matteson
As with our other examples, I can tap the + sign to add Pennywise to my block list:
Figure ZH
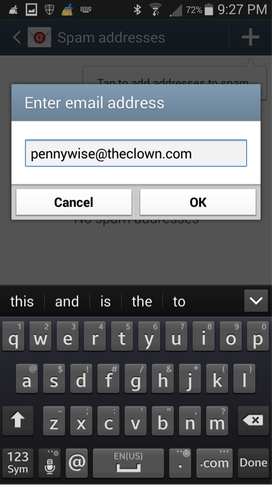
Image: Scott Matteson
Once I tap OK I return to the prior screen:
Figure ZI
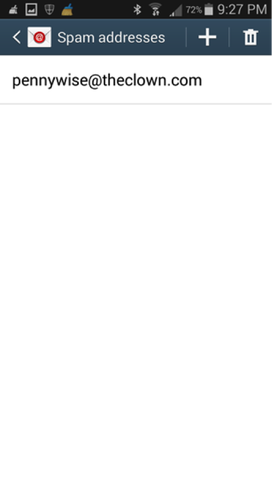
Image: Scott Matteson
And voila - good-bye Pennywise (for now anyhow, until he changes into a different form; I mean, gets a new email address).
These are the techniques I use to get the most out of my mobile email experience. For all the hubbub about how mobile devices may eventually replace desktops and laptops, I still prefer to do the bulk of my work with a bigger screen, so I appreciate the minimalism and efficiency of this approach since I can spend less time on my Android - reading email, anyhow.
Of course, there are other email apps both for your desktop/laptop and your Android device but the same principles generally apply: segregate what you don't want from what you want, prioritize what you really need to see, and file or dump the rest.
Here's to a happy and quiet holiday season!
