
How to generate sequentially numbered documents using Publisher

You probably know about Word's mail merge feature, and you might even use it to print labels or other documents, where some of the information changes (such as form letters). You can use the same feature with Publisher. Although you might not think of Publisher as an Office app, it comes with several different versions of Office. In this article, I'll show you how to print sequentially numbered tickets using Publisher and Excel. This article provides instructions for Publisher 2007, 2010, and 2013.
The Publisher document is a template, but you can download the Excel .xlsx example file.
Create the ticket in Publisher
You'll need to merge two documents: the Publisher document, or ticket, and an Excel workbook that contains the numbers you want to use to number those tickets. Please don't let the term mail merge intimidate you. Merging a Publisher document to generate sequential numbers is easy.
Now, let's create the Publisher document, or ticket, using a Publisher ticket template to simplify the example:
In Publisher, choose New from the File menu.
In the Search control, enter tickets.
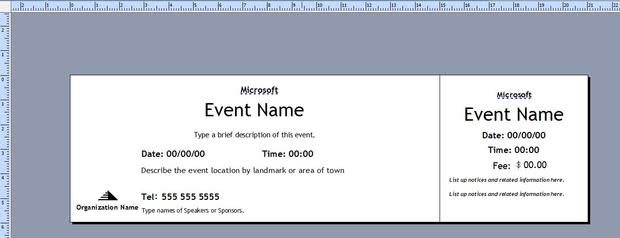
Double-click one of the ticket templates (Figure A).
Figure AFigure A Save the file.
At this point, you'd start customizing the template's content, but we'll work with the template as-is.
Create the ticket numbers in Excel
The next step is to create the simple Excel workbook that contains the ticket numbers. Open a blank Excel sheet. Using Figure B as a guide, create the ticket numbering sheet and save it, making sure to note the new workbook's name and location. As we discussed earlier, the Excel workbook stores the ticket numbers. In this example, we'll create 11 tickets numbered 100 through 110. You'll need to update the ticket values for each merge.
Figure B

Enter tickets numbers into an Excel sheet.
Merge the numbers with the tickets
With the two pieces in place, you're ready to run the merge that generates the sequential numbered tickets. Return to the Publisher event ticket document and do the following:
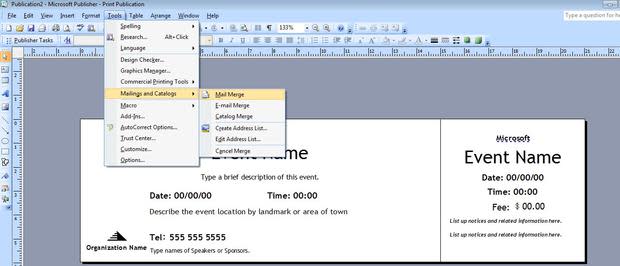
From the Publisher 2007 Tools menu, choose Mailings and Catalogs (Figure C).
Figure CFigure C Next, choose Mail Merge (Figure D).
Figure DFigure D Near the bottom of the pane, click the Next: Create or connect to a recipient list link. In this case, the recipient list is the list of values in Excel.
Using the Select Data Source dialog, locate the Excel file. Double-click it, or select it and click Open.
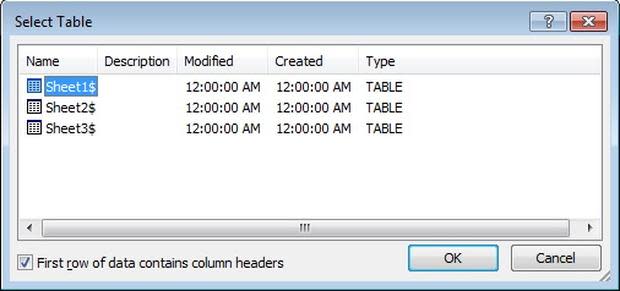
In the Select Table dialog, select the sheet that contains the values you want to merge. In this case, that's Sheet1 (Figure E), the default. Click OK.
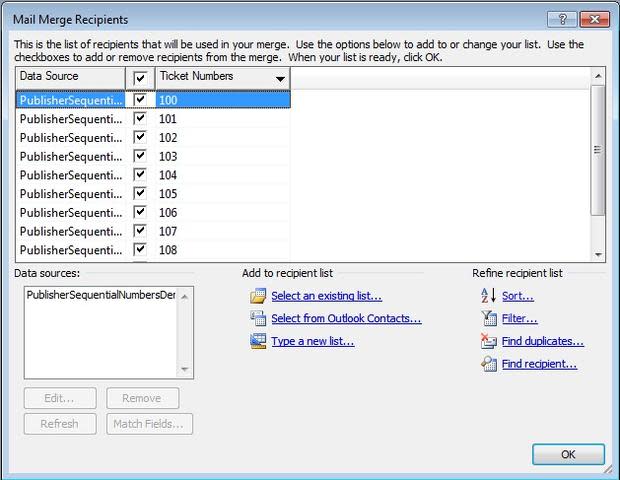
Figure EFigure E In the Mail Merge Recipients dialog, you have the opportunity to customize the list. We want all the numbers (Figure F), so don't uncheck anything before clicking OK. When applying this method to your own work, remember that you can exclude recipients at this point.
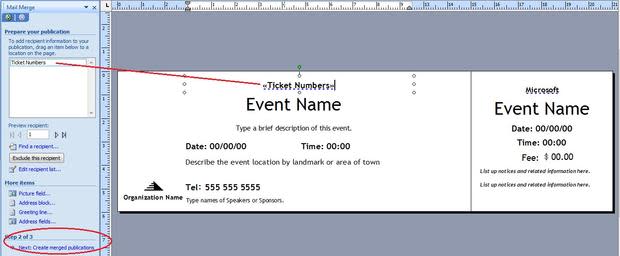
Figure FFigure F Now, you'll define the actual merge values. In this case, it's the Ticket Numbers field in the selected Excel workbook. Drag the Ticket Numbers field from the merge pane to the document (Figure G). After dropping the field control, I pressed [Enter] to replace Microsoft with the <<Ticket Numbers>> field.
Figure GFigure G Click the Next: Create merged publications link at the bottom of the pane.
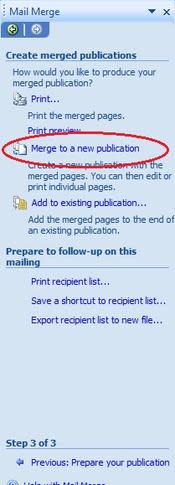
For this merge, click the Merge to a new publication link (Figure H). Merging is flexible enough to work with existing merge documents, but we need a new one.
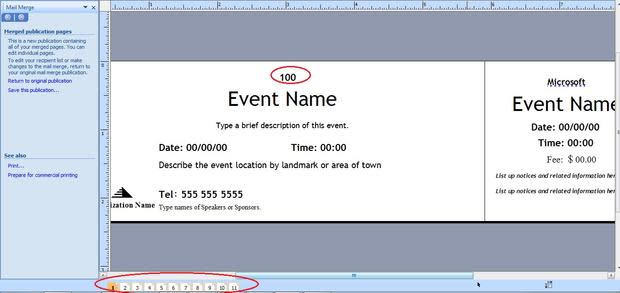
Figure HFigure H Publisher will replace the <<Ticket Numbers>> field with the values in the Excel sheet (Figure I). Click any of the page numbers at the bottom of the screen to see the ticket numbers change.
Figure IFigure I

The process is the same in 2010 and 2013, but you'll be using the ribbon:
Click the Mailing tab. Then, choose Use Existing List from the Select Recipients option in the Start group.
Repeat steps 3, 4, and 5 from the 2007 instructions above.
After identifying the value source, you're ready to merge. Choose the Step by Step Mail Merge Wizard from the Mail Merge drop-down.
Repeat steps 6, 7, and 8 above.
Print the numbered tickets
At this point, you're ready to load your card stock into the printer and print the tickets. I recommend that you preview the print job before sending it to the printer to make sure everything's in order. To print the tickets, do the following:
Choose Print from the File menu. In Publisher 2010 and 2013, choose Print from the File tab.
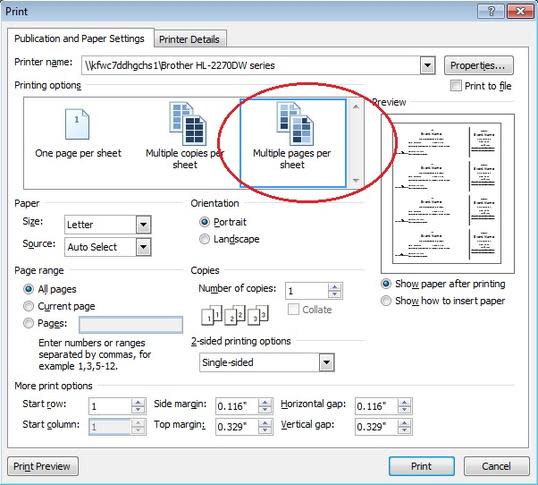
If the ticket is a single page, accept the default setting of 1 sheet. If you want to print multiple tickets on one sheet, click the Multiple pages per sheet option (Figure J).
Figure JFigure J Click Print Preview to check the settings. (Publisher 2010 and 2013 does this automatically.) The ticket numbers should increase by one (Figure K) as they do in the Excel sheet. Publisher will generate enough pages to accommodate your entire list of values in Excel.
Figure KFigure K Click Close to return to the ticket document (not necessary in 2010 and 2013).
Select the right printer, if necessary, and print as you normally would.

Wasn't that easy? It seems complicated because there are several steps, but once you've done it, you'll never hesitate to do it again.
Remember that you must update the values in the sheet if you want to continue the numbering series with the next batch of tickets. For instance, if you want your next batch of tickets to start with 112, you'd open the workbook and change the value 100 to 112, and update the remaining values accordingly. Don't forget to save the workbook after updating the values.
Send me your question about Office
I answer readers' questions about Microsoft Office when I can, but there's no guarantee. When contacting me, be as specific as possible. For example, "Please troubleshoot my workbook and fix what's wrong" probably won't get a response, but "Can you tell me why this formula isn't returning the expected results?" might. Please mention the app and version that you're using. I'm not reimbursed by TechRepublic for my time or expertise, nor do I ask for a fee from readers. You can contact me at susansalesharkins@gmail.com.
