4 financial lessons I learned while renovating my kitchen
From the moment I laid eyes on the kitchen in my house, I wanted to change each and every thing about it. It was cramped, dated, and had the most bizarre layout I'd ever seen, complete with a giant entryway to the laundry room that visually divided the room in half.
Over the last three years, my fiancé and I have thought long and hard about what our dream kitchen would look like, and we've done a lot of penny pinching to turn our vision into a reality. After setting the renovation wheels in motion last fall, we finished the project in early winter and we've been basking in its beauty ever since.
Now that we've lived with our brand new kitchen for six months, I've been reflecting a lot on the whole experience and recently realized that I learned a lot of financial lessons throughout the whole process. There are far too many to count, but these are the top four I'll remember for a long time to come!
For more like this, follow TMRW on Instagram at @tmrwxtoday.

Lesson #1: Saving for a kitchen takes patience, but it's worth the wait.
When I moved in with my fiancé a few years ago, I was excited to make our house a home and tackle a few renovation projects. But I also felt pretty overwhelmed. We both knew how expensive remodeling a kitchen can be, and with a mortgage and other bills to pay, neither of us wanted to take on any unnecessary debt (or stress).
Sure, our kitchen practically made our eyes bleed and it had next to no storage space, but these were things we could live with until we could save up enough money to pay it off in full. So we decided to be patient and put in extra hours at work for three years to save up the necessary funds. Thanks to my couponing skills, we also saved quite a bit of money on our everyday expenses so we could apply it towards the kitchen project.

In the end, we both feel so happy that we waited because whenever we look at the kitchen now, we can enjoy it more knowing that it's all paid off. This approach definitely doesn't work for everyone and we were lucky to have a fully functioning (albeit ugly) kitchen that we could live with for a few years. But if you're able to put your project off a bit and budget accordingly, it makes it so much easier in the long run.

Lesson #2: Always get two quotes for a renovation project.
After a lot of research, we decided to start our journey with a free design consultation at a well-known hardware store. We were excited and hopeful at first, but our designer quickly tried to sell us on pricey cabinets made out of particleboard.
After three years of saving, we wanted our money to go towards a more durable material and had our hearts set on wood cabinets. We expected that they'd be more expensive, but had a general sense of how much they should cost and were taken aback when our designer quoted us such a high number for a lower quality product.
I decided to go with my gut feeling and call my uncle, who has been in construction his entire life, for a second opinion. He quickly told me that the cabinets weren't worth what we'd been quoted, and said I should go for a consultation at a local business he's worked with many times over the years.
After only 10 minutes of speaking with our new designer, we quickly realized we'd made the right decision. Not only did he spend more one-on-one time with us trying to turn our vision into a reality, but he also put together a quote for custom wood cabinets that came in several thousand dollars less than what the other store had quoted us. We also saved money by ordering cabinets that weren't painted on the connecting pieces or the bottom. (No one ever sees those parts anyway!)
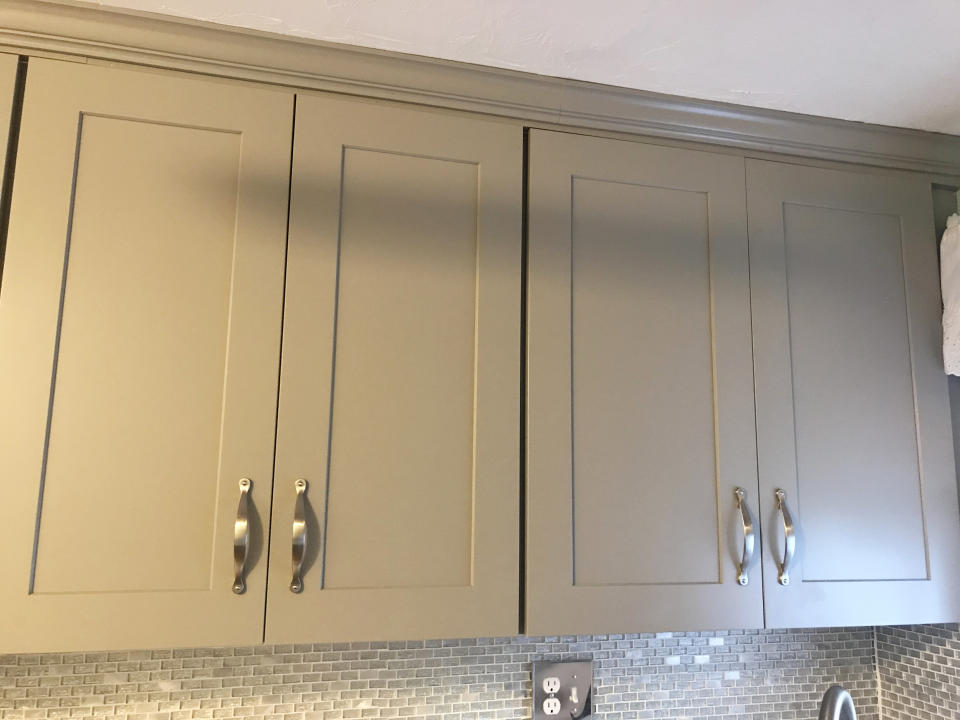
We ended up with cabinets that were much higher quality than the ones we had originally considered and ended up shaving a huge chunk off of our budget. All in all a win-win!
Lesson #3: Know where to save and when to splurge.
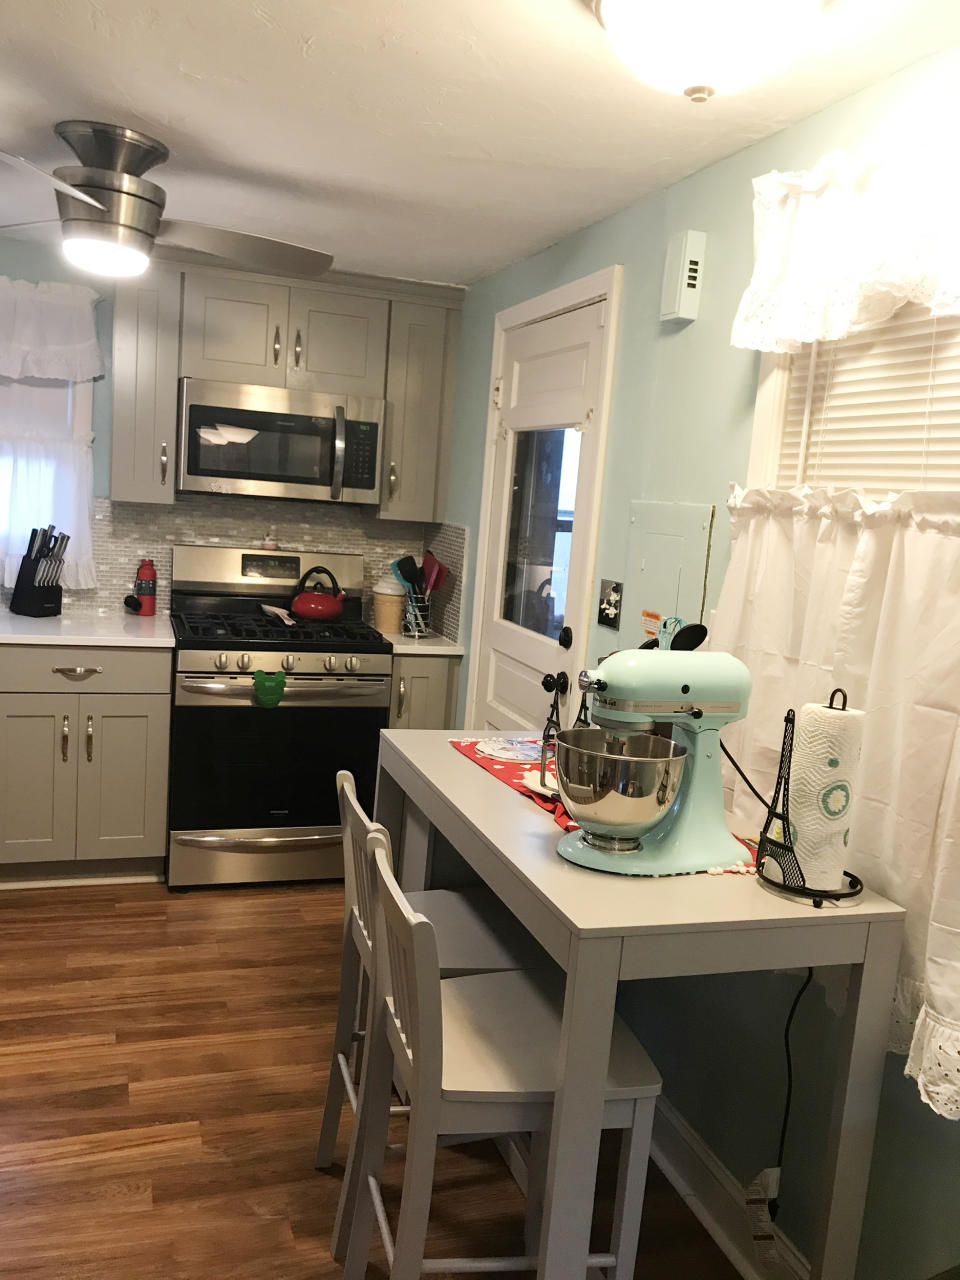
Like many household projects, kitchen renovations involve a lot of moving pieces and some items naturally take up a bigger portion of the budget. Since we had such a lack of space in our previous kitchen, roomy cabinets were a big priority and we were willing to spend the money on custom ones. The previous owners of our house had also left us with a granite countertop that was discolored and peeling, so we wanted something that would last us several decades and decided to spend a bit more on quartz countertops.

I'm always looking for ways to save money, so when it came time to choose hardware for the cabinets, I didn't want anything fancy. We ended up with something basic and utilitarian and I have no regrets about it because it gets the job done. I also chose a budget-friendly ceiling fan to replace our old one that was literally being held on with tape.
Our kitchen is pretty cramped, and there's not much room for a proper table and chairs set, but I still wanted something small that I could use while cooking and baking. After a lot of measuring and research, I came across a small table I could fit right against the wall and got two matching chairs. It was a lot cheaper than your average dining room set but it works for us and it also matched our color scheme perfectly.

Lesson #4: Don't be afraid of a little DIY.
Both my fiancé and his father are in construction, as is my uncle, so when it came time to remodel our kitchen, we knew we could save a lot of money if they did the work themselves. Sure, the job took a lot longer in the end since we had to work around their work schedules. We also ate a lot of takeout and microwaveable meals and couldn't do dishes while our kitchen was out of commission. But in the end, we ended up saving thousands of dollars in labor costs alone.
Obviously, not everyone is a skilled laborer and DIY isn't always a practical option. But there are ways to save money on your kitchen renovation project and get your hands a little dirty. For starters, just about everyone can paint, so grab a brush and some painter's tape and forget about hiring a professional for this part of the project.
Simple tasks like installing light switch covers, assembling furniture and mounting a fan are also quite easy to do after watching a quick YouTube tutorial. If you're feeling brave and have a steady hand, some backsplashes are easier to install than others. Just don't attempt one with small pieces like we did because it can take a long time to install!


