20 Pie Dough Tips From a Professional Baker
TABLE OF CONTENTS
On This Page
Keep It Cold
Handle Ingredients With Care
Don't Overmix
Give It Time
Additional Pie Crust Tips
There's something undeniably special about showing up to a party with a homemade pie. This multi-faceted dessert wears many hats: A lattice or a crumble topping, a gooey fruit filling, or a milky custard. We firmly believe pie is a dessert appropriate for every occasion, especially when made from scratch. But making a pie entirely from scratch is no small feat.
Let me be honest here. Pie had me stumped when I started working as a professional baker. I could crank hundreds of cookies without batting an eyelash. I could whip up perfectly amber caramels and soft sheets of marshmallows with no problems. But pie perplexed me. When it comes to a pie, there are so many components to consider: The crust, the filling, the topping. Each element requires love and care. Striking the perfect balance of a golden-brown crust and a well-set filling seemed downright impossible. Nonetheless, I dove in head-first. After my first Thanksgiving pie baking marathon, when I whipped up hundreds of pumpkin and pecan pies, I realized that all it took to master the art of pie was a little practice (and some serious elbow grease).
If you've always dreamed of baking pie but are intimidated by the process, now is the time to dive in head-first. I'm bringing you a pie-baking tip sheet to guide your journey. Today, I'm focusing on one of the notoriously finicky elements of baking pie from scratch: pie dough. Pastry chefs and home cooks across the country all have their techniques and tricks that they swear by, but here is a solid foundation to help you succeed at making homemade pie dough.
Getty Images
Keep It Cold
Keep the Butter Cold
Our perfect pie dough is supple, smooth, and spotted with creamy bits of butter, which will melt in the oven and provide that glorious crisp, flaky texture. The operative phrase being: Melt in the oven—not before.
If your butter melts during the mixing or rolling process—before the pie crust hits the oven—you won't achieve those flaky layers we're looking for in this buttery pastry. With this goal in mind, the cardinal rule of pie crusts is to keep things as cold as possible. The colder your pie dough, the less likely the butter will melt or leach out of the dough before baking.
Use Your Fridge To Keep Other Ingredients Cold
One of the main challenges of making pie dough from scratch is keeping all the ingredients cold, especially if you're working in a warmer climate. And you better believe that after baking through the summertime in Alabama, I've developed a few tricks to keeping my pie dough ingredients cold. In short: Use your fridge.
When making pie dough, particularly on a warm day, I'll put every component of my mise en place in the fridge. Yes, even the flour. Chilling your flour will slow down the process of the butter melting as you work it.
Chill Thoroughly
When preparing to make pie dough, I'll typically start by cubing my butter, which I'll immediately store in the fridge (or, on hot days, the freezer) while I measure the dry ingredients. I'll then stash the bowl of flour, sugar, and salt in the fridge for five to 10 minutes while the butter finishes chilling. Resist the temptation to start immediately—let all the ingredients chill through.
Handle Ingredients With Care
Add Water Slowly
Never shower your pie in water, as it's better to add it one tablespoon at a time slowly. Remember to keep water cold and place it in the center so you can push the mixture towards it without whipping or scraping the sides of the bowl.
Handle Dough Gently
When handling your pie dough, use a delicate touch. We aim to mix all the ingredients until just combined, not to mash them into a thoroughly blended lump.
Evenly Distribute Butter
Each baker takes a different approach to incorporate the butter into the dry ingredients. You can smear, snap, or crumble the butter in—my favorite method is to pin the butter into the flour until evenly distributed in pieces.
Don't Handle Dough for Too Long
If you handle the pie dough for too long, you risk the heat in your hands melting the butter in the crust. For this reason, some bakers prefer to use a pastry cutter or pulse all the ingredients in the food processor. When making pie dough, I like to use my hands. Over time, you develop a sense of what the dough feels like at each stage, something you can't get from a machine.
Roll Dough Away From You
When using a rolling pin to spread your pie crust, roll it away from you and give it a quarter turn. Start slowly and try not to roll over the same area twice (turning will help achieve this). Remember to always work with chilled dough.
Maneuver Dough Slowly
When it's time to move your freshly rolled dough into a pie sheet or baking tin, you don't want all of your not-over-working to go to waste. Try folding the dough so you can easily carry it and gently place it in the tin. From there, you can unfold the "edges," making sure not to leave any area too thin.
Photographer: Jen Causey, Prop Stylist: Christine Keely, Food Stylist: Ana Kelly
Don't Overmix
Mix Until Combined, Not Uniform
Our perfect pie crust is super buttery and flaky—mixing your ingredients until just combined is key to achieving this texture. Overworking the pie dough will develop gluten, resulting in a tough, mealy pie crust.
Don't Knead Too Much
After incorporating your butter, most recipes suggest adding ice water to the dough. At this point, you'll only want to handle the dough until it just starts to come together. Kneading the dough too much might create a uniform, shiny mass, but you're secretly sabotaging your pie by working the butter in and destroying any chance of flakiness. Some chunks of butter are good! They'll melt in the oven and create those coveted flaky layers in your pie crust.
Don't Be Afraid To Leave Crumbles
After incorporating all the ingredients, your pie dough might look dry or slightly crumbly. That's okay! Resist the temptation to continue mixing. Resting the mixture in the fridge will give the dough time to hydrate further.
Give It Time
Let It Rest Overnight
When making pie dough from scratch, at least one hour and up to an overnight rest in the fridge is crucial. This resting period is essential.
Don't Roll Crust Too Quickly
Rolling out your pie dough directly after mixing would warm too quickly and become sticky. Resting the mixture in the fridge keeps your pie dough nice and cold, making it easier to roll.
Allow Flour To Hydrate
A resting period in the fridge will allow the wet ingredients to hydrate the flour further, resulting in a smooth, pliable dough.
Keep It Rolling
When rolling out your pie dough, keep it constantly moving. Leaving your pie round in the same spot on the table as you roll it is a recipe for a sticky, torn mess.
Use Flour
Use flour liberally and slide an offset spatula underneath your pie dough to shift it around on the table between rolling. I even like to flip my pie dough mid-rolling so the side touching the table faces up. Keeping your pie dough moving while rolling will allow you to transfer it to the pie dish quickly.
Additional Pie Crust Tips
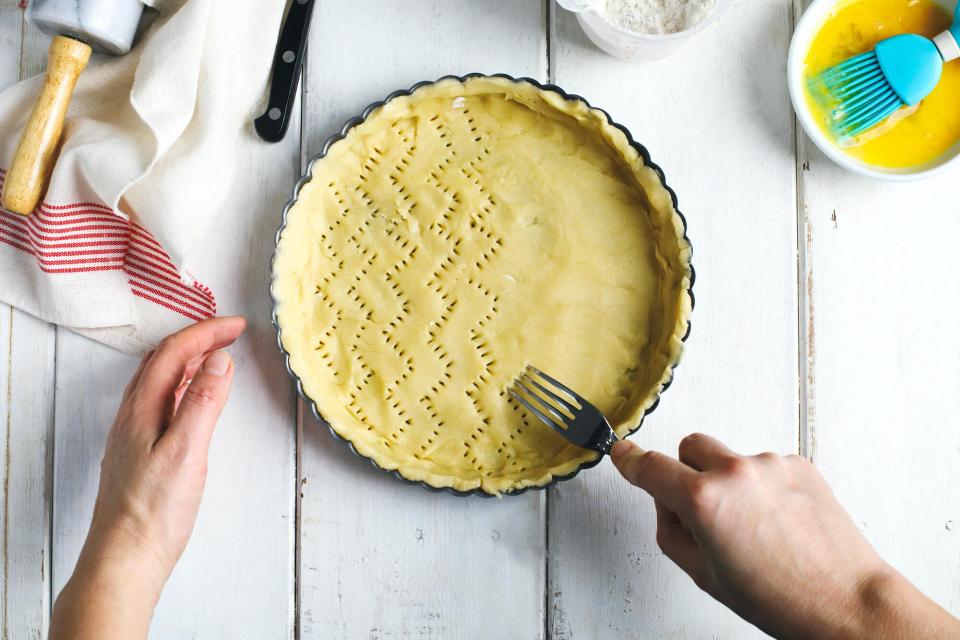
Poke the Bottom With a Fork
Once rolled out and set in the pie dish, poke all over the bottom of the pie crust with a fork. Making holes in the crust discourages air bubbles from forming while baking, which can warp your smooth pie base.
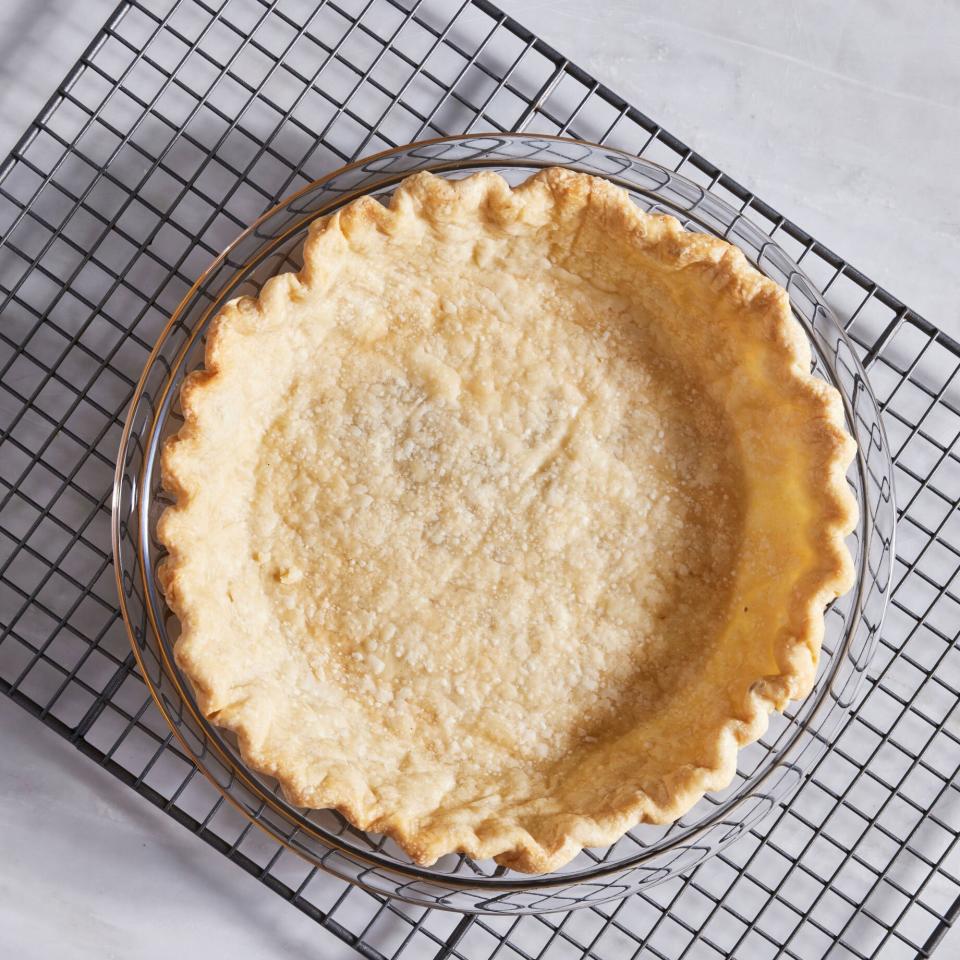
Freeze Before Baking
Continuing with the "keep it cold" theme, give your pie crust rest in the freezer before baking. This final step seals in the crimp pattern and keeps everything nice and cool. You can even store a ready-to-bake pie crust in the freezer to get a jumpstart on holiday prep (or for everyday pie emergencies).
To Blind Bake, or Not To Blind Bake?
Specific pie recipes will call for you to blind bake the pie crust. Pie dough—a flaky, buttery pastry—has the natural propensity to puff and bubble in the oven. Weighing it down with pie weights helps the shell keep its shape and prevents air pockets from forming. This step is necessary when baking pies with particularly juicy fillings, such as apple or blueberry, or in a pie with a no-bake filling.

