How to Adjust Your Rear Derailleur for Better Shifting
The rear derailleur is like a World Tour Team’s strongest domestique: one of the hardest working, but rarely appreciated parts of the overall equation. Few of us really appreciate how integral the rear derailleur is until it stops functioning perfectly. Then you’re stuck with, at best, an imprecise and clattery ride.
So the next time you climb with little—well, a little less—effort, give a nod to this marvel of engineering. Here’s how rear derailleur adjustment works—plus tips to keep it running like new.
How the rear derailleur adjustment works
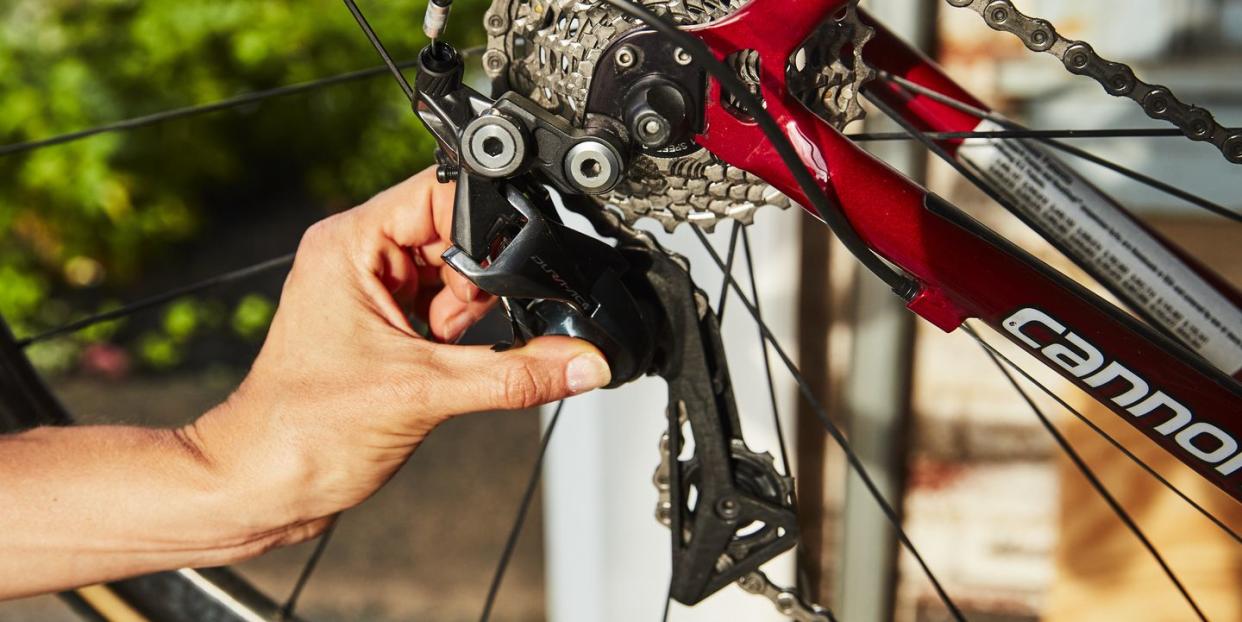
Your rear derailleur moves your chain across cogs and maintains proper tension on the chain with every gear change. How? The chain runs around two jockey pulleys on the rear derailleur. When you shift to a larger chainring or cog, the shifter cable pulls the rear derailleur forward, causing the pulleys to push the chain onto the larger sprockets while keeping chain tension in check.
When you shift to a smaller ring or cog, the shifter cable releases the rear derailleur, which swings outward, taking up chain slack and causing the pulleys to pull the chain onto a smaller sprocket. If everything is set up correctly, your rear derailleur should make one clean shift for every click of your shifter.
The many parts of a rear derailleur
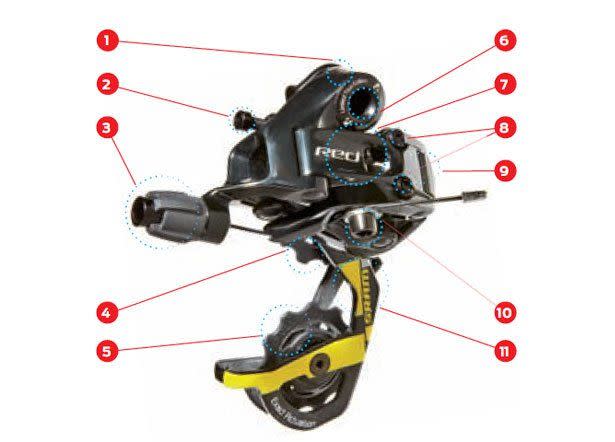
The upper area on the derailleur is the b-knuckle.
On Shimano and SRAM derailleurs, the b-tension adjuster fine-tunes the height of the guide pulley. On Campagnolo derailleurs, the adjustment is done via a screw near the p-knuckle.
To adjust cable tension, use the barrel adjuster.
The guide pulley keeps the chain in line as it moves from cog to cog during shifts.
The idler pulley helps hold tension on the chain regardless of gear choice.
The mounting bolt connects the derailleur to the frame.
The parallelogram linkage lets the chain move left and right and up and down the cassette while remaining parallel to the cogs.
High and low limit stops are usually found near the b-knuckle but sometimes on the front of the parallelogram. The low limit (often marked L) prevents shifts into the spokes; the high limit (marked H) prevents the chain from dropping off the smallest cog.
The p-knuckle holds both the guide pulley and a spring that keeps tension on the cage to hold the chain taut.
The cable bolt pinches the shift cable in place. On most derailleurs, when the shift lever pulls on the cable, the derailleur moves up the cassette to a lower gear. The exception: Shimano’s low-normal derailleurs, on which it does the opposite.
The cage keeps the chain in line between the pulleys.
How to adjust and align a rear derailleur
If your chain doesn’t move when you shift, or it skips cogs, your rear derailleur may be out of alignment. Hop off your bike and do this: Shift your chain into the biggest chainring and smallest cog, then loosen the cable clamp bolt (where the cable attaches to the derailleur).
Look for the high and low adjusters on the derailleur—often marked with an H and an L. Adjust the high-gear screw by turning it until the jockey pulleys line up with the smallest cog. Your chain should move smoothly around the cog and pulleys when you turn the pedals.
To check alignment with the largest cog, rotate the pedal forward and push the rear derailleur so that the chain shifts to the largest cog. If the pulleys take the chain beyond the largest cog, screw the low adjuster inward until this stops. Reattach the cable and tighten the clamp.

Fine-tune with the barrel adjuster, located where the cable housing enters the rear derailleur. For the best performance, position the guide pulley roughly 6 to 7mm away from the cogs. If your chain skips when you shift to a lower gear, give the barrel adjuster a half-turn counterclockwise. (Tip: Think L for lower and for left turn.) A higher gear? Try a half turn clockwise.

After cleaning, add a few drops of lube to the pivot points (there are eight) of the parallelogram linkage, cycle through a few shifts, then wipe off any excess lube. When you clean your chain, clear any muck from the inner and outer surfaces of both pulleys—it collects at the base of their teeth.
How to replace a rear derailleur
First, remove the chain. Most chains use some sort of quick removal link to make this easy, so look for that first. If not, break your chain with a chain tool or, if your chain is joined by a connecting pin, by removing the pin (use a new pin to rejoin the chain). Loosen the cable-clamp bolt on the rear derailleur and pull the shifter cable out. Undo the hex bolt that attaches the derailleur hanger from the rear dropout.
Make sure your new derailleur is compatible with your bike’s shifters; eight- through 11-speed shifters must be matched with the same manufacturer’s equivalent derailleur. Attach the new derailleur to the hanger using its hex bolt. Reattach the cable and loop the chain through the jockey wheels before reconnecting the chain. Shift through all gear combinations to make sure everything is running smoothly. If it isn’t, turn the barrel adjuster on the derailleur in or out to fine-tune shifting.
You Might Also Like
