How to nail an at-home manicure in 8 easy steps
Looking for more of the best deals, latest celebrity news and hottest trends? Sign up for Yahoo Lifestyle Canada’s newsletter!

Yahoo Lifestyle Canada is committed to finding you the best products at the best prices. We may receive a share from purchases made via links on this page. Pricing and availability are subject to change.
Trying to stay busy and entertained indoors has been a challenge this past week, but being stuck at home has reminded me of one thing — I need to dedicate more time for self-care. On top of regularly masking my hair and skin, constantly washing my hands and napping, I've also been thinking about how to resolve my current nail situation.
Being unable to get my nails done at a salon has been one of the biggest changes to my regular routine (if you know me, you know I am the biggest nail art fan). And because my nails have seen better days and cannot wait any longer for a professional manicure, I decided to reach out to one of Toronto’s best nail artists for expert tips and tricks to pull off the perfect DIY manicure at home — a mastered skill that will serve me well during this period of self-isolation and years to come, because let’s face it, getting your nails done don’t always come cheap.
There’s a shade of RED for every woman! ♥️ 💅🏻 by @nailsfromnars
A post shared by TIPS NAIL BAR® + Beauty (@tipsnailbar) on
Sporting the ‘NEW CLASSIC’ 🖤 💅🏻 by @nailsfromnars
A post shared by TIPS NAIL BAR® + Beauty (@tipsnailbar) on
ALSO SEE: I tested out this $44 at home gel mani kit: Here's my honest review
Below, Nargis Khan, master nail artist at Tips Nail Bar, breaks down the essential tools and steps required to give yourself the perfect at-home manicure.
What you need:
Here’s what to do:
Step 1: Get your nails into shape

To begin, make sure hands are clean and dry with bare nails. Clip excess length off first, if necessary. Carefully file nails, moving one direction to get tips in your desired shape: square, oval, or somewhere in between.
Step 2: Push back and buff cuticles
To prep cuticles, gently push them back with an orangewood stick. Then buff away the shine of the nail with a buffer. Removing the shine will help nail polish adhere better. Be sure to buff around the cuticle area and under the free edge to get rid of any excess dead skin or debris.
KINGMAS 100 Pcs Nail Art Orangewood Stick Cuticle Pusher

SHOP IT: Amazon, $9
Step 3: Exfoliate your hands
Exfoliate hands with a gentle body scrub to eliminate dead skin cells. While you can exfoliate with a scrub and water, Khan suggests using the scrub on dry skin to get its full potential.
“Start by massaging the scrub into cuticles, between fingers, on knuckles and any dry patches,” explains Khan. “This will help slough off any dead skin so your moisturizer will absorb better. Then rinse off with water.”
This is also a good time to gently clean any grime from under nails — use an orangewood stick for this.

SHOP IT: Well.ca, $42
Step 4: Moisturize hands and cuticles

Grab your favourite cuticle oil and massage it into the cuticles and the nails. To better lock in moisture, apply a generous amount of body lotion, cream or butter to your hands and wrists.
ALSO SEE: Editor's secret to strong, healthy nails is only $8
Sally Hansen Vitamin E Nail & Cuticle Oil

SHOP IT: Amazon, $8
Step 5: Clean your nails with polish remover
Clean the surface of your nails with a cotton pad and acetone or nail polish remover. Be sure to get into those corners! This will free them of any oils or debris, ensuring longer wear of your mani.
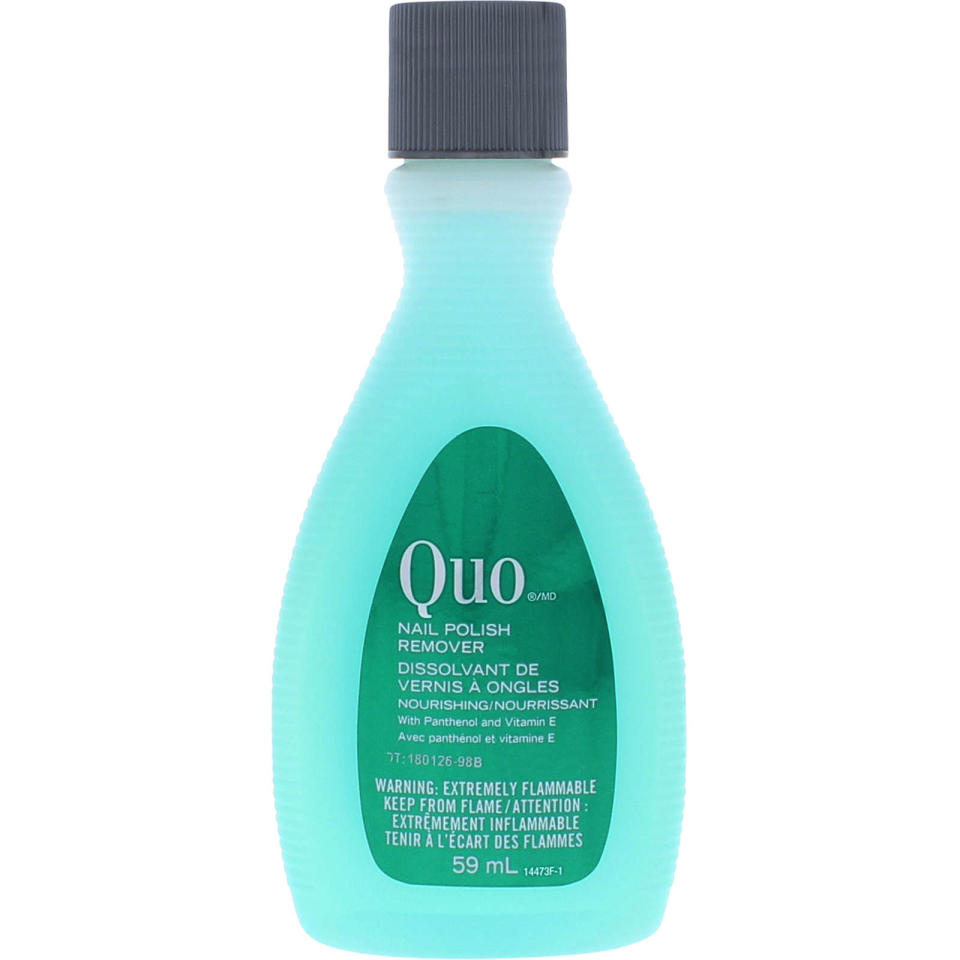
SHOP IT: Shoppers Drug Mart, $2
Step 6: Cover your bases
Prep nails by brushing on ridge filler or one to two layers of a nourishing basecoat to ensure a smooth nail plate for polish.
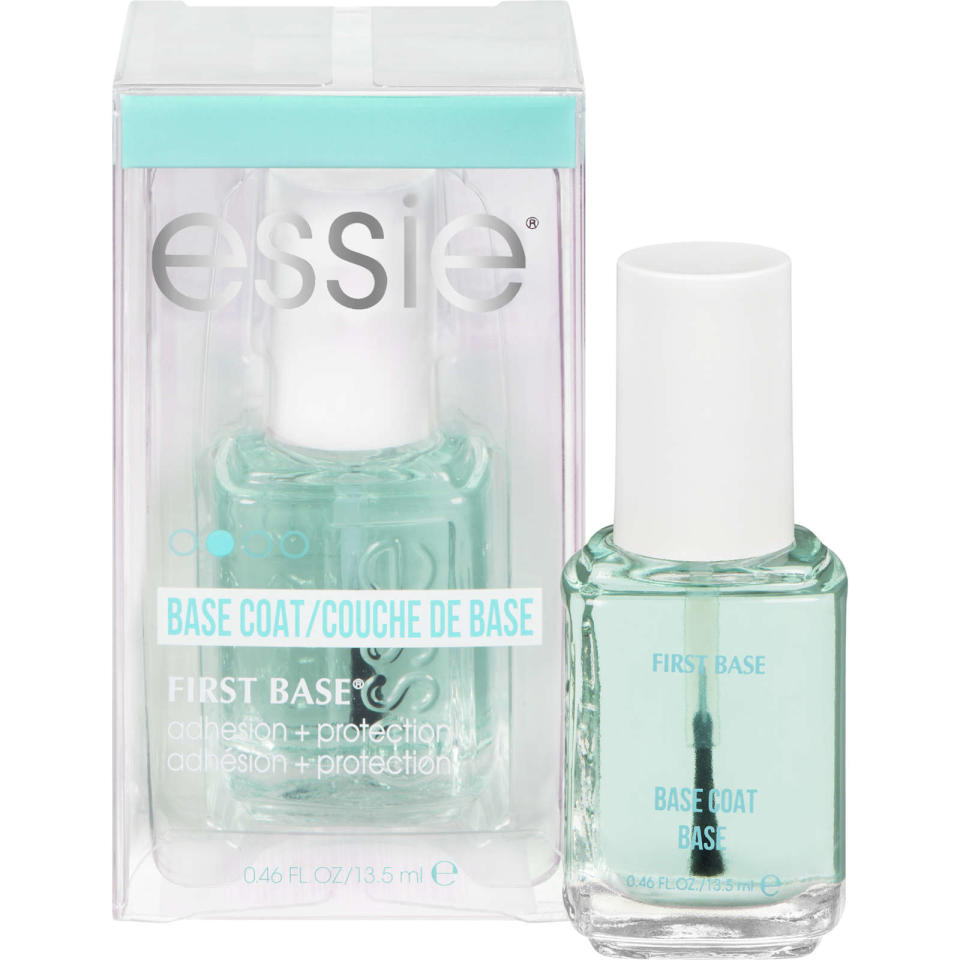
SHOP IT: Amazon, $11
Step 7: Apply coats of colour

Paint on two to three thin, even coats of your preferred polish of choice without applying too much pressure on the brush. Wait one minute between each coat, and don’t forget to paint the very tips of the nails to prevent chipping.
When it comes to messy edges, remember to keep calm and clean on. Don’t fret. Dip a small nail brush or cotton swab in some polish remover to clean up any mistakes.
Step 8: Finish with a topcoat
Complete your mani with a high-shine (or matte, if you prefer) topcoat to keep your manicure chip-proof and to make sure your hard work goes the distance.
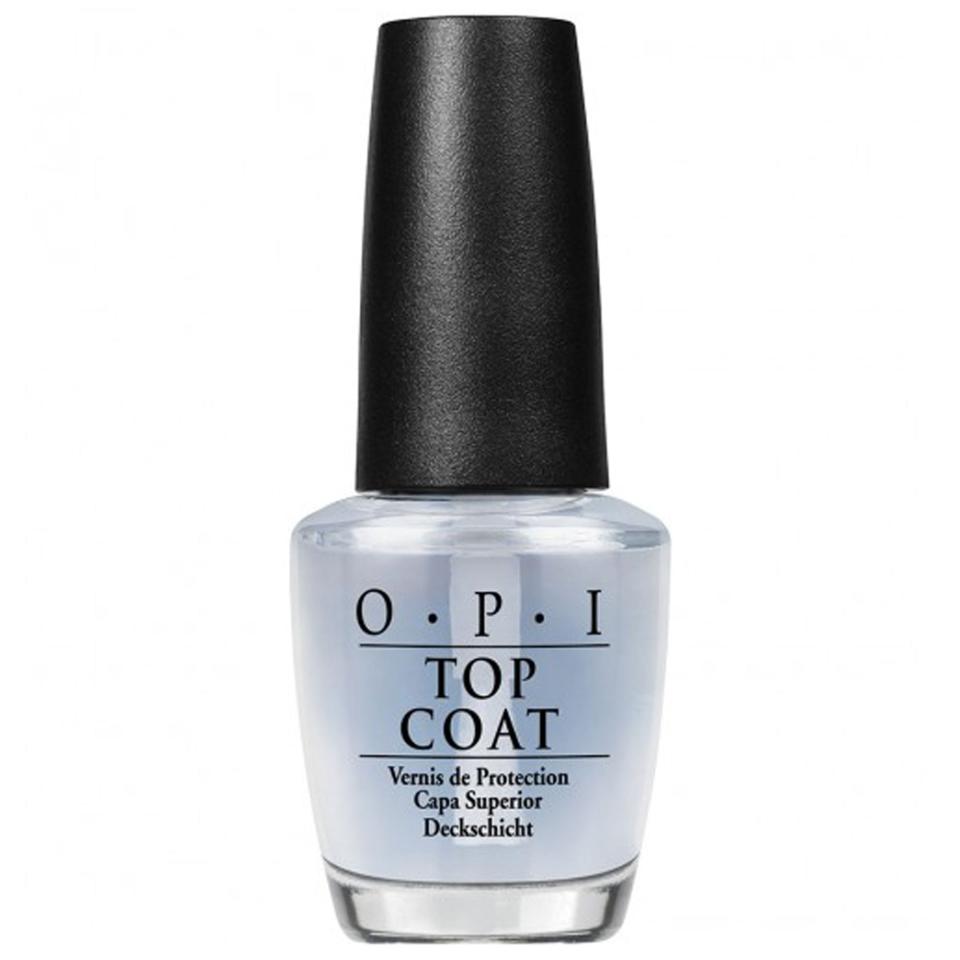
SHOP IT: Amazon, $10 (originally $13)
Let us know what you think by commenting below and tweeting @YahooStyleCA! Follow us on Twitter and Instagram and sign up for our newsletter.

