People Are Building Vacuums Into Their Cabinets And You Need To See The Results
The struggle to get under the cabinets with a broom or a vacuum is real. Anyone who's spent time cleaning their kitchen knows this pain. Because even with a Roomba-whose round edges don't hit the flat boards quite right-some crumbs just don't want to come out of hiding.
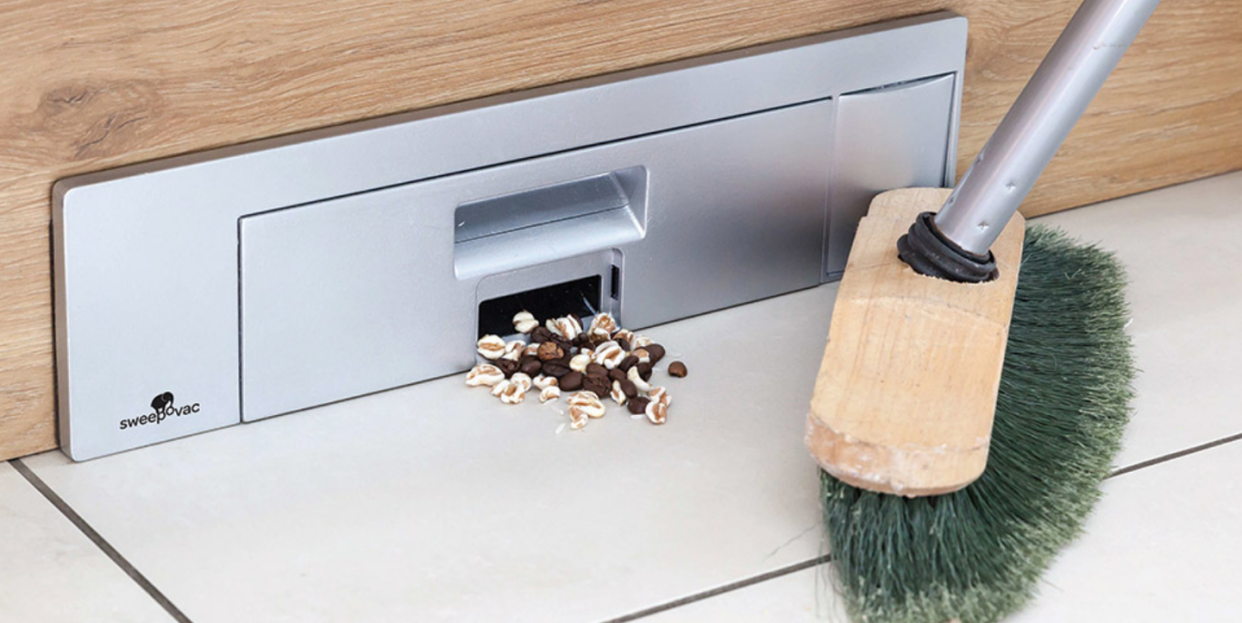
So, naturally, the neat freak in me jumped for joy when I learned of the Sweepovac-and I need it as soon as humanly possible. It's a built-in, under-the-counter vacuum system that works perfectly to suck up all the stubborn dust and dirt accumulating under your cabinetry. No matter what the layout of your kitchen looks like, the toe-kick vacuum will fit perfectly at the base of most cabinets, so it's both out of sight and easily accessible. Genius.
Put simply, you'll use a broom to sweep the items from your floor into the Sweepovac and then just let it do its job. Once the gadget's anti-bacterial bag is full, a light will indicate it needs to be replaced, and it's as easy as using the handle to pull out the drawer and insert a new bag.
According to one Amazon reviewer, "This little guy is awesome!" Though it's important to note that, while a majority of reviewers seem to agree it's worth it, it does take a bit of time to install. "Installation was fairly easy," the same reviewer wrote, but despite the Sweepovac website claiming it is "easily fitted in 30 minutes," the reviewer shares "[it] took about 2 hours, but most of that was getting through two layers of wood on the side of my cabinet."
A very generous (and happy) user, g00gl3it, even let us in on exactly how they did it: "I outlined all of the lines with several layers of painting tape to help if the saw blade jumped on me, and I also taped a piece of thick cardboard to my wood floor to protect it from the same. After I cut through the first board, I had to use a chisel and hammer to break it up as it was heavily glued to the interior board. Once it was removed, I repeated cutting with the straight cut trim saw and the second board popped right out. I ran the electrical line directly to the back of the outlet already installed in my kitchen island. Fairly straightforward if you can do some basic electrical work (safely). Of course, I turned the breaker off first and tested the line before working on the outlet."
Eh, it sounds a bit intense, so if you're not able to DIY it, it's something you could easily call a handyman or -woman to help you install. Perhaps it would take them closer to the 30 minutes the site predicts. If you ask me, never having to bend down again to pick up pet hair and other debris is definitely worth the call.
Follow House Beautiful on Instagram.
('You Might Also Like',)

