CDs are cool again. Here’s how to rip them.

The number of sold CDs is rising for the first time in a generation, in part because buying them is a great way to support the bands you love. But there's a problem: you can't listen to CDs on your digital devices unless you rip them first.
In ancient times—back in 2001—people knew how to do this, but much that should have been remembered has been forgotten.
No worries: we’re here to remind you (or maybe even teach you for the very first time in your life) how to rip CDs on your computer.
Get an optical drive
You’ll notice that CDs, DVDs, and Blu-rays are all the same shape, and any drive that can play a Blu-ray or a DVD can also read CDs. You might already have a CD drive on your computer, especially if you own a desktop. Laptop computers, however, almost never come with optical drives anymore. This is because, in their quest to make modern laptops thinner and lighter, manufacturers had to eliminate bulky optical drives. This would’ve been a huge problem in the late 90s, but with the arrival of speedier internet connections and digital alternatives to enjoying music and movies, most people started to leave optical drivers behind.
[Related: A modern guide to cassette tape players]
Luckily, you don't need an internal optical drive to rip a CD: External DVD drives that connect to your computer via USB, go for as little as $23, and will easily do the job without you having to dive into your parent’s basement for an old computer. If you want to rip Blu-rays you’ll need a special drive which will likely set you back around $70—you can find them online or at your local computer shop. Whatever type of drive you get, make sure to buy one compatible with the USB ports on your computer so you don’t need to spend extra money on an adapter or a USB hub.
How to rip CDs in Windows
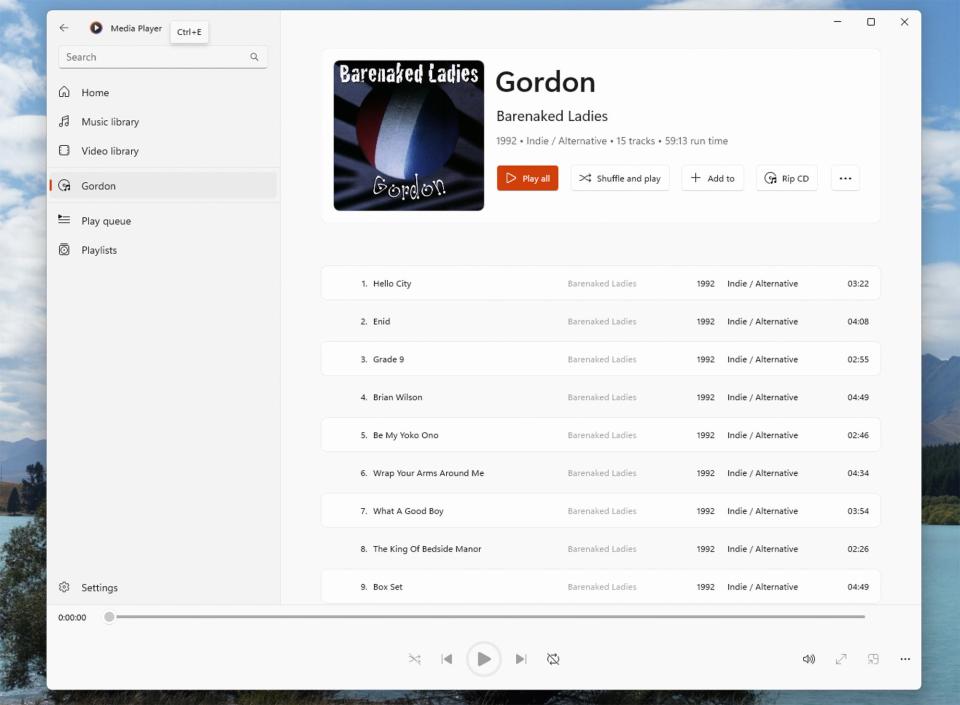
The simplest tool for ripping a CD in Windows 11 is Windows Media Player. If you’re old enough, you probably have terrible memories of this program and you might prefer other alternatives for playing your favorite tunes. But for ripping music, the new version of Windows Media Player makes things extremely straightforward.
Insert a disk into your optical drive and the software will automatically identify it, complete with album art. You might be tempted to go straight ahead and click the Rip CD button to copy the music to your computer. But before you do that, be sure to check the program’s Rip settings, which you can find by clicking the three-dot button to the right of the interface. From here you can decide which format you want to save your music as.
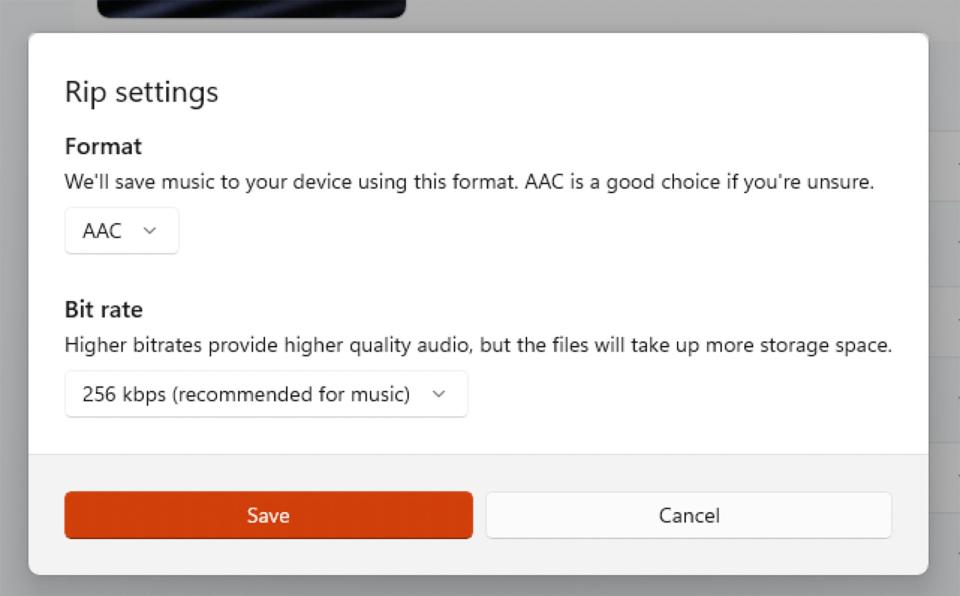
Under the Format heading, you’ll find a dropdown menu where you can choose between five different audio formats: AAC, MP3, WMA, FLAC, and Apple Lossless. If you don’t care for file size as long as you get the highest sound quality, you might want to change it to FLAC. But if you’re OK with standard quality and want to optimize space, there’s no need to change this setting: The default, AAC at 256kbps, is a perfectly reasonable balance between file size and audio quality.
Now that you’ve chosen the output format, you can hit that Rip CD button. Once the process is done after approximately 10 minutes, the contents of the CD will show up in the Music folder for your Windows account. You can leave it all there, if you want, or move it to whatever folder you like.
[Related: How to digitize all your VHS and cassette tapes]
How to rip CDs on a Mac
Back in the day, Apple users ripped music using the company’s version of Windows Media Player—the way better reputed iTunes. That program is now gone, but the Music app took its place.
To use Apple’s Music app to rip a CD, insert the disk and the tool will open.
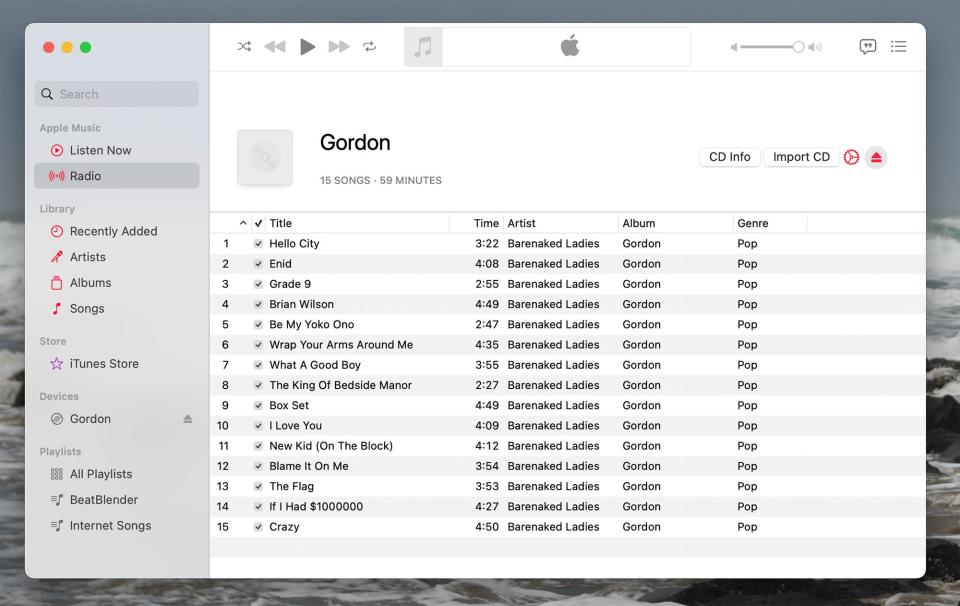
The app will automatically find the artist, album, and track information, but to get the album art you will have to right-click the empty album icon and choose Get album art. After that, click Import CD to copy the disk’s content. Unlike Windows Media Player, you don’t have to manually set the output format, as the Music app will ask you every time before starting the ripping process.
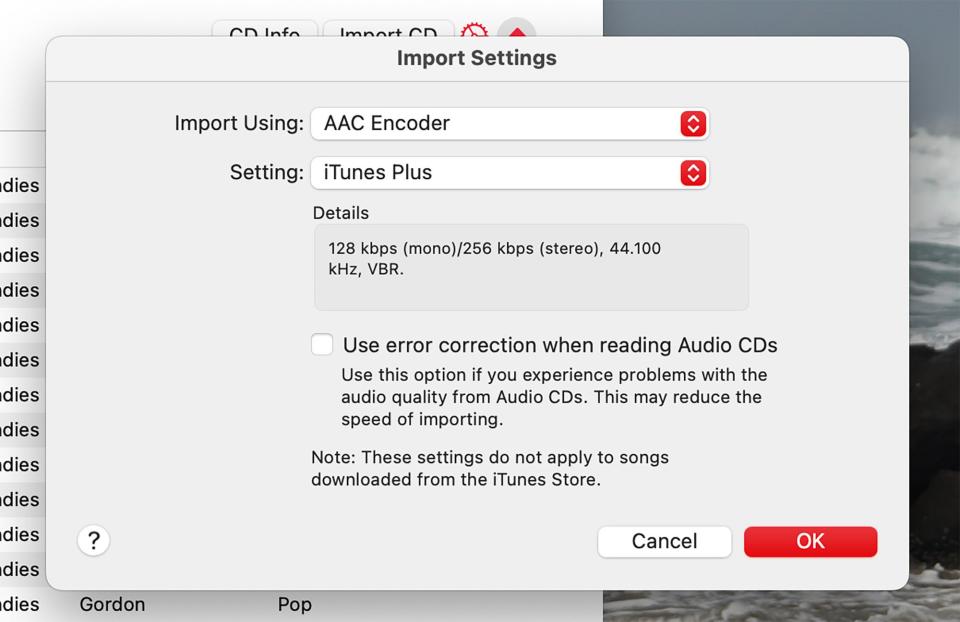
The platform supports AAC, AIFF, Apple Lossless, MP3, or WAV. The default option, AAC, is a great balance between file size and audio quality, so only change this option if you want something specific or want audiophile-level sound quality.
Once the process is complete, audio files will show up in the Music folder in your home directory. You can listen using the Music app if you want, or any other application.

