How to Create a Gallery Frame Wall for Family Photos
You’ve got a smartphone packed with photos, yet if you’re like most parents, you rarely print any. Follow our easy advice for getting memories off your phone and onto the wall.
RELATED: 12 Best Photo Apps for Moms
Step 1: Edit
“The easiest thing you can do to make prints look better is to brighten them,” says Bostonbased family photographer Kate Lemmon. Click “edit” in your phone or photo-editing application. Choose to adjust the “brightness” or “exposure” and move the slider just a little to the right to make the photo brighter.
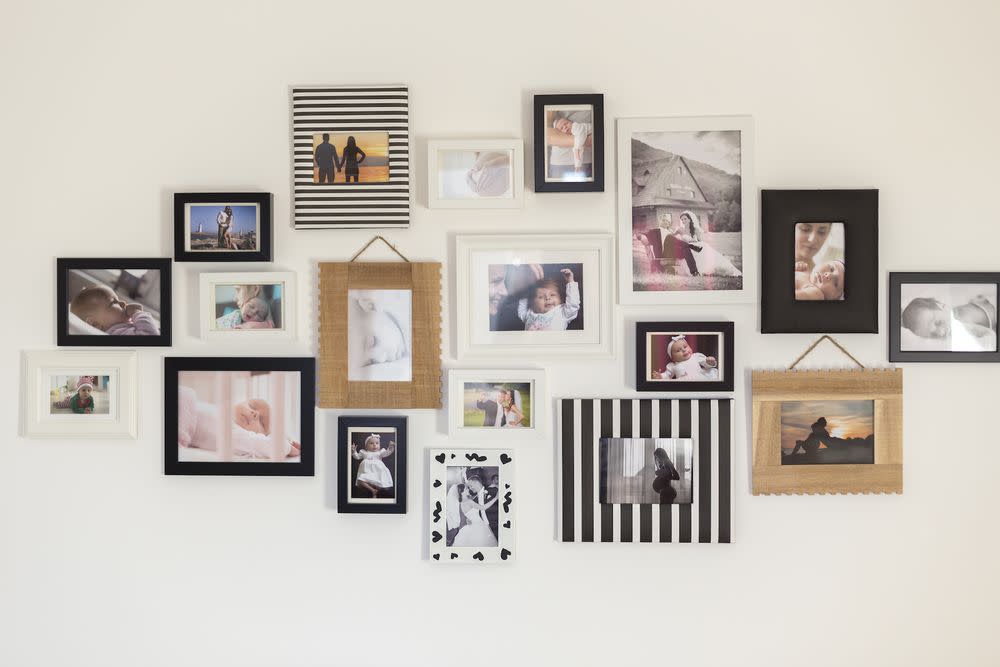
If a favorite shot isn’t top-quality—there’s graininess or blurriness—try converting it to black and white, which can instantly and artfully obscure f laws. Going black and white is also a foolproof way to create a cohesive look when hanging a group of photos together.
RELATED: 5 Tips to Make This the Year You Organize Your Baby Photos
Step 2: Print
Whether you’re clustering frames on a mantel or a ledge or plotting a gallery wall, one way to create an appealing collection is to stick to one category, like all professional family portraits, all candid iPhone photos, or beautiful vacation images taken on your fancy digital camera. “Or look for shots with similar color profiles— bright, saturated outdoor pics or vintage-looking nighttime ones,” Wolf says.
When it comes to sizes, it can be hard to decide what subject matter will look good sized up, like a poster, versus scaled down, like a 4x6.
“Family photos taken from farther away usually work best for large statement prints—think big landscape with tiny people,” says Lemmon, who likes to print oversize images to hang above a sofa, sized to about two thirds of the sofa’s width. Close-up and detail shots, like teensy newborn feet, work best in frames no larger than 11x14.
Where to print depends on what you’re using the photo for, says Shelly Niehaus, a Dallas photographer.
Good: Quickie prints from kiosks are handy in a pinch, like when you need a new family photo to take into day care, but not the best for displaying at home.
Better: For everyday, casual printing of snapshots, Niehaus refers her clients to Costco. The store has better quality and color than drugstores offer, and the prices can’t be beat—from 17 cents for a 4x6 print to $7 for poster sizes.
Best: For keepsake photos and long-term framers, try a professional-grade online lab like Mpix or Adorama. For just a bit more than you’d pay at a drugstore (19 to 29 cents for a 4x6), you’ll get archival, acid-free materials that ensure the color quality holds up over time—plus more editing and finish options.
RELATED: No More Photo Clutter: Simple Ways to Organize Your Family Photos
Step 3: Frame
Mats are great for frames you plan to hang on the wall. But skip them for tabletop frames, which are smaller in scale and don’t need the extra layer that matting provides. “Mats add impact and help draw your eye right to the image, plus they can cover up imperfections like wrinkled corners and uneven margins on old photos,” says Tessa Wolf, creative director for Framebridge.
You might also go mat-free for extra-large prints or when there’s a large amount of white space near the edges of your photograph.
Similarly to making your photos the same theme, frames should share a vibe even if they don’t match exactly. For instance, stick to wood frames in varying finishes, or group antique-looking brass frames in assorted shapes.
“I like to use classic silver frames but in various sizes and styles,” says interior designer Kerri Goldfarb, co-owner of Madre, a home-décor boutique in Dallas. Or go with the no-fail pick of white gallery-style frames, which brighten and polish any photo and work in just about any room.
RELATED: 7 Ways to Design a Calming Kid's Bedroom
Step 4: Display
When your pro family photo shoot turns out great, it’s tempting to hang a huge print in the foyer. However, designers suggest saving personal images for more private spaces like a family room, a hallway, or a bedroom.
“A non-prominent staircase or landing is a great spot for a gallery wall that you can add to over time,” says Mia Brous, Madre co-owner.
When it comes to positioning your frames, the vertical center of any frame or grouping should be about 4 feet 9 inches from the floor, which is average eye level, Wolf says. If you’re hanging a frame above furniture, like a sofa or a cabinet, go about 8 inches above the piece so the art feels visually connected to the piece below—not just floating above it. Keep the spacing between a collection of frames at about 2 inches to make the frames feel like a group without being too close.
You don’t want a dozen frames to adorn your mantel or sideboard. Like jewelry, less is more! About three to five frames on a shelf or a console is ideal, says Kaylan Kane, an interior designer in Chicago. Odd numbers of objects please the eye, so stay with a group of three.
“I might use one framed photo mixed in with objects or books to add a little personal touch,” Kane says. To achieve height and good spacing, you can layer coffee-table books in by setting frames on them.
RELATED: DIY: Decorate Your Home on a Budget

