My dog hated having her nails clipped, so I built her a nail scratch board instead
Do you want to know my least favorite sound? It’s the clattering of my dog’s nails on my kitchen floor. Every time I hear it, I’m reminded that, despite my very best efforts, her nails are too long. For the past few months, I’ve battled with balancing trimming Fenwick’s nails to a reasonable length versus keeping her calm and positive throughout the process. It’s not an easy balance to keep and I’ve found myself growing frustrated with this two-steps-forward-one-step-back dance.
Border collies are genetically prone to being nervous and sensitive – and Fenwick certainly got the memo, as she is one of the most sensitive beings I’ve ever come across! Despite doing my best to desensitize her as a puppy to being handled and groomed (although, in hindsight, not as much as I should have done), she really dislikes having her nails clipped with one of the best dog nail clippers.
The reason I’m so unhappy with the state of Fenwick’s nails is that it’s detrimental to her health for them to be too long. Lara Sorisi, an APDT-certified dog trainer, says that “long nails can be really uncomfortable for dogs when they’re moving and walking. It can also leave them at a higher risk of having an injury, as the dog can end up catching them, ripping them out, or dislodging them when the nails aren’t properly trimmed. It’s really important to have the correct nail length for your dog and manage it at all times.”
However, despite how important it is to cut your dog’s nails, it’s equally important to make sure that you’re not forcing them into a situation that makes them scared or fearful. Lara says, “It’s never too late to introduce a handling procedure to your dog, but it’s important to always make sure that it’s a positive experience. If you just go straight in and grab the dog’s paw, then you could be at risk of hurting the dog, or even being hurt yourself if the dog reacts negatively due to the high-stress situation that you’ve placed it in.
“If your dog hates having its nails clipped, but you physically force them to do it anyway, your dog may go into Fight, Flight or Freeze. No matter which option they choose, you’ll be damaging the bond with your dog and making it even more difficult to cut their nails next time. Any scenario that requires handling needs to be treated really carefully and it needs to be broken down multiple times before you encounter a scenario where your dog absolutely needs their nails trimmed due to safety.”
Fenwick and I have come a long way in our grooming journey, as I’ve gone from not even being able to get the nail clippers anywhere near Fenwick’s feet to now being able to clip three or four nails per session. However, I’m still struggling to ensure that her nails are at the correct length (she’ll snatch her paws away if I linger near her feet too long, so it’s hard to gauge where exactly to trim her nails), so I wanted to try something different.
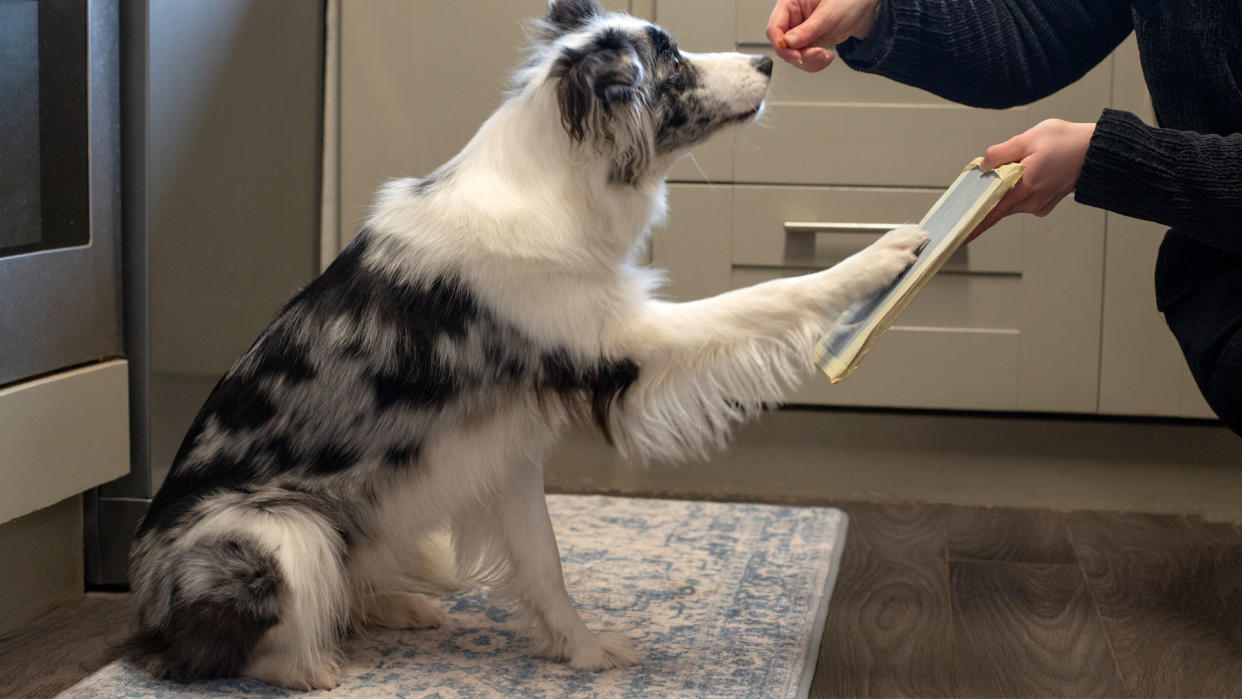
I’d heard of nail scratchboards through seeing other dog owners use them on social media and thought that it was something Fenwick would easily take to. While she’s a sensitive soul, she’s also whip-smart and always eager to learn something new. The concept of a nail scratchboard is simple – rather than the owner using nail clippers or dremels to shorten the dog’s nail, they do it themselves by scratching at the rough surface of a scratchboard.
You can purchase ready-made options such as this Scratchboard but I decided to try making my own to start with.
Training a dog to use a nail scratchboard
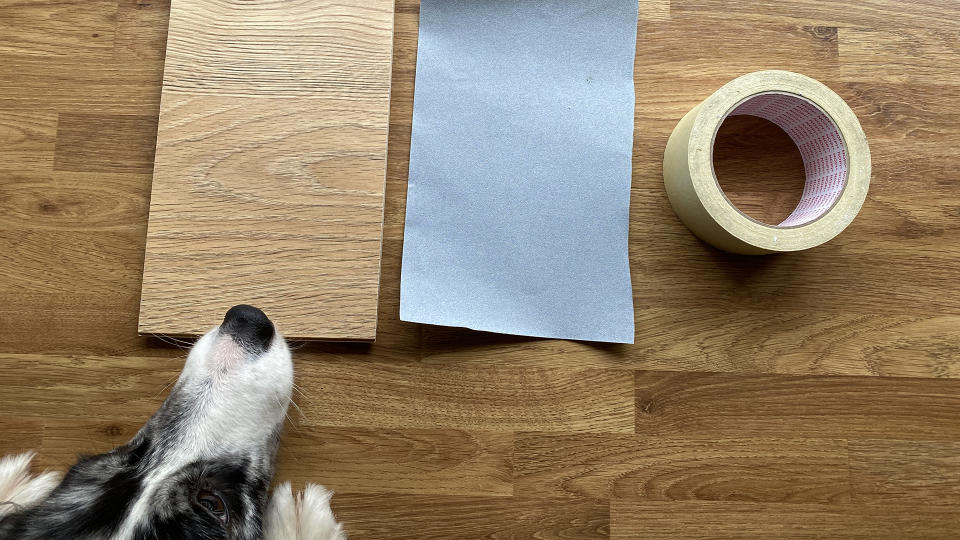
Making the scratchboard itself was even easier than I was expecting. I used a leftover flooring sample (although any type of wooden board would work), a very fine grit sandpaper (although I would likely choose a medium–to–fine grit next time), and some tape. I simply measured the sandpaper to fit the board and then fitted tape on all sides to make it as secure as possible. I didn’t worry about gluing the sandpaper down or finding a more permanent way to attach it, as I knew that I’d have to replace it at some point anyway.
Once I’d created my DIY scratchboard, I followed the steps below to train Fenwick to use it. It’s generally advised to fully train the front paws first before you tackle the back paws, so I only cover training the front paws here.
1. Introduce your dog to the scratchboard
Before you begin, make sure that you’ve got a good supply of the best dog treats to reward your dog. Then, place the scratchboard down flat on the ground in front of your dog. To begin with, every time your dog interacts with the scratchboard (whether that’s by sniffing it, lying down next to it, or putting their paw on it), mark the behavior with a ‘Yes’ or ‘Good’ and give them a treat. This will tell your dog that good things happen when the scratchboard is around.
2. Reward them for touching their paw to the scratchboard
If your dog touches their paw on the scratchboard (or even near the scratchboard), mark the behavior particularly enthusiastically and give them multiple treats to help them understand that this is what you want them to do. At this point you don’t need to be giving them any commands – you’re letting them figure out what you want by themselves.
As your dog begins to understand what you want them to do, you can start to become more discerning about when they get rewarded. For example, if your dog has touched their paw to the board multiple times already, but doesn't quite place it right on their latest go, withhold the marker cue and treat until they do it correctly.
3. Gradually increase the incline of the scratchboard
Once you feel that your dog fully understands the concept of placing their paw on the scratchboard for a treat, you can start to increase the incline. I would recommend doing this very gradually, starting at a height where you can fit two fingers underneath the board and going from there. As the height increases, your dog’s paw will naturally drag down the board due to gravity (they will naturally use their nails, so you shouldn’t need to worry about their paw pads being hurt).
At this point, once Fenwick began properly scratching at the scratchboard, I introduced a command cue of ‘Scratch’. Every time she chose to scratch at the board, I would say ‘Scratch’ and give her a treat. After several repetitions of this, I then began to ask her to perform the behavior by saying ‘Scratch’, waiting for her to do it, and then marking and rewarding her.
By the end of a single 15-minute training session, Fenwick had learned how to scratch the board on command. While I’d been confident that she would pick this new behavior up quickly, she still surprised me with how fast she learned it. I suspect that the previous paw-targeting training that we’ve done helped, but I don’t think it was a necessary part of the process.
I’ll definitely be adding the nail scratchboard into Fenwick’s regular grooming routine. My rationale is that if I can keep her front nails short with the scratchboard, then I can focus my desensitization on her back paws, making the overall process easier on both of us.
Looking for more on this? Be sure to find out how to stop a dog’s nail from bleeding or check out the best dog nail files.

