Here's Exactly How to Carve Your Dog or Cat's Face on a Pumpkin for Halloween
Brie Passano
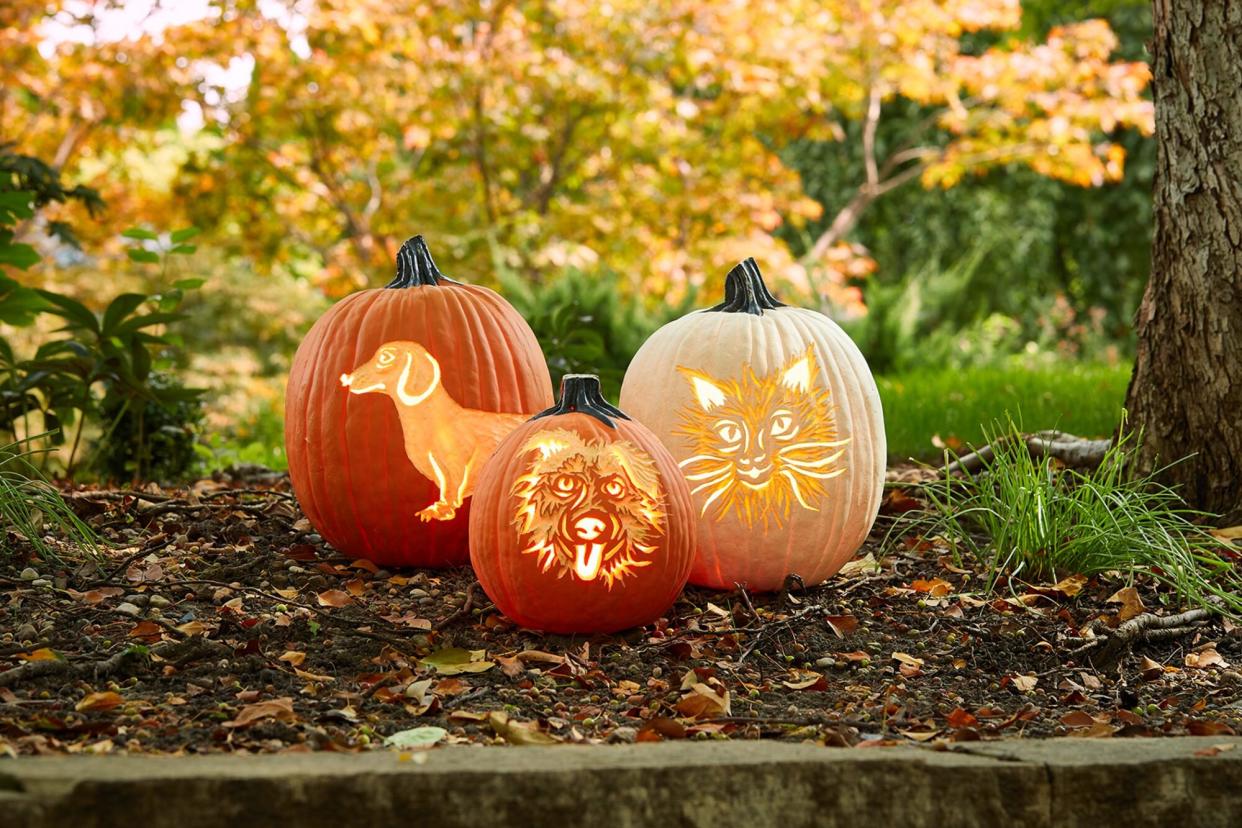
Halloween brings out the creative, um, spirit in all of us. And carving a pumpkin with your dog or cat's face on it is one sure way to show your neighbors what a clever pet parent you are. When trick-or-treaters come knocking at your door, your pet will greet them in the sweetest (and safest) way: with their face glowing from a jack-o-lantern.
It's not hard to carve a one-of-a-kind jack-o-lantern that tells the world "An awesome pet lives here." You don't even have to be an especially good artist. All you need is a good photo of your pet's face, the ability to trace, and a little time to render your creation. Plus a pumpkin, of course.
If you'd like your masterpiece to last more than one season, you can carve it from a fake pumpkin. A dremel tool is really helpful for making cuts and patterns in artificial pumpkins. But a real pumpkin works just as well (although less permanently); wood-carving tools will be helpful for that.
Start with a photo of your pet that shows her face clearly. You'll use a copier or printer to make a high-contrast black-and-white printout of the photo, sized to fit your pumpkin. With tracing paper, trace the outline and details of your pet's photo. Our step-by-step instructions below offer some tips about which areas to fill in more and less heavily. This image on the tracing paper becomes your stencil, which you'll use to transfer the design to your pumpkin. Then cut and etch your pumpkin according to the design, and you're ready to greet trick-or-treaters.
Do our example pumpkins still seem complex? The trick is that you want your design to mix areas where you cut through the whole pumpkin and areas where you just etch away the pumpkin's outer skin. This combination will create spots where the light inside your pumpkin glows more brightly (where the whole pumpkin is carved out) and less brightly (where you've only removed the pumpkin skin). This results in an image that captures the nuances of your pet's face and the texture of her fur.
Note that you can also use these steps to carve a pumpkin from a preexisting stencil, too. Just skip Steps 3 and 4 below.
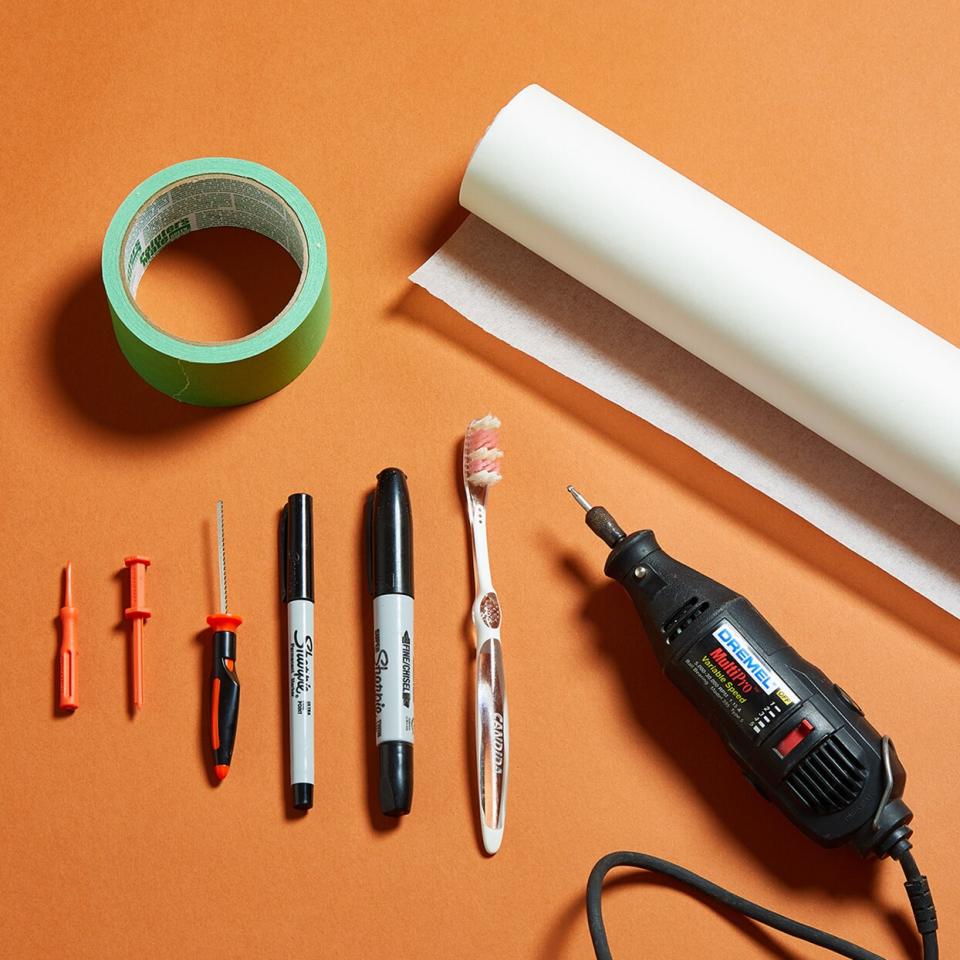
Materials You'll Need to Carve Your Pet's Face into a Pumpkin
Real or fake pumpkin in desired size and color
Photo or image of your pet that clearly shows the face
Copier or home printer
Ruler
Tracing paper
Pencil
Permanent markers (fine tip and medium tip)
Painters tape
Tool for scraping seeds and pulp (if using a real pumpkin)
Small-blade pumpkin saw (for cutting all the way through the pumpkin skin)
Toothpick or something sharp to transfer pattern (we show tools from a commercial pumpkin carving kit)
Dremel drill with fine and medium bits (for etching fake pumpkins)
Wood-carving tool set (for etching real pumpkins)
Toothbrush or other tool for cleaning up the cut edges
Brie Passano
How to Carve Your Pet's Face into a Pumpkin Step-by-Step
Other than the need to clean out the seeds inside a real pumpkin, the steps for creating a stencil and carving your design are the same for a real pumpkin or a fake one. If you're using a fake pumpkin, just begin with Step #2.
1. Clean Out Your Pumpkin
Use the small-blade pumpkin saw to cut a hole in the bottom of the pumpkin. If you're using a real pumpkin, remove the seeds and pulp and scrape the inside of the pumpkin skin to create a smooth interior. This will make cutting easier and give the pumpkin a cleaner final look.
2. Determine the Size of Your Pet Pumpkin Stencil
Measure the surface of the pumpkin to determine the appropriate size of your pet's face. As much as possible, stay within the flattest area of the surface.
3. Print a Photo of Your Pet's Face
Using a copier or your home printer, resize the image of your pet's face to the measurements determined in Step 1. Print out a black-and-white image at this size, increasing the contrast of the printout to help define the features. You will only focus on your pet's face, so you can ignore all the other areas of the photo. If you have Photoshop or photo editing software, you can erase the areas around the face that will not be carved and only print the face image.
4. Trace the Photo to Create an Outline for Your Pumpkin Stencil
Place a piece of tracing paper over the black-and-white printout of your pet's face. With a pencil, trace the main features of the face (ears, eyes, nose, mouth) and the general outline of the outer face. You can paperclip or tape the two pieces of paper together and hold it up to a window for tracing. The backlight will make finding the features much easier.
5. Fill In the Details of Your Stencil
Using the pencil marks as your base pattern, draw the final outline (above) of your pet's face, eyes, nose, mouth, whiskers, ears, and other features you chose to include in Step 3. The areas you select to fill in with solid black will be the areas that are cut through on the pumpkin. These cut sections should be the areas you want to feature the most, as they will be the brightest.
Eyes, nose, and ears are defining features that should be brightest. The areas not filled in will be etched using a dremel or wood-carving tools for a much lighter glow, depending on the depth you etch the pumpkin's surface.
TIP: If you have access to an iPad or photo editing software, you can create your stencil by electronically tracing your pet's photo.
6. Tape Your Stencil to the Pumpkin
Once you are happy with the pattern you've created, separate the tracing paper and the photo. Then place the tracing paper over the pumpkin and carefully fold the edges of the paper to shape it around the pumpkin's curve (below). Try to keep the design as flat to the pumpkin as possible. Tape to hold it in place.
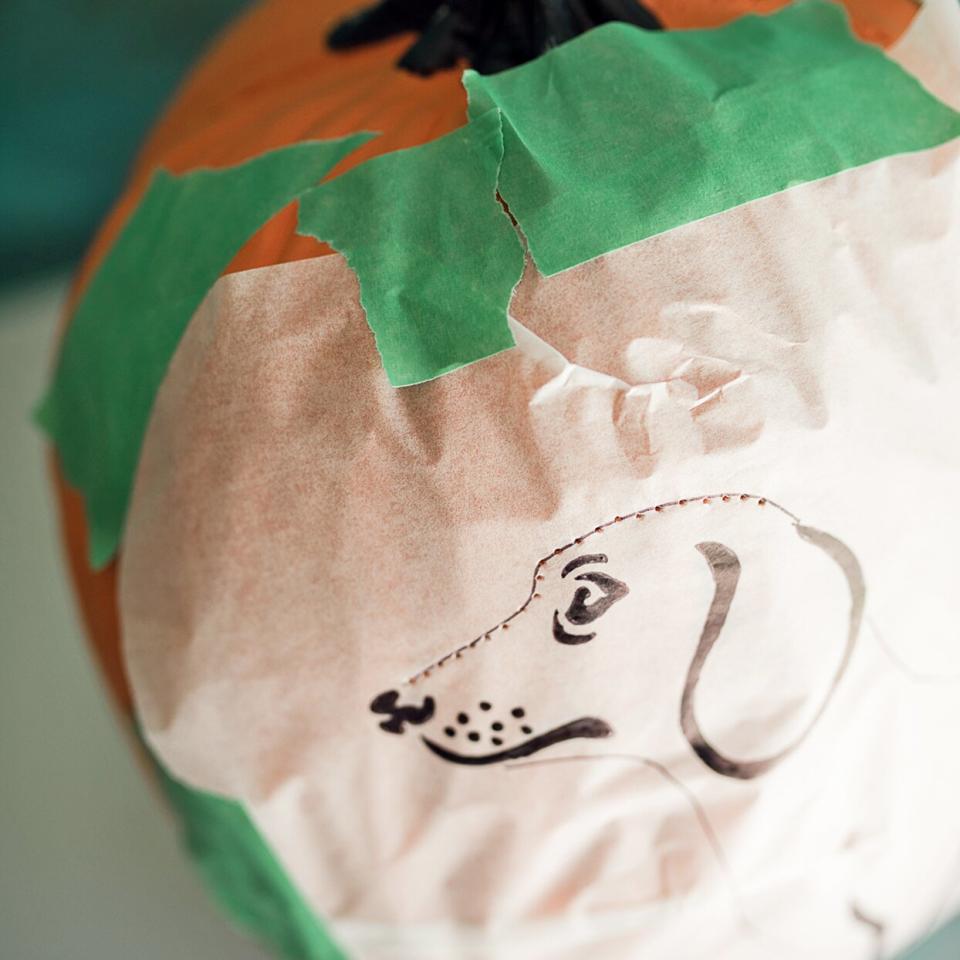
Kristin Cleveland Tape the stencil to your pumpkin and begin poking holes along the outline of the image.
7. Transfer the Design to Your Pumpkin
Using a sharp tool, like a toothpick or a pattern tracer from a pumpkin carving kit, poke holes through the tracing paper onto the pumpkin, following all of the outlines of the pattern and around the edges of the black solid areas to be cut (above).
8. Check Your Outline
Remove the tracing paper. You should see an exact outline of your pet's face and features (below). Determine if there are additional details you want to add to your design and poke additional holes if needed.
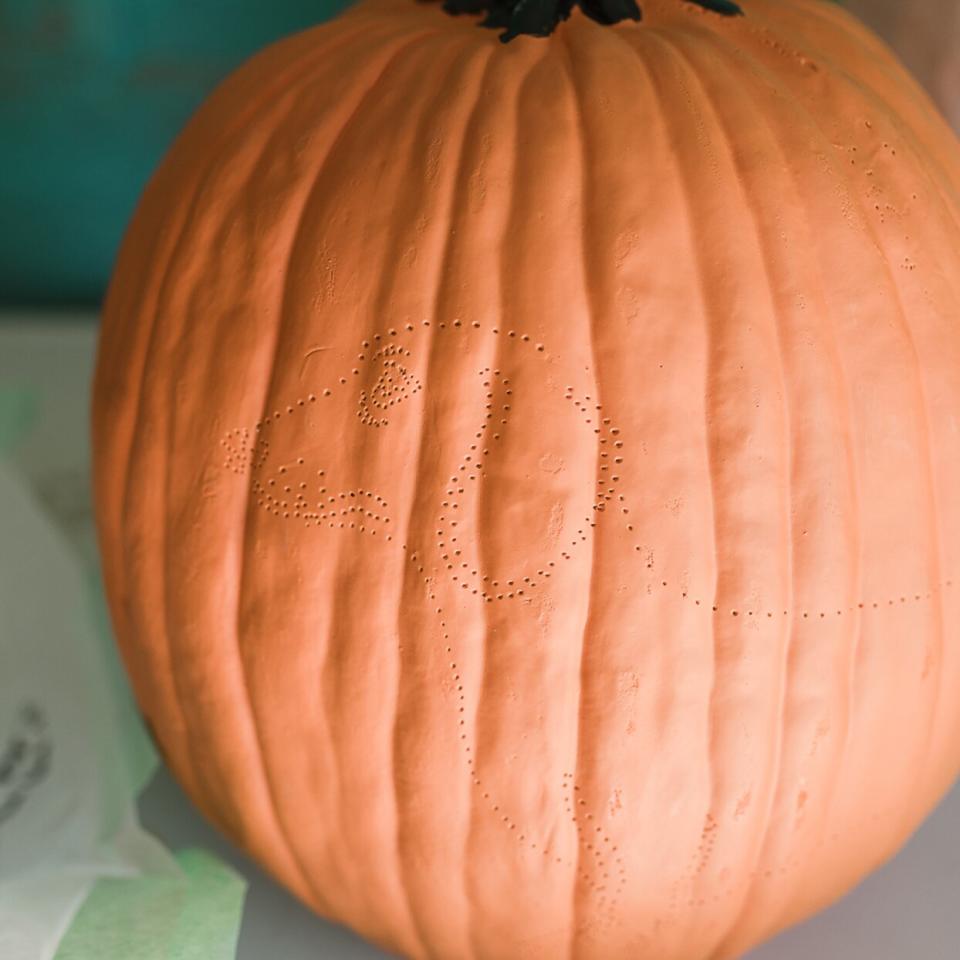
Kristin Cleveland After outlining the stencil with a sharp tool or toothpick, your pumpkin will show the outline of your design.
9. Begin Carving the Cut-Out Areas of Your Pumpkin
First you'll cut out the areas that are heavily shaded black on your stencil (below). It's important to start with the smallest, finest features and work up to the larger sections that need to be cut. Keep the small pumpkin saw blade straight (perpendicular to the pumpkin surface) and carefully cut all the way through the surface of the pumpkin. Refer to your pattern before cutting to make sure you are cutting the correct area and correct shape.

Brie Passano The first sections you carve will be the areas that cut all the way through the pumpkin, like the eyes and nose.
10. Etch the Details of Your Design
Once all the cuts are made, begin etching (removing the skin of the pumpkin but not cutting through!) the larger areas of the design and defining the general face area. Etching should be done in stages, since the deeper you etch the more the light will shine through. To create a fur texture, etch areas deeper, creating ridges that resemble fur. Refer to your pet's photo and your sketches as you develop the face.
TIP: Be very careful around the cut-out areas, as they can easily be broken or damaged if the etching gets too thin!
11. Clean Up Any Rough Cuts Around the Design
When all your cuts and etching is complete, use a toothbrush or similar tool to rub away rough spots along the design. Place a light source in the bottom of the pumpkin, and you're ready for Halloween!
Project designs by Kristin Cleveland.

