I made butter from scratch with one ingredient amid rising costs and a looming shortage. It took 20 minutes and practically zero effort.
A supply shortage has caused the price of butter to skyrocket ahead of the holidays.
The only ingredient needed to make homemade butter is heavy cream.
Use salt and other add-ins to give your butter different flavors.
A supply shortage caused the price of butter to surge ahead of the holidays.

Between sweet potato pie and cookies baked for Santa Claus, butter might be the unsung hero of the winter holiday season. But according to the Wall Street Journal, there'll be less butter to go around this year.
The outlet reported lower milk production on US dairy farms, and ongoing labor shortages at processing plants have resulted in the lowest amount of butter in US cold storage facilities since 2017.
The decline prompted the cost of butter at US supermarkets to surpass most other foods in the past year, with the price of butter rising 24.6% between August 2021 and August 2022, the WSJ reports. According to CNBC which cited data from the US Bureau of Labor Statistics, the cost of butter rose 27%, and margarine surged 44% from September 2021 to September 2022.
Since I'm trying to save money amid the nationwide inflation, I decided to try my hand at making homemade butter. I used a recipe by popular TikToker itz_zealand as a reference.
You'll only need one ingredient to make homemade butter.
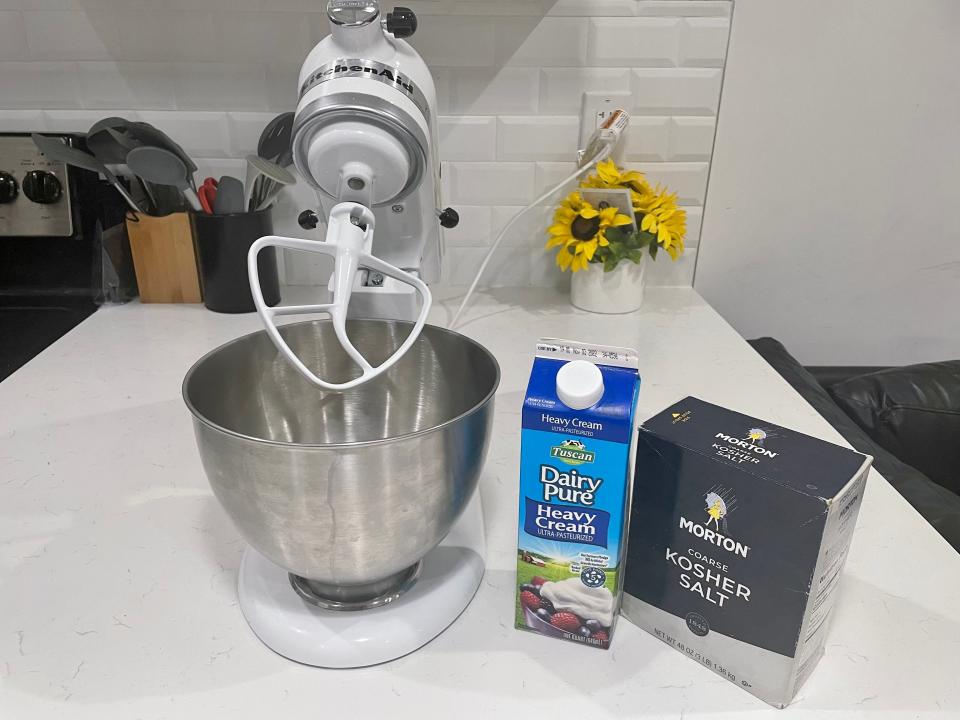
Fortunately, making butter is a fairly cheap endeavor since it only requires one ingredient: heavy cream. Adding salt or other flavorings is an option, but not necessary.
You'll also need the following:
A stand mixer
One large bowl
A strainer
To start, pour the heavy cream into a stand mixer with the whisk or flat beater attachment.

I used a one-quart carton – or four cups – for my butter, but feel free to use as much or little as you want.
I whisked the heavy cream for 20 minutes, starting at a low setting before gradually increasing to a medium speed.

For the first 10 minutes, the heavy cream retained its liquid form and showed no signs of firming up. I started whisking on the lowest setting of my KitchenAid stand mixer.
After 10 minutes, the heavy cream began to thicken and cling to the flat beater attachment.
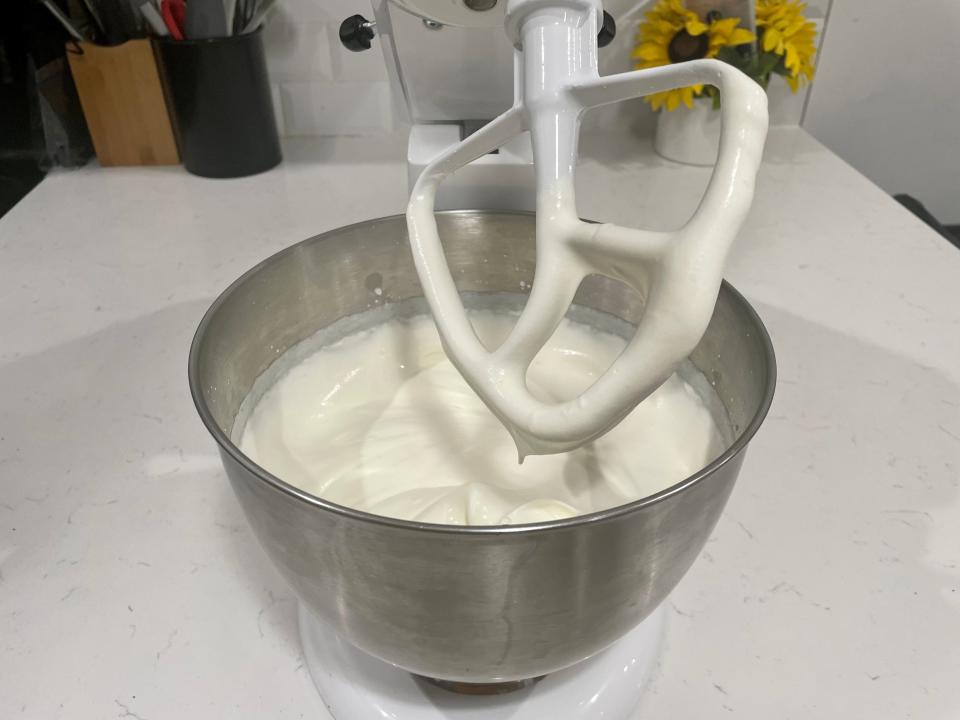
10 minutes into whisking the heavy cream, it slowly began to thicken, resembling a very light yogurt in look and texture. I found it helpful to occasionally stop the stand mixer and scrape excess heavy cream stuck to the sides back into the fold.
A few more minutes of whipping allowed the solid butter to separate from the buttermilk.
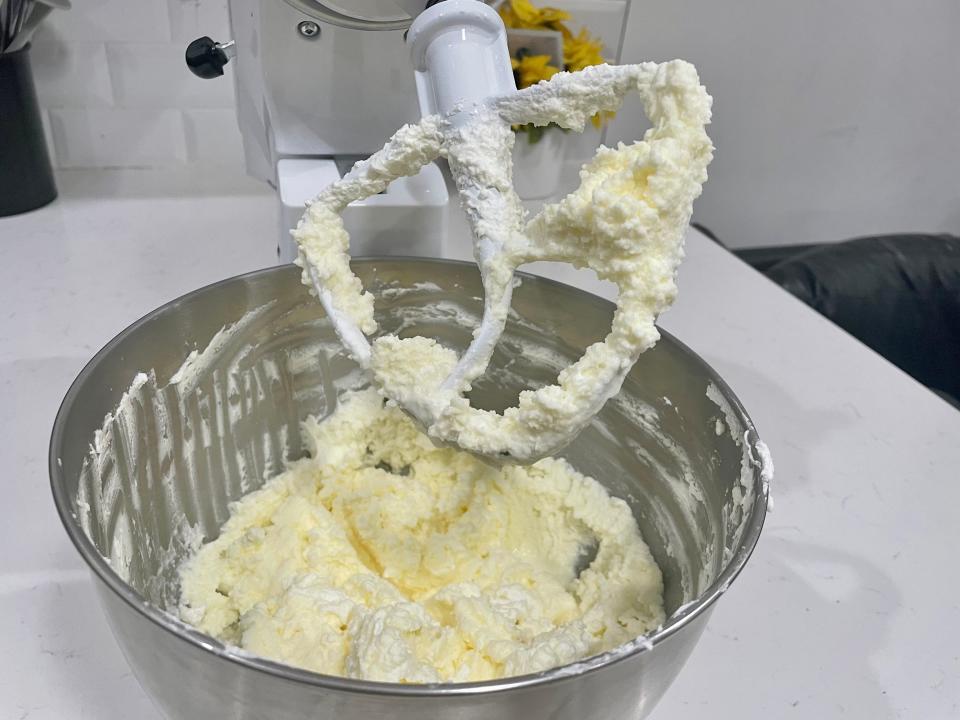
Around 20 minutes into whisking, pieces of solid butter began to form and separate from the buttermilk. When this happens, the butter-making process is almost done.
Stop the stand mixer once the solid butter consolidates.

By now, there should be a noticeable pool of buttermilk at the bottom of your stand mixer. It's your choice whether or not you want to keep the buttermilk, but Bon Appétit reported that there are tons of uses for it.
At this point, the solid butter should feel firm but pliable and take on a light yellow color.
Use a strainer to separate the solid butter from the buttermilk.
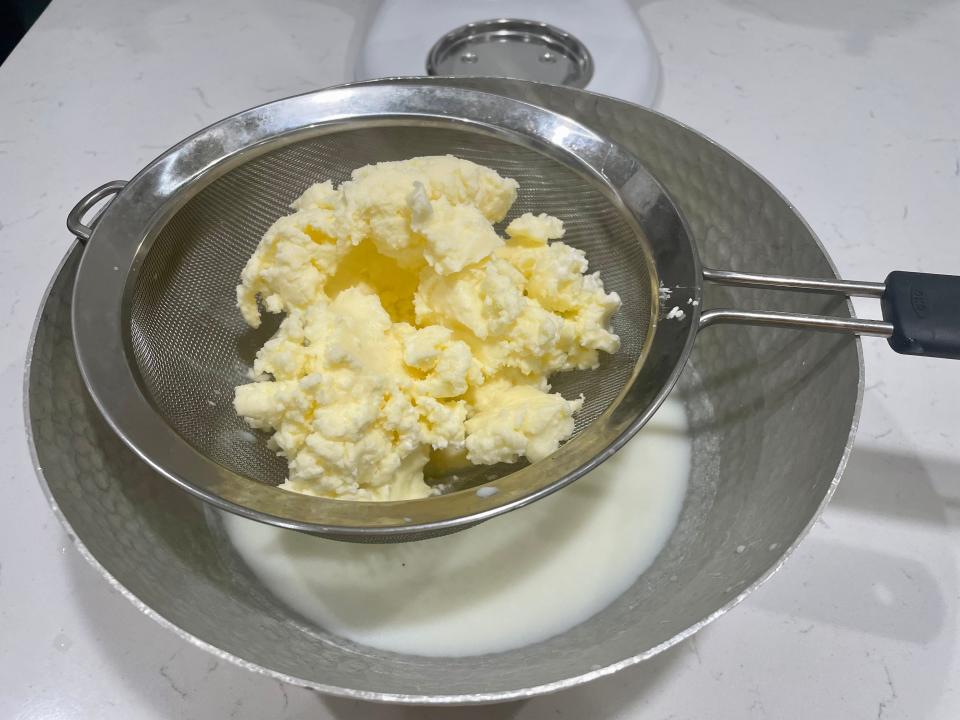
Place the strainer over a large bowl and separate the butter from the buttermilk.
Rinse the butter with ice water to remove excess buttermilk.
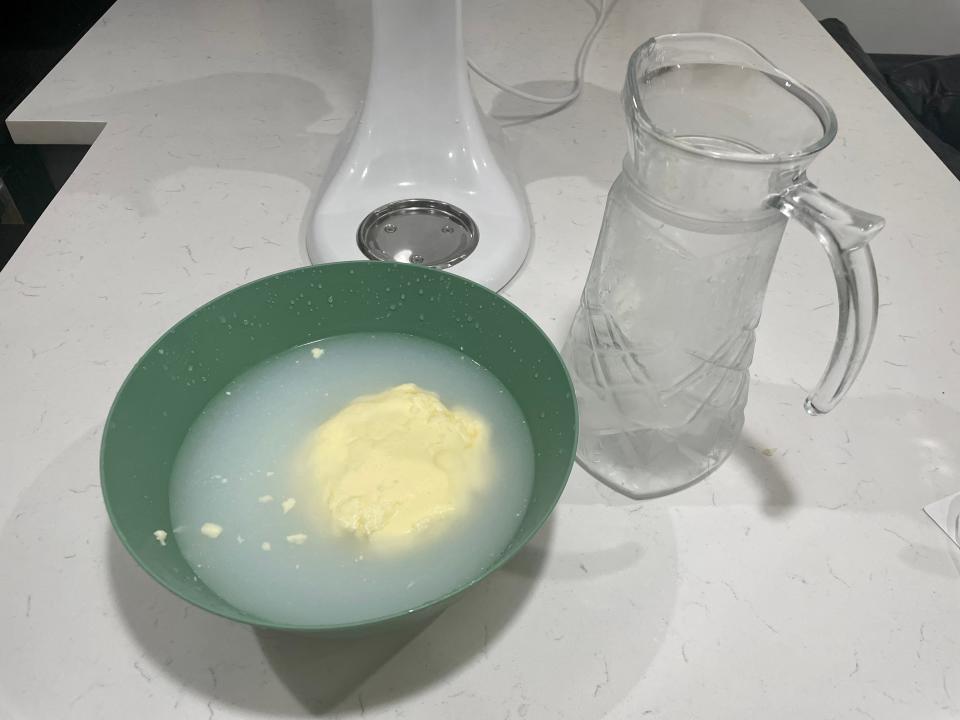
Transfer the solid butter to another large bowl and add cold water to help rid it of excess buttermilk. Master Class suggested using a flexible spatula to do the task, but I used my hands.
Repeat this process until the ice water goes from murky to clear.
You've officially made homemade butter! Use add-ins like salt and garlic to give the butter an extra burst of flavor.
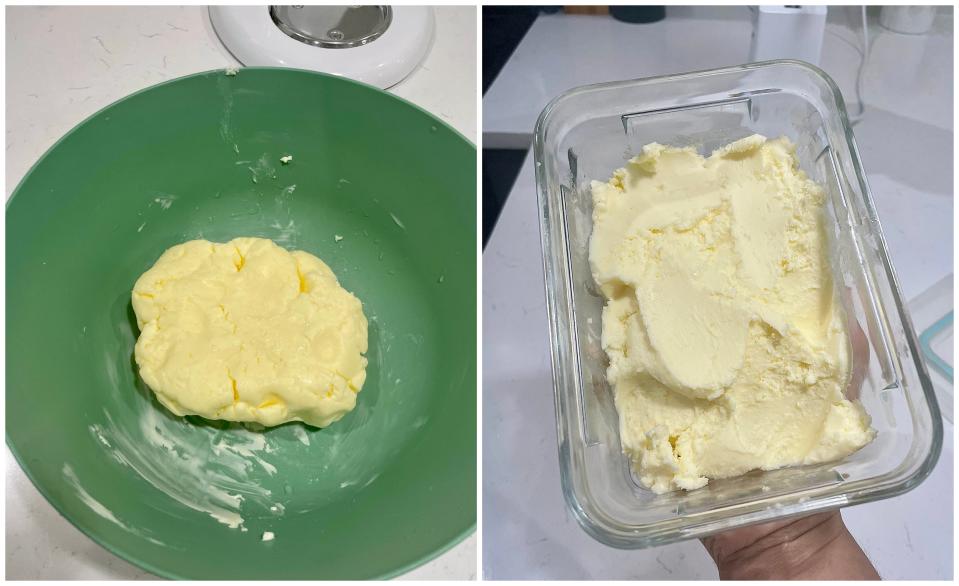
The final steps are to add any extra flavors to the butter and store it away. Personally, I added ¾ tablespoon of salt to give it a slight flavor since it tasted very neutral at first.
I wasn't sure what to expect with this recipe, but I haven't stopped telling everyone I know about it because it's that good. The texture, when at room temperature, is creamy and the taste is light and airy.
It might be in my head, but when I compared my homemade butter to a store-bought version, the homemade butter tasted less processed.
Also, "homemade butter" always made me think of a wooden butter churn and lots of arm work, but the recipe was hands-off and only took 20 minutes.
Overall, I would 1000% make this recipe again, and I have plans to add chives, garlic, and parsley next time.
Read the original article on Insider

