This Mid-Century Modern Gingerbread House Is the Pandemic Christmas Project We All Need
This article was originally published on Epicurious.
As I completed the assembly guide for this mid-century modern take on the classic gingerbread house, I kiddingly asked my editor if we’d be awarded honorary architecture degrees when the project wrapped up. Or...was I kidding?
This winter I found myself in creative overdrive. Some people do 10,000-piece puzzles. Some people make homemade candles, or homemade bagels, or fall into a deep gardening obsession. I spent months designing this cookie house in a Wes Anderson–inspired monochromatic color scheme. It has working lights and a blueprint drawn to scale. It has wallpaper in every room.
In a year when so little felt under our control, this is a DIY project that lets you control every detail.

Gingerbread House Back - INSET
Most cookie houses are made of gingerbread. And don’t get me wrong, I like gingerbread. But I love cardamom more, and I wanted a kick-ass chewy and crispy cookie base with punchy flavor. (It’s the same dough that’s used for my Diamond Cardamom Sparkle Cookies—packed with freshly ground cardamom and black pepper and layered with lemon zest.) The cookie provides a bright background for the decor, which skips the classic candy overload, and focuses instead on cool-toned shimmer and shine.
Because all that shine and sparkle is the point. I hope this cookie project brings you reprieve from the quarantine doldrums, adding a little holiday joy as we wrap up a difficult year. Make some hot toddies or cocoa, turn on your favorite holiday movie or music, and dive in. Be sure to print the PDF guide before you start!
Print the Mid-Century Modern Cookie House PDF Guide →
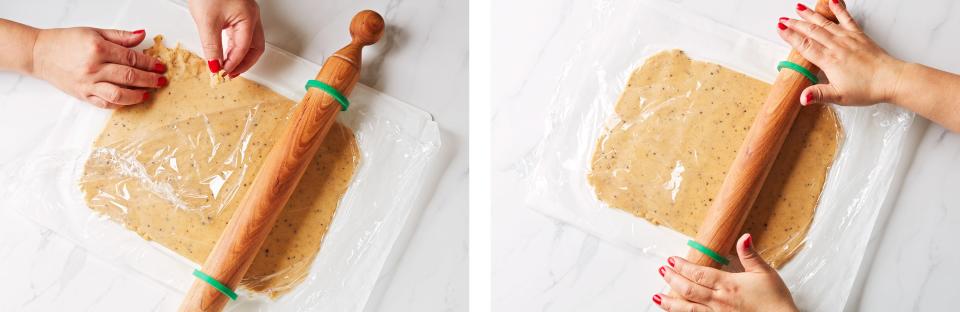
GingerBread House Rolling Dough Pair - FPO
So, let’s get down to brass tacks. Let me take you on a little tour.

GingerBread House Step 2 Cutting Rolled Dough - PROCESS
Building any house—gingerbread or not—requires that you stay organized. You’ve got your blueprint. You’ve gathered your materials. But now, an essential tip that will make this ambitious construction project almost a breeze: Keep each paper template resting on top of the cookie dough cutouts and baked cookies as you go. The labels will match the blueprint, which is your best friend for the next four days.

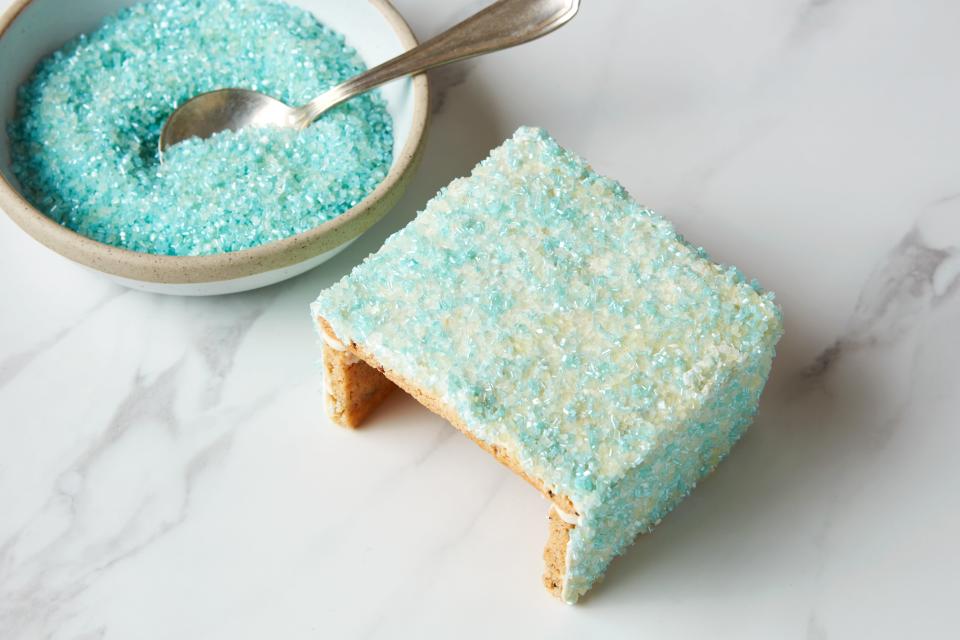
GingerBread House Step 6b Candy Wallpaper - PROCESS
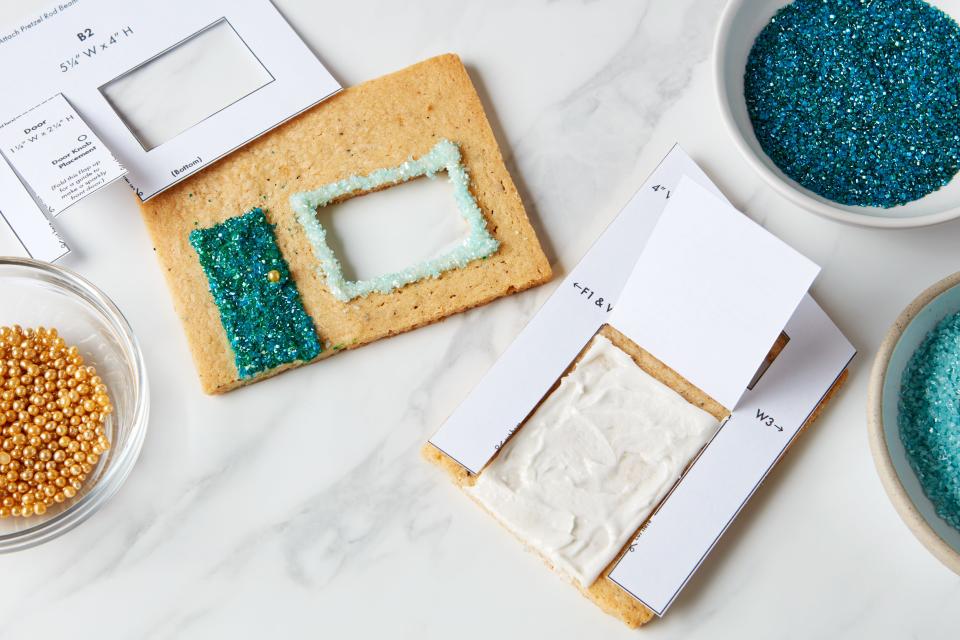
Shall we start with my favorite part? The matchy-matchy bedroom wallpaper above—which reminds me a bit of a Wes Anderson movie set—will make the hunt for old-fashioned green candy apple sticks worth it. But candy canes in any color are cute here too. (Online sources for all candies and decorations can be found in our shopping guide.)
If you find that your royal icing is drying out too quickly while you’re spreading it on this wall or anywhere else, it may be that the icing is too thick. Add a few drops (just a few!) of water to thin it out and try again. When you’re storing royal icing, be sure to cover it with plastic wrap that’s directly touching the surface—this will help keep it from developing a dry crust. Note everything in this guide is piped with our all-purpose royal icing (AP royal icing), with the exception of the trees, which get a slightly thicker formula.

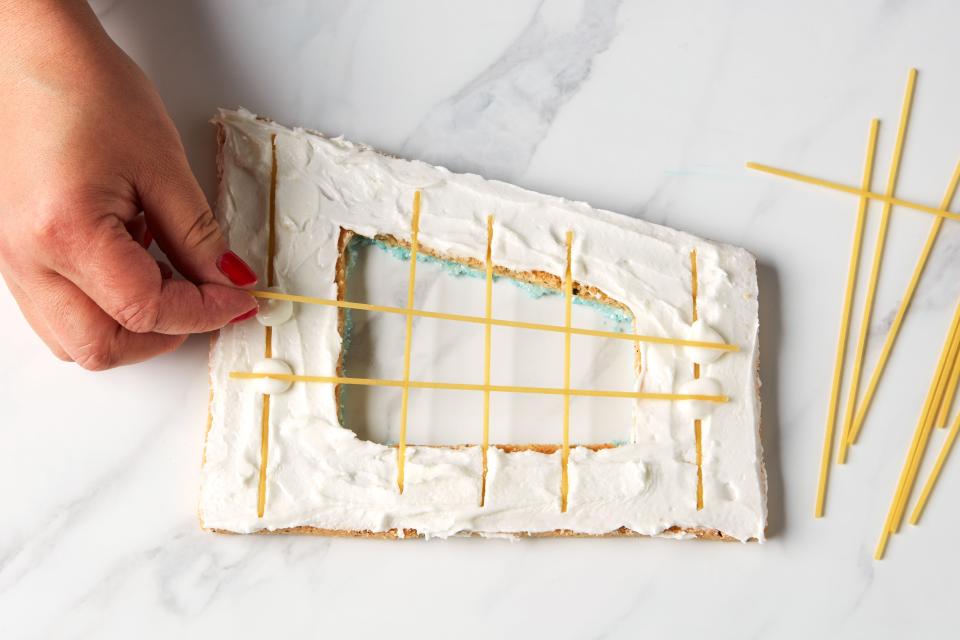
GingerBread House Step7a Spaghetti Windows - PROCESS
Of course, we need sparkly bedroom window frames, piped in royal icing and decorated with crunchy sugar. But we may need rimmed quarter-sheet pans more. They catch all the sugar as you add it and prevent a mess on your table and floor. Once it’s captured in the sheet pan, you can pour any excess back into the container for using later.
A few general piping tips: When piping icing, continuously twist and keep pressure on the pastry bag for better control and to prevent icing from leaking from the top. For convenience, keep a large jar or heavy glass nearby to rest the bag of icing, making sure to fold the bag in half like a taco so that the tip and opening face up. If the piping bag sits unused, the tip may harden—just run it under hot tap water for a few minutes until it flows freely.
To refill the bag, remove the tie, fold back the pastry bag opening 3 to 4 inches, and place in a heavy cup so you can work hands-free. Stir icing well before refilling. After refilling, close bag again with a tie (or string tied in a bow) before using.

GingerBread House Step9a Shed - PROCESS
The shed is a freestanding piece that will hide the battery packs for the twinkling lights. When you’re putting it together, it’s helpful to use cans of food to support the walls as they dry for at least three hours. (You’ll see the assembled shed below in Photo J.)

GingerBread House Step10 Trees - PROCESS
These trees might be the showstoppers of our winter wonderland design—feel free to make more so that you have an entire frosty forest! Under the layers of piped icing, the trees are made from ice cream cones, with a bit of icing in the tip of the cone to facilitate stacking.

GingerBread House Step5 Stone Wall Technique - PROCESS
For the stone wall details throughout the house, you’ll apply patches of royal icing and press in skin-on almond slivers with some intentional bulges of icing to simulate mortar.

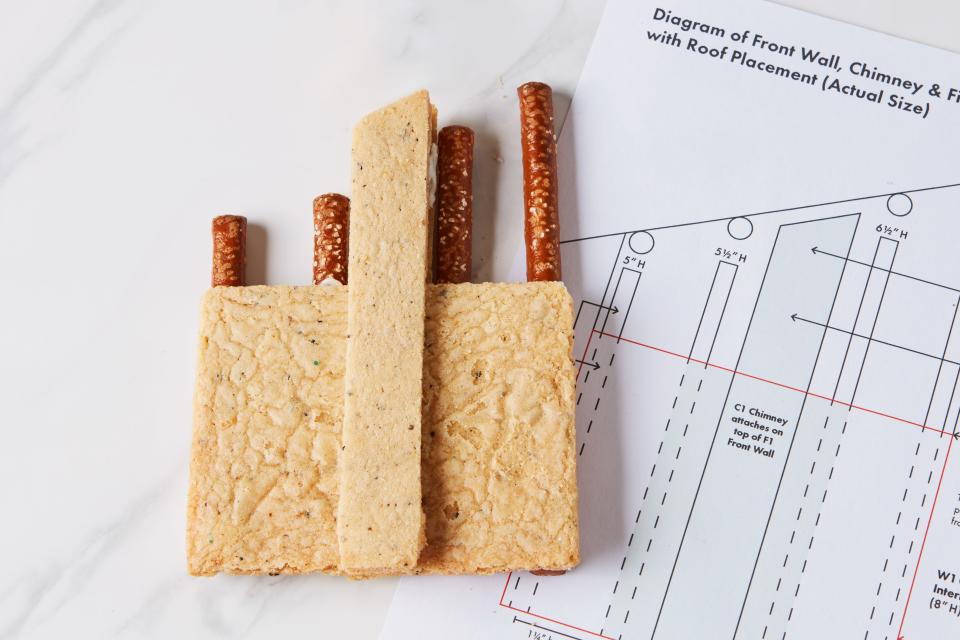
GingerBread House Step3a ChimneyWall - PROCESS
The front wall has an interior chimney and fireplace with pretzel rods extending above to create window panes up to the roof.
GingerBread House Step7b Spaghetti Windows - PROCESS
A thick layer of royal icing holds the spaghetti window panes, reinforcing the back wall. No one will see this side after the house is put together, but it’s fun to peek through the window at the stripy bedroom wallpaper.

GingerBread House Step6a Exterior Wall - PROCESS
No one can accuse me of not going truly over-the-top: Even the garage has sparkly wallpaper. Don’t we all dream of a garage with sparkly wallpaper? It’s an optional step, of course, but it really is pretty when the house is all lit up. (On the flip side of this wall, you have the bedroom wallpaper in green apple candy sticks.)
GingerBread House Step9b Shed - PROCESS
Here’s the completed shed, which is reinforced with a layer of royal icing. You’ll run the lights from here along the backside of the house.
In general you have a few options if a cookie piece breaks. First, you can glue it together with royal icing and let it dry overnight. If you glaze it the next day and cover it with sparkly sugar, no one will be the wiser. A second option is to remake the piece using any leftover rolled dough. Or, if you have any extra baked cookies, just cut a small piece using a serrated knife and make a splint using royal icing. Let dry overnight.
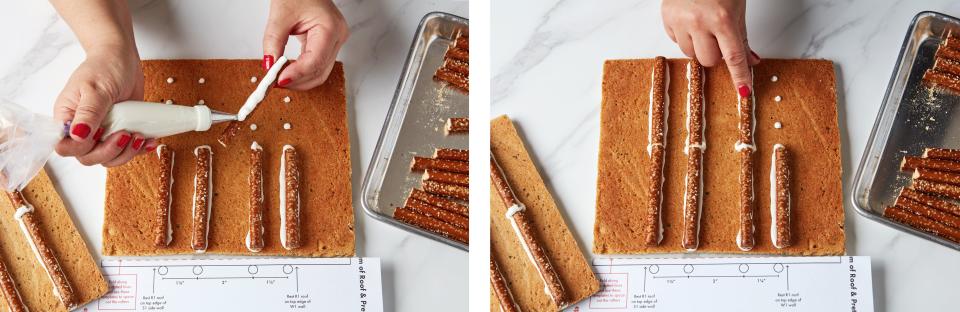
GingerBread House Roof Rafters Pair - FPO
Exposed beams on the ceiling are a classic element of mid-century modern house design, so I couldn’t help myself. (If you’d prefer to save time, feel free to skip them!)
GingerBread House Step3b Chimney Wall - PROCESS
This doesn’t look exciting yet, but if you jump ahead, you’ll see that the chimney will have a stone façade and a sparkly jewel-toned wreath (with a holiday pop of color). I think of the red bow as the seasonal house decor equivalent of a red lip. Peer into the great room and you’ll see a magical Christmas tree next to the sparkly wallpaper.
GingerBread House Step8 Folding Template - PROCESS
Teal doors and gold doorknobs make this the prettiest house on the block. To get the vibrant, rich-feeling hue, the teal sparkle mix is made from a combo of emerald and sapphire sugars. Can’t find the exact versions suggested in our shopping guide? Feel free to substitute another sparkly green sugar, or create your own custom hue, mixing whatever two colors you like.

GingerBread House Step12 Lights in Snow - PROCESS
Above, you’ll see a close-up of the front yard, showing the beginnings of a (coconut) snowfall. I love the glow from the lights; it’s as if the snow actually melted from the hot light bulbs. This is easily achieved by pressing your finger lightly over each light. (You don’t want to expose the light completely, though!)
One warning (based on personal experience): During the lighting installation, keep in mind that the spaghetti window panes are very fragile. Don’t be too concerned about pushing the lights to the floor inside the house—even if the wiring only hovers near the ceiling, the bedroom will still glow and show off your fancy wallpaper.
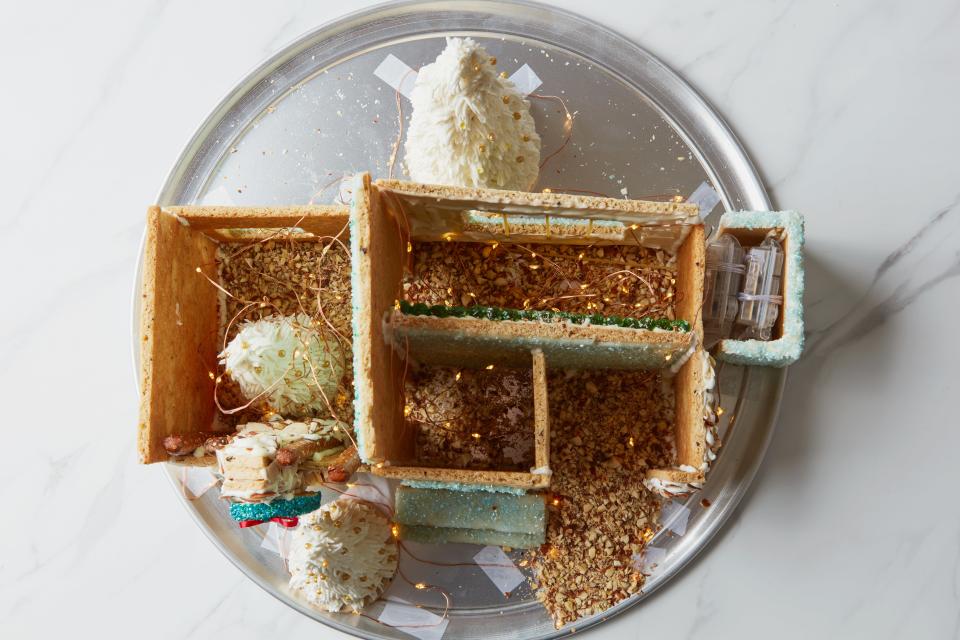
GingerBread House Step18 Overhead - PROCESS
The printed blueprint comes to life in the photo above! For stability, it’s a great idea to permanently attach each roof to the house, but if you want to be able to peek in and show off your house interior—dollhouse-style—you can carefully rest the roof in place without icing. The pretzel rods have a gritty texture that will catch against the slightly rough edges of all the vertical walls. When lifting the roof, carefully place fingers between any icicles.

Gingerbread House Front V2 - HERO
Perhaps you’re going to build this elaborate gingerbread house and never let a soul take even one bite. Or maybe you’ll post it on Instagram (Tag me! Tag Epicurious too!) and then knock it all down to eat, wall by wall. Either way, I’ll see you at Certified Cookie-Architect graduation...maybe next year.
Print the Mid-Century Modern Cookie House PDF Guide →
Originally Appeared on Architectural Digest

