Mission complete: Is building your own patio worth it? | Home With Tess
I’ve been working on a patio all the livelong day (and night).
And finally, after a month and a half of hard manual labor, with a few moments of panic sprinkled throughout, our patio is complete.
My husband and I set out last month to build the cheapest paver patio possible. While various online estimates place the average starting cost of a 250-square-foot patio at $2,000, we ultimately wound up spending around $1,200 by using the cheapest pavers we could find, hunting for the best estimates from landscape suppliers, and, of course, doing the work ourselves.
But doing things yourself, as you likely know, often (or, dare I say, always) comes rife with challenges and missteps. And our patio project came with plenty.
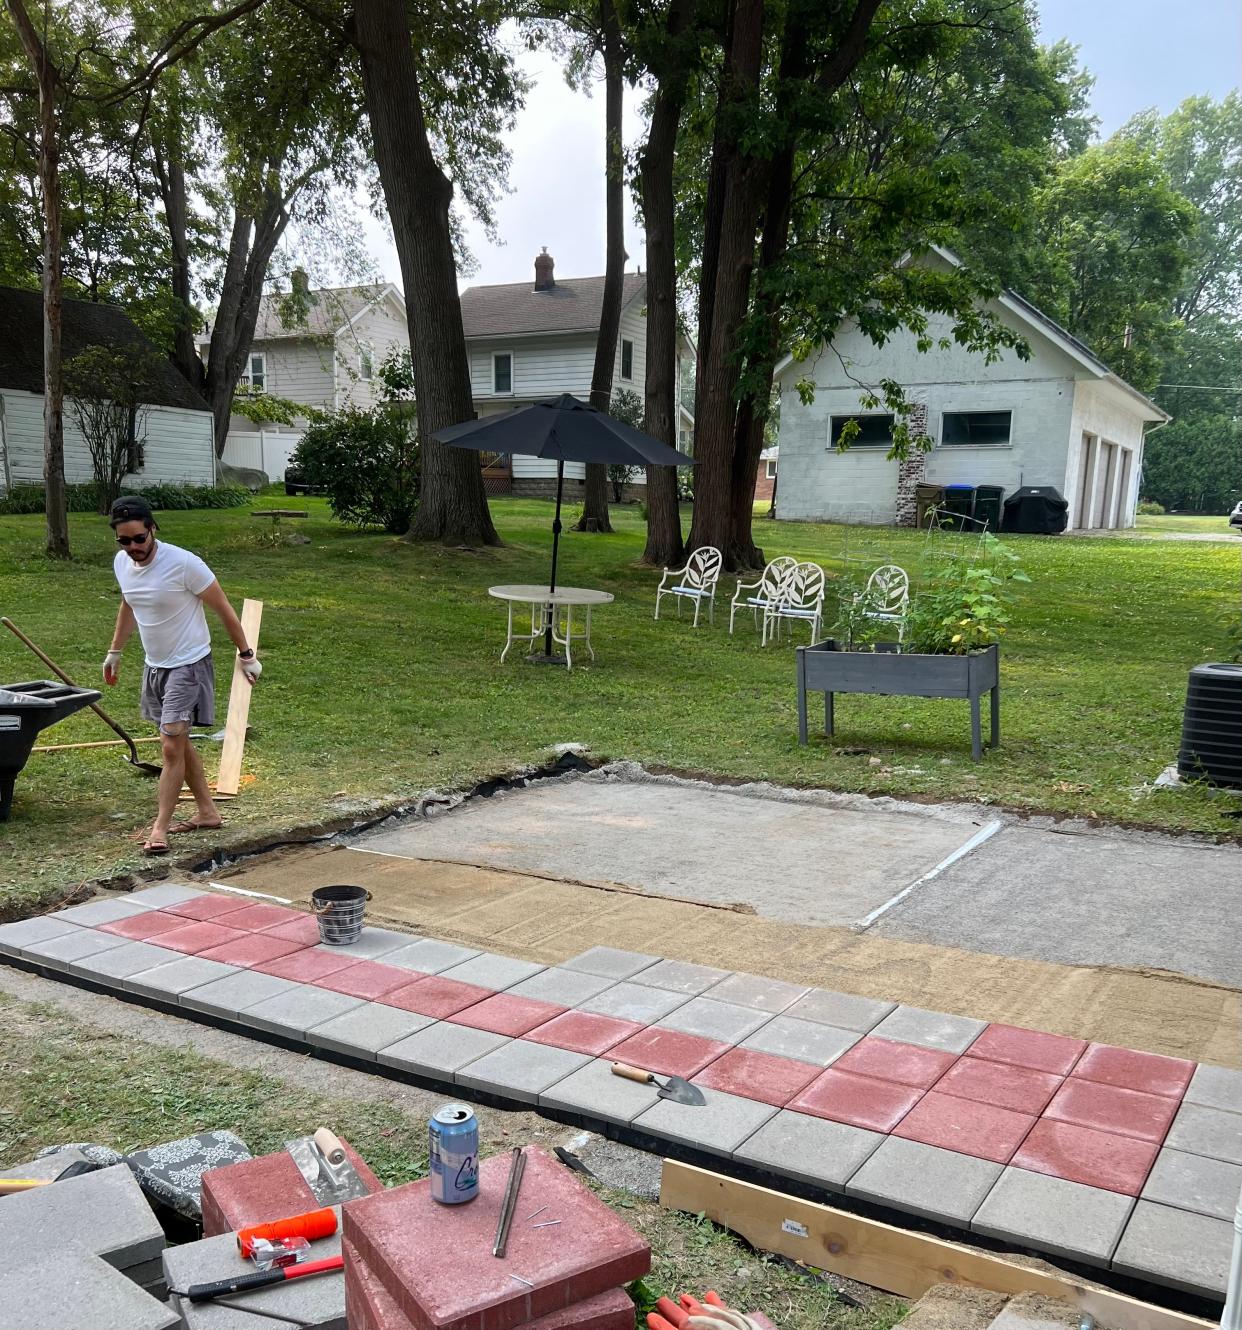
I’ll save you the nitty-gritty of exactly how we built the patio. Trust me: You’ll want to learn that from the professionals (many good tutorials are available on YouTube, online and in books you can borrow from the library). But generally, building a paver patio consists of digging and compacting your dirt; laying, leveling and compacting a stone base; laying and leveling a sand base; and laying your pavers on top.

Our first major mishap came when ordering the base materials. Despite all my research, I found it difficult to figure out the right size of stone or gravel I needed to use. Each search resulted in conflicting recommendations, and I was stumped.
I wound up asking two different landscape suppliers what they’d recommend, and they both suggested crushed limestone (#10 limestone, to be specific), so I went with it.
The day of the delivery, I was expecting something resembling gravel to fall out of the dump truck. Instead, I was left with what looked like a giant mound of cat litter.
Too late to change course
I’ll admit it — when I saw it, my heart dropped like the gravel I thought would be there. I later discovered sources that explicitly recommend against using crushed limestone as a subbase (of course, along with other sources that do recommend it). With 5 tons of it sitting in our driveway, I knew it was too late to change course.
The digging, too, proved to be a challenge, not just because the days were hot and the dirt was filled with rocks and tree roots — it felt a lot like we were in the movie “Holes,” except this was suffering we completely and intentionally brought upon ourselves — but also because we discovered a PVC pipe cutting straight through where we wanted our patio to go.
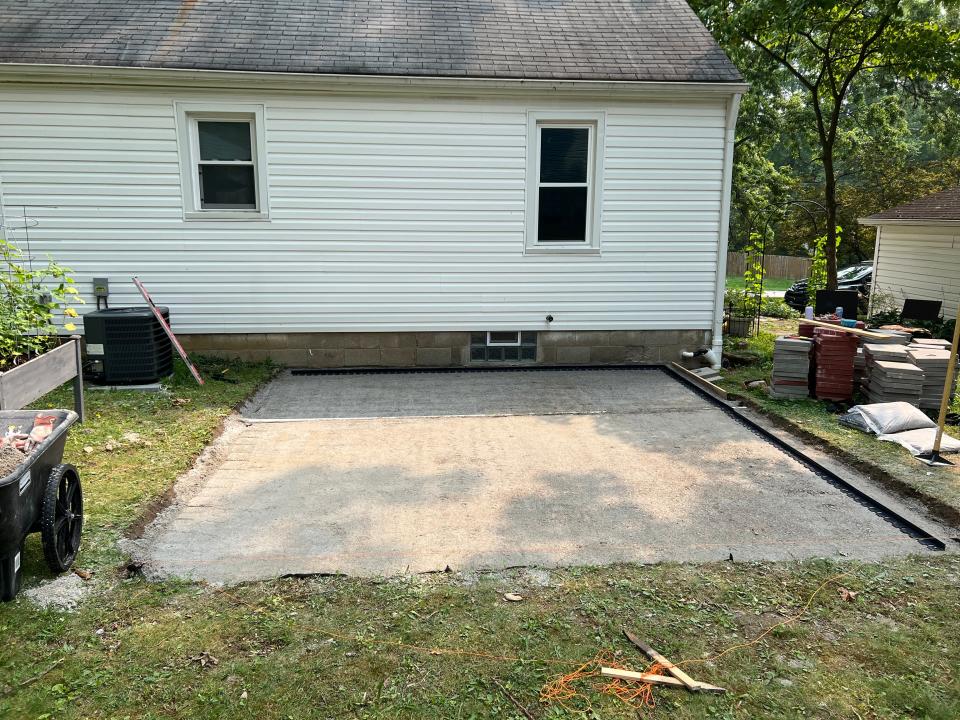
We wound up building around the pipe, and while it was difficult, I was feeling confident about the project after we laid the limestone down. If I know anything about hardscaping, it’s that base preparation is everything, so I had spent hours upon hours carefully leveling the stone. After we tamped the final layer of it, I could see from some angles that it looked slightly uneven, but I figured the sand on top would level everything out.
Spoiler alert: I was very, very wrong.
Leveling the sand is done through a process called screeding, which consists of placing sand between two straight objects (I used two 1-inch PVC pipes) and running a flat board across them. If your stone base is level, the gliding board should create a perfectly smooth surface on which to lay your pavers.
The problem is, my stone base was not level. As I laid my pipes, I could feel where some areas dipped and, as a result, created a wobbly layer of sand.
I fully realized the gravity of my mistake when I stopped screeding halfway through to place a row of pavers. I’m glad I did this, because it allowed me to better see areas I needed to try to manually level before laying the rest of the pavers.
Still, despite adding hours of extra work for myself, as I laid each 20-pound paver down, sweating from both the hot sun and the anxiety, I could see areas that were uneven. Laying the final paver felt not like a moment of triumph, but a moment of defeat.
Of course, as my mom later said, “We are our own worst critics.” After taking a step back from the project and returning the next day with a new wave of determination, I pulled up some of the pavers and adjusted the sand to be more level.
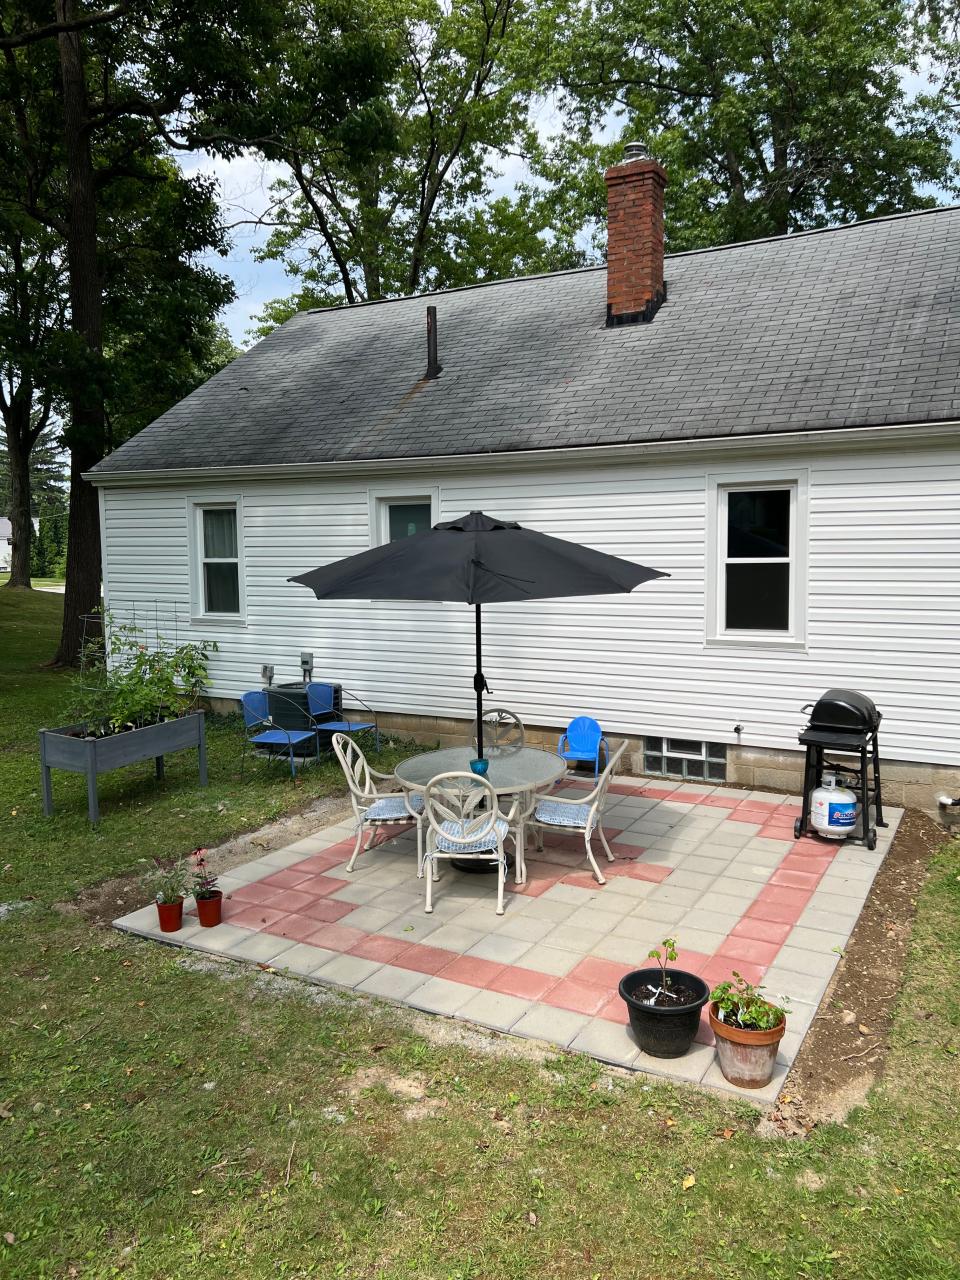
Is it perfect? Well, no. But overall, I’m quite happy with how it turned out, and it truly brings our backyard to life. Plus, any doubt I had in the structure was put to rest (at least for now) by the storm that ran through the area the night after we finished installing it. Despite heavy rains, I walked outside the next morning to no flooding and the pavers held firmly in place. Most importantly, our basement was perfectly dry, meaning we got the slope right on the patio.
Was patio worth it?
Still, the question remains — was it worth it? Ultimately, we wound up saving at least $800. It’s a nice chunk of change to have, but that $800 may have guaranteed that we had a patio installed professionally, saving a lot of time and, ideally, a lot of headache as well.
Despite all of that, I’m glad I went the DIY route. I realize that may change down the road if I experience any major settling or various other unforeseen issues, which I will be sure to write about if they do occur.
But I enjoyed working outside, and I learned so much doing the project that I have confidence I could do it quicker and better the next time around. And at the end of the day, when I sit down on the patio and unwind, the tranquility I feel outside is met with a huge sense of pride that my husband and I created this all on our own.
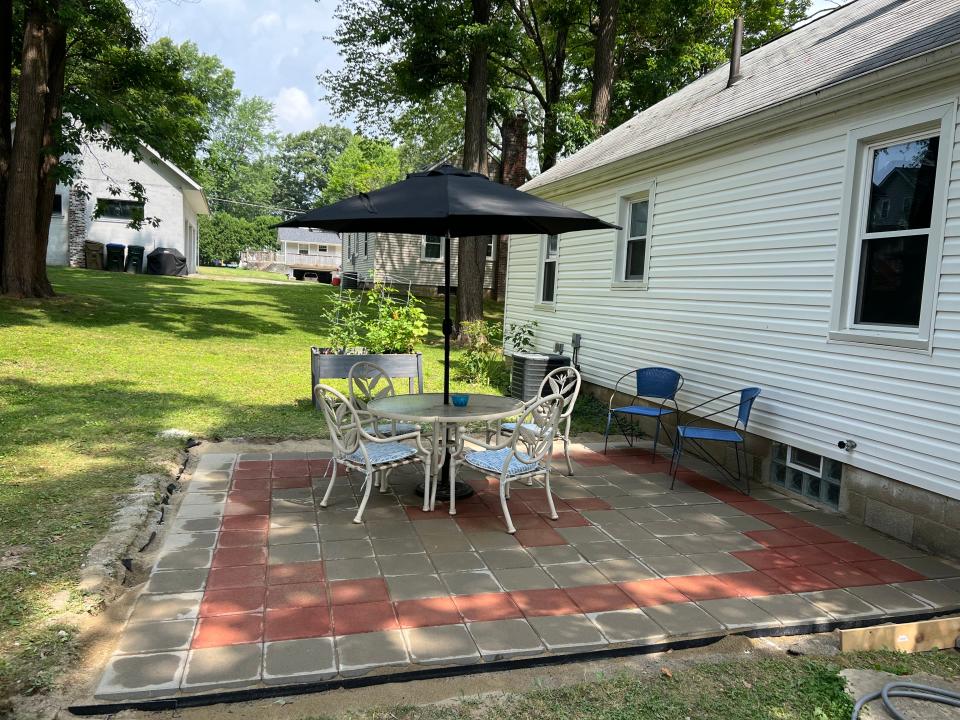
To me, that feeling is invaluable.
Email your questions to Theresa “Tess” Bennett at homewithtess@gmail.com.
More: Math lessons from a DIY journalist | Home With Tess
This article originally appeared on Akron Beacon Journal: Mission complete: Is building your own patio worth it? | Home With Tess

