Old House Handyman: Rebuilding a porch requires research, extra pair of hands
The view from Daughter No. 3’s front porch is one straight out of a magazine – verdant pastures dotted with tan Belgian draft horses and black-and-white Holsteins; a pond; and a curvy, hilly road that routinely delivers the calming clip-clop of Amish-buggy horses’ hooves on asphalt.
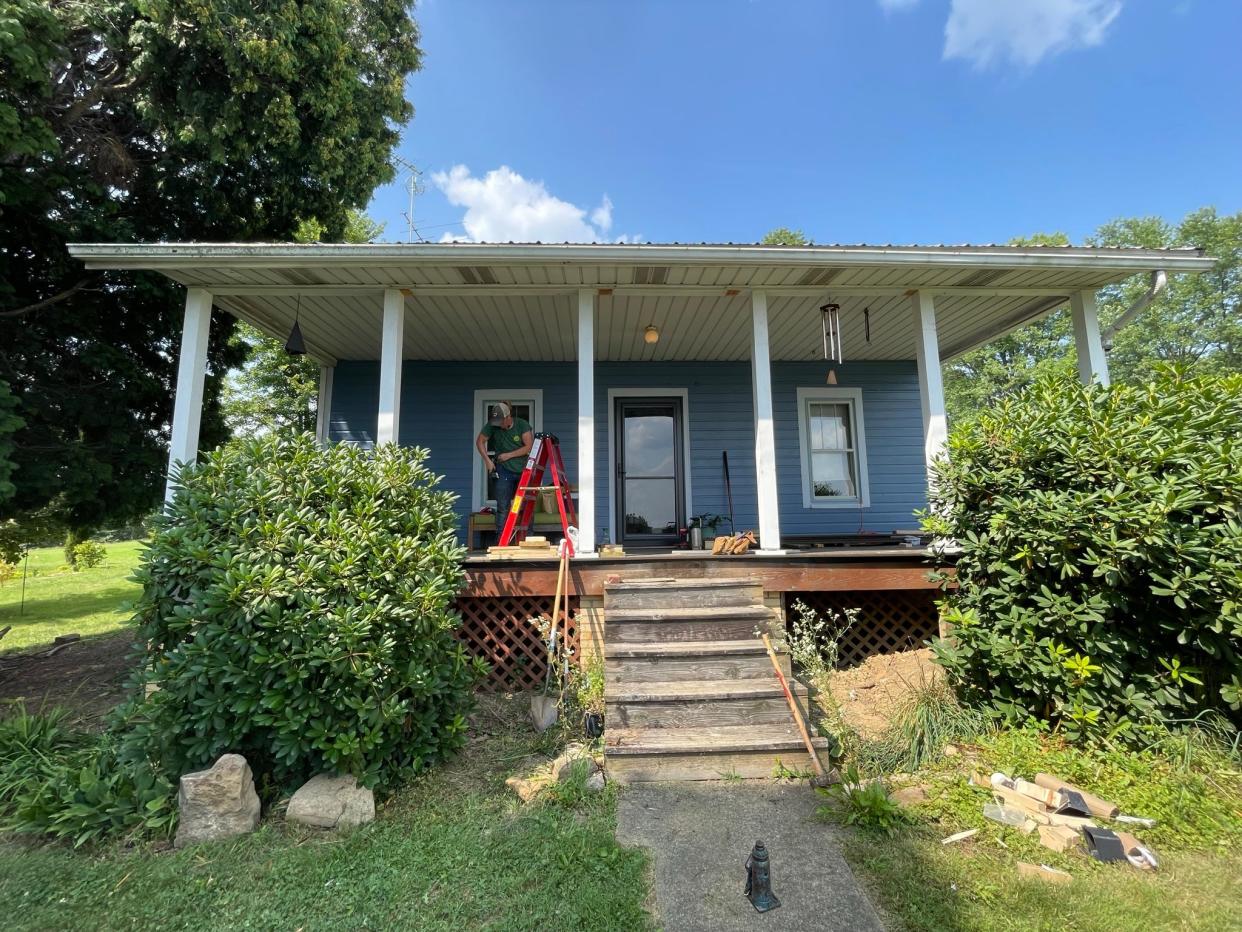
But on a hot summer day last week, when most folks would have preferred to sip lemonade on the front porch, we were rebuilding one.
We had shade, thank goodness, from the jacked-up porch roof. We had a breeze – the kind felt outside a blast furnace. And we had steady work to keep our minds occupied.
But dang, it was hot. And a lazy day with lemonade on the porch was something we would have to imagine.
Old House Handyman: Replacing bathroom plumbing leads to full house pipe upgrades
The front porch on this house, built more than 80 years ago during The Great Depression, had been updated at least once in the past, in the 1980s. The cedar porch floor was in OK shape. The posts that held up the roof and linked the railings had rotted pretty badly. The railings were in bad shape, too.
So, Daughter No. 3 did months of research, ordered materials and did an amazing amount of work to tear up and replace the floor. Her research pointed her to Moisture Shield composite floorboards. She learned that these boards require more closely spaced joists to support them. And she found that something called the “Duckbill Deck Wrecker” tool to remove old flooring – which allowed her to take up the wooden floor without damaging it. While it’s old and not something we wanted under brand-new posts, we can re-use the wood because she used this relatively inexpensive tool.
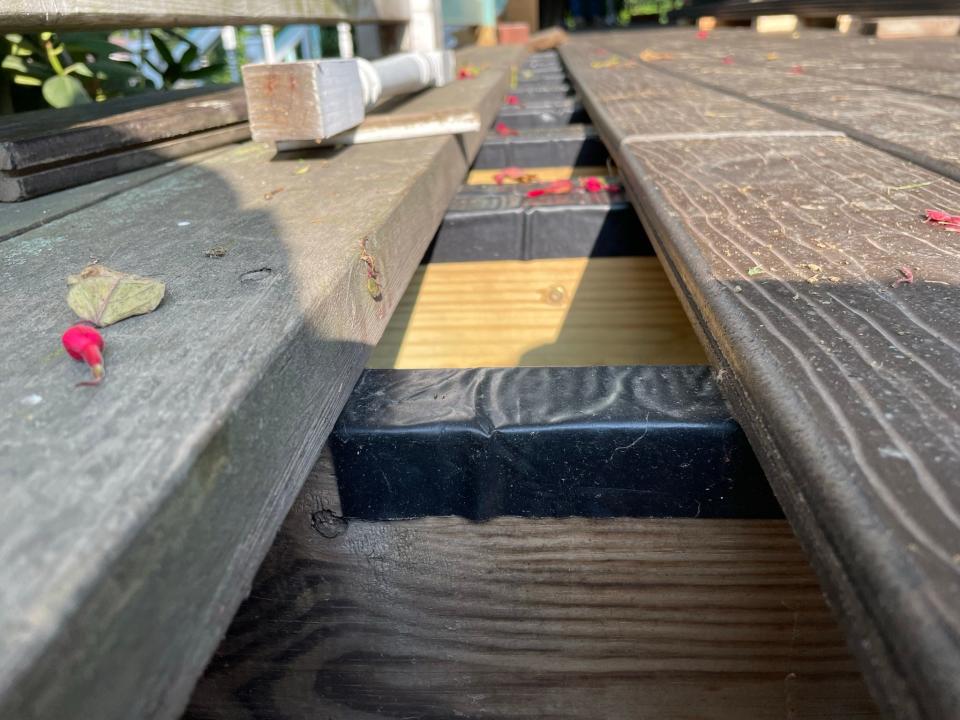
Our daughter chipped away at this project for months. She ripped out the old floorboards, and because composite wood requires more support than wood, she installed new floor joists. The original joists were 24 inches on center. The composite manufacturer called for joists at least 16 inches on center but said that the optimum is 12 inches on center.
So, she installed new joists between the old ones, putting all of them 12 inches on center.
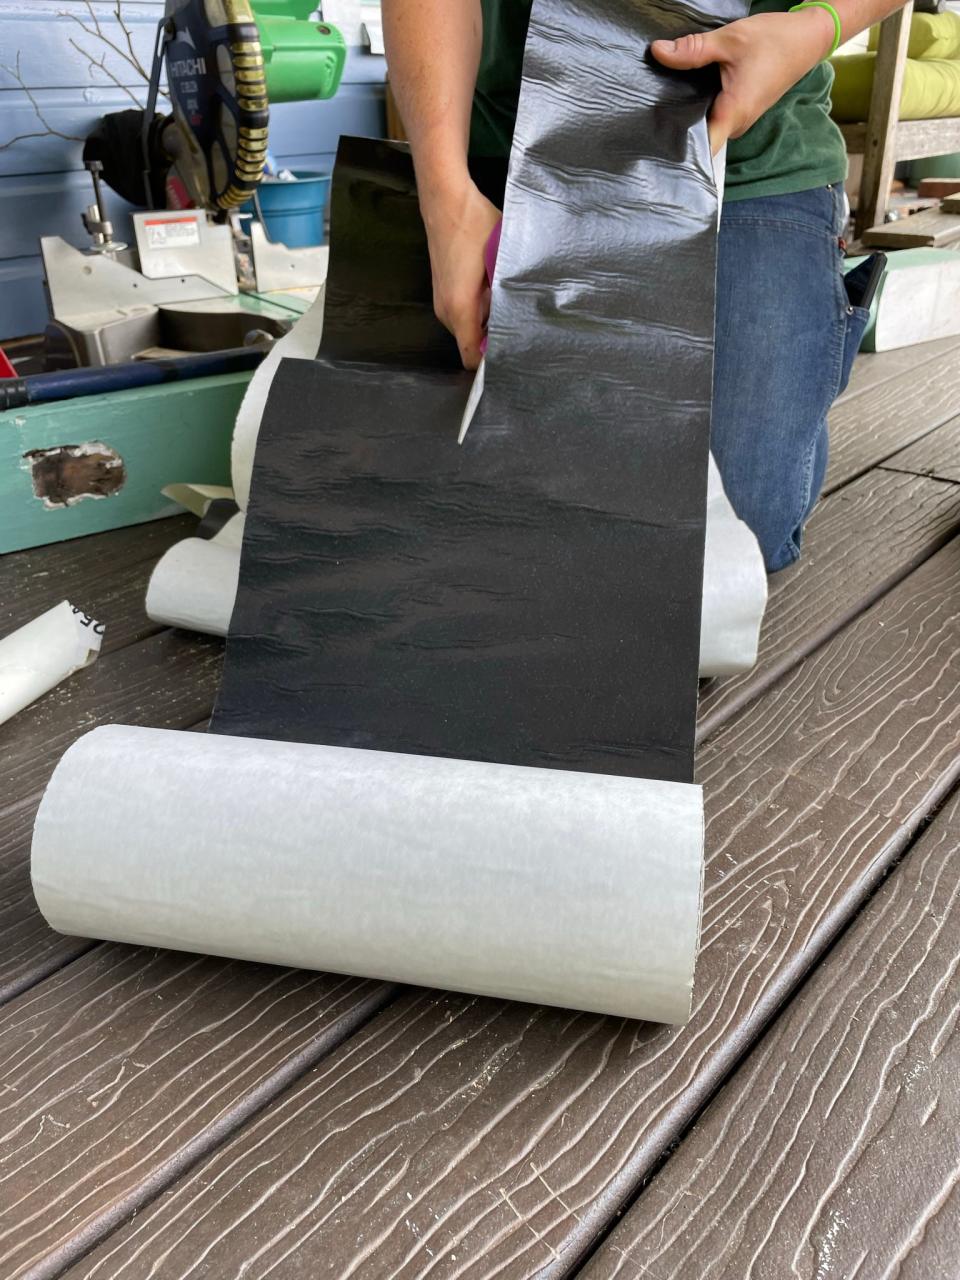
Then, she topped all of the joists with butyl tape called “deck flashing tape.” It’s a thick, sticky, rubbery, wide tape that protects the tops of the joists from moisture, reducing the chances of rot and prolonging their lifespan. And then she fastened the floorboards to the joists using CAMO hidden fasteners, which are metal brackets with s-shaped plastic clips that slip into grooves on the sides of each board. They’re held in place with small-headed screws that slip down between the boards and become virtually invisible – no nail or screw heads on the surface of the floor. For porch posts, she ordered Yella Wood brand. They are “KDAT,” which stands for “Kiln Dried After Treatment.” That means they were pressure-treated and then kiln-dried, so, in her words, “they’re not sopping wet and going to twist and crack.”
The new posts are hollow with a Styrofoam core, which allows for venting that should reduce the opportunity for rot. “The hollow post is lighter weight and has structural strength because it is virtually knot-free – and they are butt-jointed so tightly that the joints are virtually invisible,” she said.
She prepped the new posts by lightly sanding them and painting them with three coats of primer. And we placed the posts on aluminum plinths (bases) that allow for venting, which sit on top of solid plastic plinths that rest on the new porch floor.
Old House Handyman: Locating leak in bathroom turns into total makeover

The one thing neither of us knew was how to hold up the porch roof while she installed the remaining few floorboards and the new posts. So, we hired our carpenter neighbor, Atlee, to lead us through the process of supporting the roof and installing the new posts.
Atlee told us we needed eight 12-foot 2x6 pieces of lumber. He instructed me to “sister” the 2x6s together for strength by putting one board on top of another and driving in screws to make them one board. We strategically placed each of the newly formed 4x6s between the porch roof supports and a board laying on the ground. And then, Atlee took a sledgehammer to the base of each 4x6 and whacked it into place so that it was holding up the porch roof.
Then, we took out all of the posts and railings and spindles.
And soon, we were trimming the new posts to slide into the spaces where the old posts had been.
That is a gross simplification of Atlee’s process of measuring and trimming. It took several hours. But in one day, we ripped out all of the old porch posts and installed new ones – new posts that I hope will last another half-century at least, and probably a century based on our daughter’s research and hard work.
Next up: Railings and spindles. And believe me, she will have done the research to make sure they are durable.
Alan D. Miller is a former Dispatch editor who teaches journalism at Denison University and writes about old house repair and historic preservation based on personal experiences and questions from readers.
youroldhouse1@gmail.com
@youroldhouse
This article originally appeared on The Columbus Dispatch: Old House Handyman: Tips for rebuilding a porch to last a lifetime

