In unsharp relief: How to use blur to enhance your photos
- Oops!Something went wrong.Please try again later.
- Oops!Something went wrong.Please try again later.
- Oops!Something went wrong.Please try again later.
In the early 1930s several renowned photographers including Ansel Adams, Imogen Cunningham and Edward Weston, formed an artists collective called Group f/64. They celebrated photography’s ability to present the world as it is. With that, they believed that everything in their image should be as sharp as possible. f/64 refers to the smallest aperture, and thus the most depth of field, available in cameras of the time.
For the most part the sharpness of a photo, and how much that is in focus, is a good thing, especially in landscape photography. But blur can also be a useful tool in one’s photographic skillset. It can help to emphasize things, usually the main subject, that are sharp in the photo and/or convey a sense of action.
When employing blurriness as a technique, it’s a good idea to have something that’s sharp in the photo to give the viewer as point of reference. One’s eyes tend to seek out what’s in focus in an image or scene.
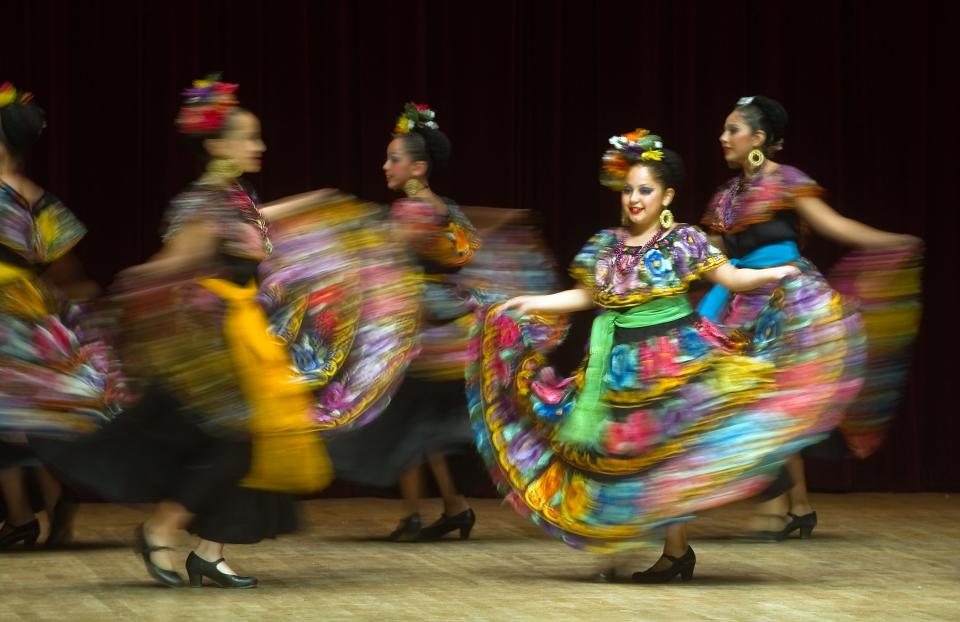
Motion blur is an effective way to add some fuzziness to your photos. By using a slow enough shutter speed, whatever is moving in your scene will become blurred. This blur can communicate a sense of movement and energy to your photo. Still it’s good to have something that isn’t moving in the photo to give the viewer a visual refuge for their eyes.
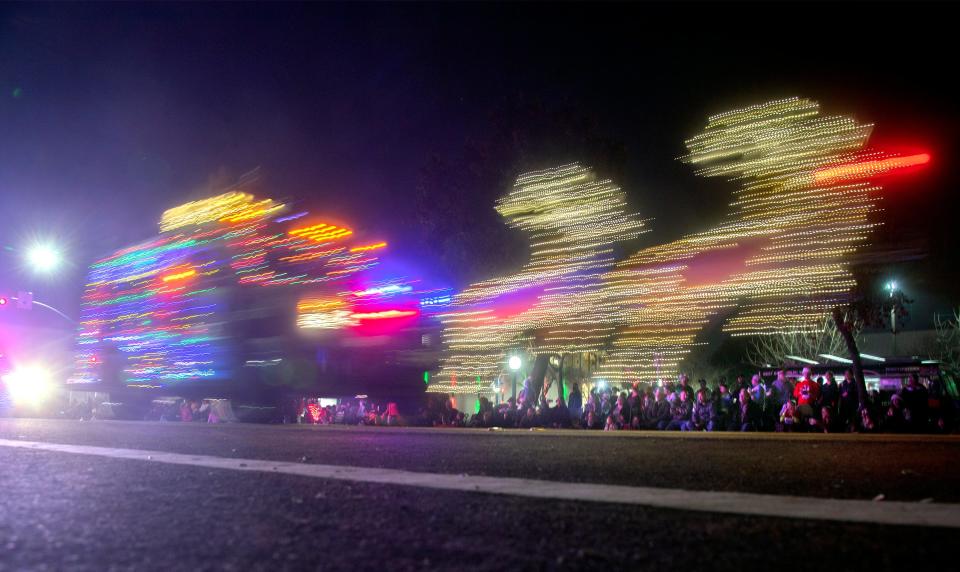
Which shutter speed you use will depend on how fast the action is moving. Also the the apparent motion blur is relative to the direction the movement is going. Movement that is perpendicular to the camera (left-to-right or right-to-left) will show blur more readily than if the movement is traveling toward or away from the camera.
The shutter speed that you use depends upon how fast what you’re shooting is moving. You can get away with a relatively faster shutter with a fast moving subject than a slow one. In general I would recommend something like a 1/60th to 1/30th of a second to start with.

A word of caution.
The use of slow shutter speeds can result in what’s called “camera shake.” That’s when the shutter speed is so slow that your own movement causes the camera to shake and everything is blurry in the photo. It takes a well-practiced and steady hand or a tripod to hold the camera still.
Using a wide aperture for very little depth of field can be another way to use blur. By setting your lens to “wide open” or the largest opening, your scene’s foreground and background will be out of focus and a very narrow portion of your subject will be in focus. This technique is enhanced by getting close with a telephoto lens and helps to really make your subject pop out.
Be aware: making sure your focusing is spot-on is critical. Being off just a little can result in, say, having a person’s nose in focus and not their eyes where it should be.
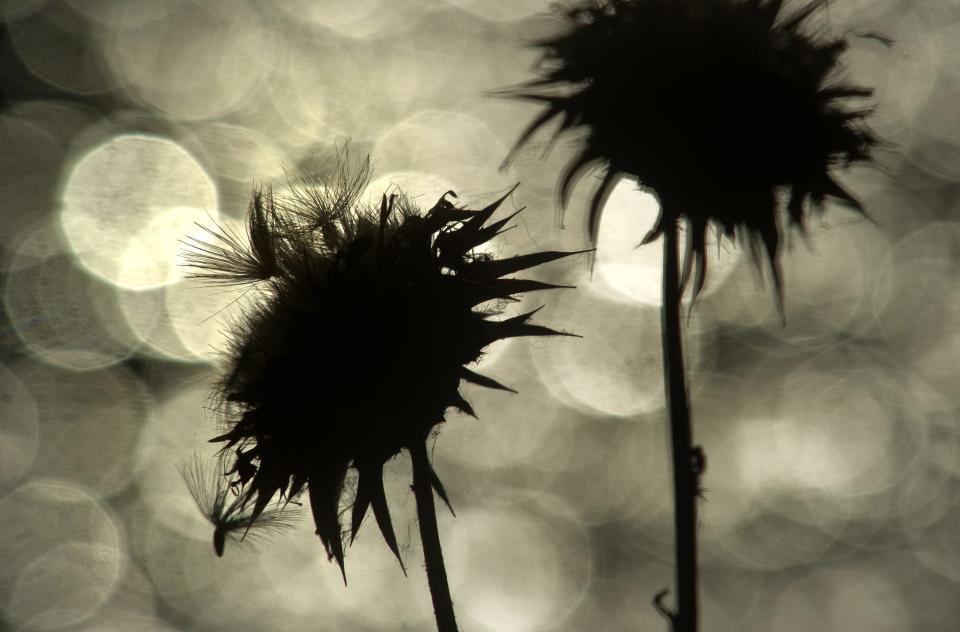
Bokeh (pronounced BOW-keyh) is a Japanese term that literally means “blur.” Photographically it refers to the large circles of light created large lens apertures and out of focus highlights in the background. They can be made by anything from light bulbs to street lamps to Christmas lights. You should be relatively close to your main subject while the lights should be far enough away in the background to cause them to blur into the large circles. They can a pleasing background to your photos when done well.
Blur may not be the sharpest tool in your photographic tool box, but when used carefully and judiciously, it can be an effective one.
Record photographer Clifford Oto has photographed Stockton and San Joaquin County for more than 37 years. He can be reached at coto@recordnet.com or on Instagram @Recordnet. Follow his blog at recordnet.com/otoblog. Support local news, subscribe to The Stockton Record at recordnet.com/subscribenow.
This article originally appeared on The Record: Photography tips: How to use blur to enhance your photos

